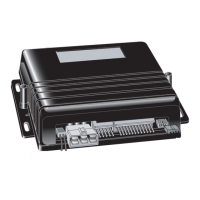
5-BUTTON MANUAL / AUTOMATIC
TRANSMISSION REMOTE STARTER
WITH VIRTUAL TACH SYSTEM
(AS PRG-1000 COMPATIBLE)
Notice
The manufacturer will accept no responsibility for any electrical damage resulting from improper installation of the product, be that either
damage to the vehicle itself or to the unit. This unit must be installed by a certified technician using all safety devices supplied. Please
note that this guide has been written for properly trained Autostart technicians: a certain level of skills and knowledge is therefore
assumed. Please review the installation guide carefully before beginning any work.
Warning
Before installing the unit, if installing on a vehicle with a manual transmission, test that the OEM Door Switch contacts of the vehicle work
well, and that the Parking Brake system operates properly. If installing on a vehicle with an automatic transmission, test that the vehicle
does not start when the gearshift lever is in the “Drive” position. If it starts in gear, reset the remote starter to manual transmission.
Doc#: 090826 Rev:1.1 - PS-3175E - - YB - Assembled in Canada
PS-3175E
Quick Installation Guide
(For a copy of the complete install guide visit http://www.autostart.ca)
Table of Contents
Entering Programming Mode ................................... 2
Manual or Automatic Transmission ........................ 2
Resetting the Module................................................ 2
Transmitter Programming Procedure ..................... 2
Entering Programming Options .............................. 2
Programming Options .............................................. 3
Bypass ........................................................................ 4
Optional Time Delay Adjustment in Virtual
Tach System .......................................................... 4
Multi-speed Tach Programming .............................. 5
Horn Honk Timing adjustment ................................. 5
Programming the transponder ................................ 8
Supplementary Information ..................................... 9
Fifth Relay Output (2nd IGN, ACC or CRANK) ..... 9
Tach jumper settings ............................................. 9
Testing ...................................................................... 10
Remote-Starting Your Vehicle ............................... 10
Setting Your Vehicle Into Ready Mode ............... 10
Diagnostics via parking lights ............................... 11
Diagnostic table for shutdown. ............................ 11
Diagnostic table for start failure. .......................... 11
EncryptR™ Technology ......................................... 12
P. 12 http://www.autostart.ca Installation Guide
EncryptR™ Technology
Note: EncryptR™ Technology will be launched October 1
st
2009.
How to enable EncryptR™ Technology in a vehicle?
1. Use a Polarstart remote starter (PS-3175E or PS-4661-TWE or PS-4461-TWE with software V.5.0 and
up)
2. Use an EncryptR™ Ready iDatalink ADS-TB or ADS-AL-CA module with EncryptR™ enabled software
which can be downloaded from the idatalink website at www.idatalink.com.
3. Set the Remote Starter in “ADS” bypass mode found in Mode 4 of the remote starter installation manual.
4. Set the Remote Starter in “2way Communication” found in Mode 4 of the remote starter installation
manual.
5. Program the remote starter module to the vehicle, as normally done.
6. Program the ADS bypass module to vehicle, as normally done by following the ADS installation guide.
7. Remote start the vehicle once. If the communication is good between the remote starter and the ADS
bypass module, the LED on the bypass module will blink GREEN upon remote starting the vehicle.
8. EncryptR™ Technology is now automatically set and enabled!!!
What can make the encrypted communication fail?
x Replacing the remote starter module
x Factory reseting the remote starter module
How to re-synchronize the encryption?
1. Follow the ADS bypass reset procedure from the ADS installation manual
2. Re-learn bypass to vehicle by following the ADS installation manual
3. Remote start vehicle once
4. EncryptR™ Technology is now automatically set and re-enabled!!!
About synchronization
x Disconnecting the bypass module and remote starting the vehicle without any bypass module connected
will NOT cause the remote starter module and the ADS bypass to be out of synchronization.
x Disconnecting the battery of the vehicle will NOT cause the remote starter module and the ADS bypass
to be out of synchronization.
x Upon remote starting the vehicle; the remote starter communicates with the ADS bypass module thru the
supplied ADS data cable. Since the communication is set in 2 way communication, the remote starter is
waiting for a confirmation back from the ADS bypass module that it acknowledges upon the start
command. If no answer back from the ADS bypass module, the remote starter will wait for the bypass
module answer in order to change the encrypted code.
x The EncryptR™ is now the safest way to prevent theft from stealing vehicles by using the remote starter.
Using the supplied ADS data cable and the EncryptR™ encryption makes the installation safer than ever
and cannot be tampered with by generating the “Out When Running” signal in the ADS data cable to
override the security on the vehicle.
NOTE: In order to qualify, upon completion of the installation, the installer must go on-line to
www.encryptrtechnology.com
and fill out the Limited anti-theft warranty form.

 Loading...