OWNER’S MANUAL
11
5
2
Sand
2
10
12
5
ALIGN
10
9
2
5
Drain Valve
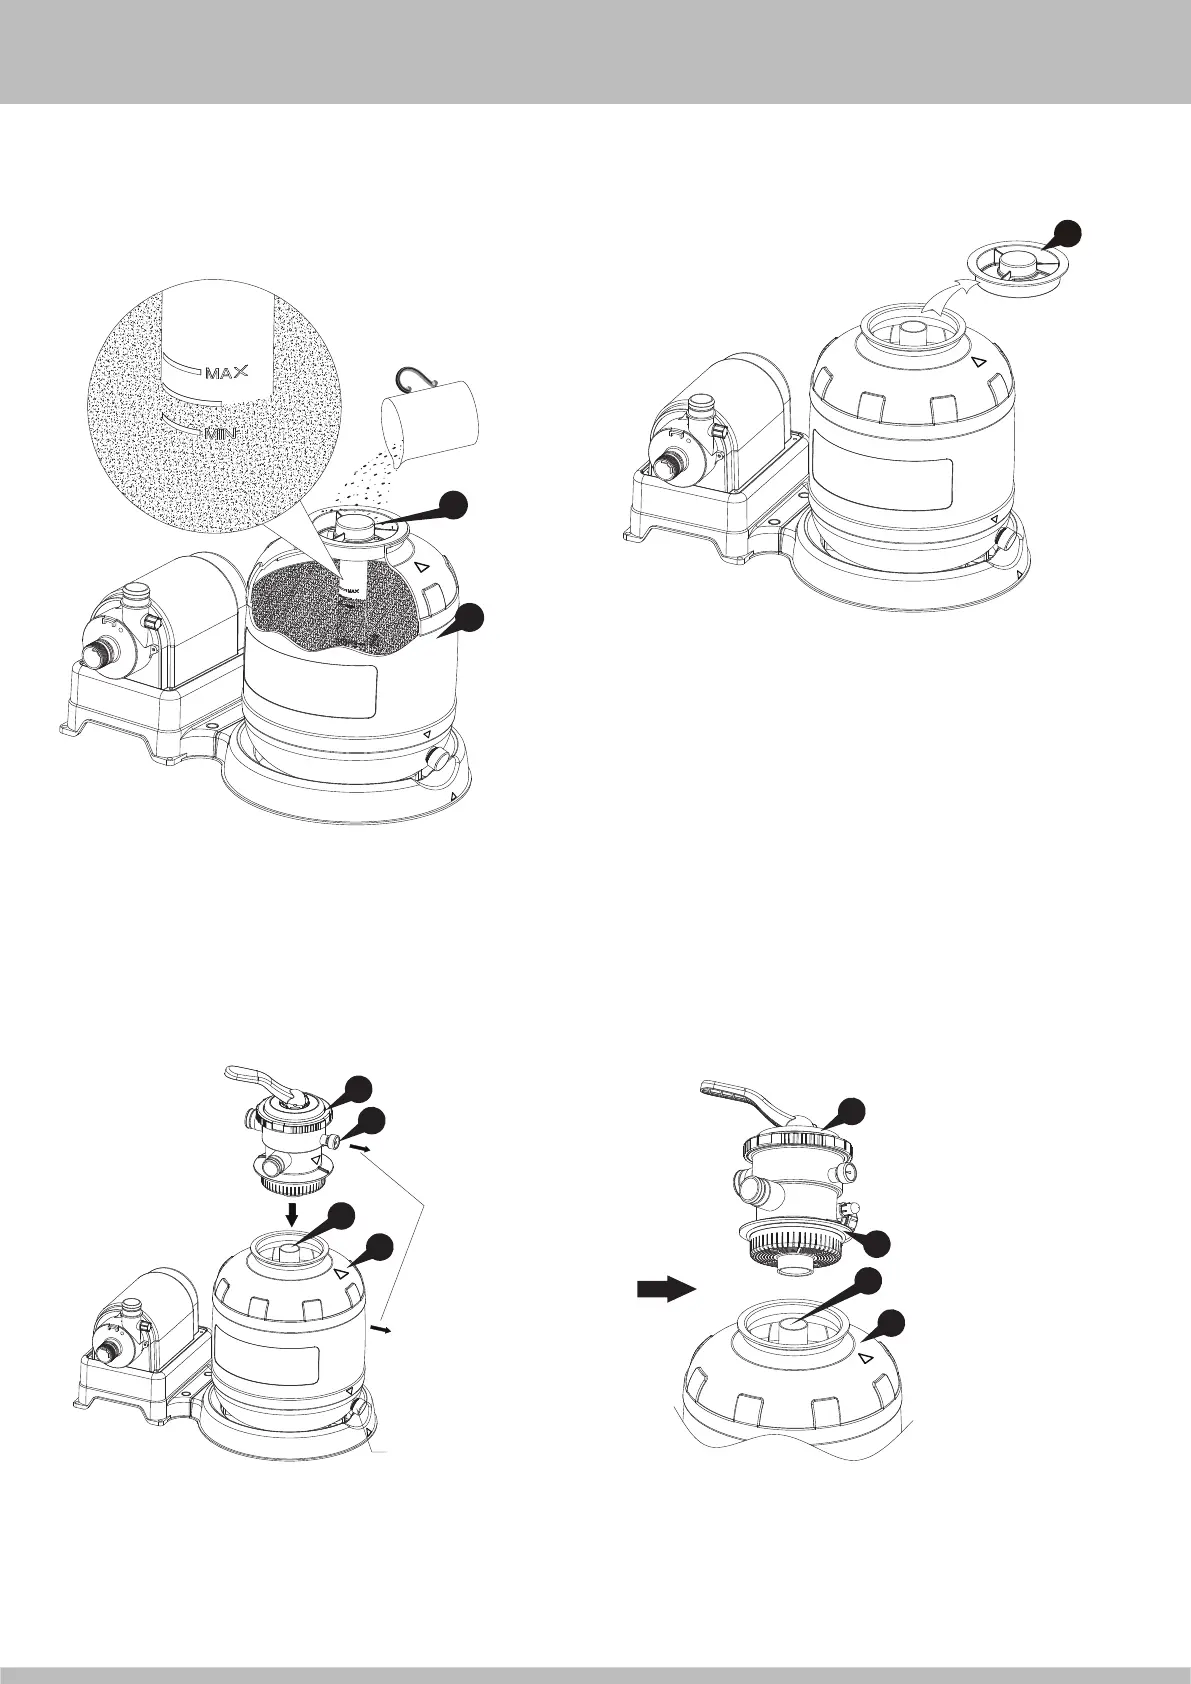
9. Fill the tank with #20 silica sand ONLY. You can purchase the
sand from your local home improvement or building material stores.
Slowly pour sand into the Sand Tank
2
until the sand level is
between the Min and Max marks on the Center Pipe
5
.
10. Remove the Sand Guard
6
and save for future use.
6
11. Install the 6-Port Valve
q
to the Sand Tank
2
, and ensure if fits
securely into the Center Pipe
5
.
Rotate the Valve so that the Pressure Gauge
e
is aligned with the
Drain Valve.
Make sure the Gasket
9
is
present at the bottom flange
Tips: Triangular marks
on the 6-Port Valve
q
and the Sand Tank
2
.