Page 5 of 20
March 2024
PJN3 SERIES
RECIRCULATING FLUSH
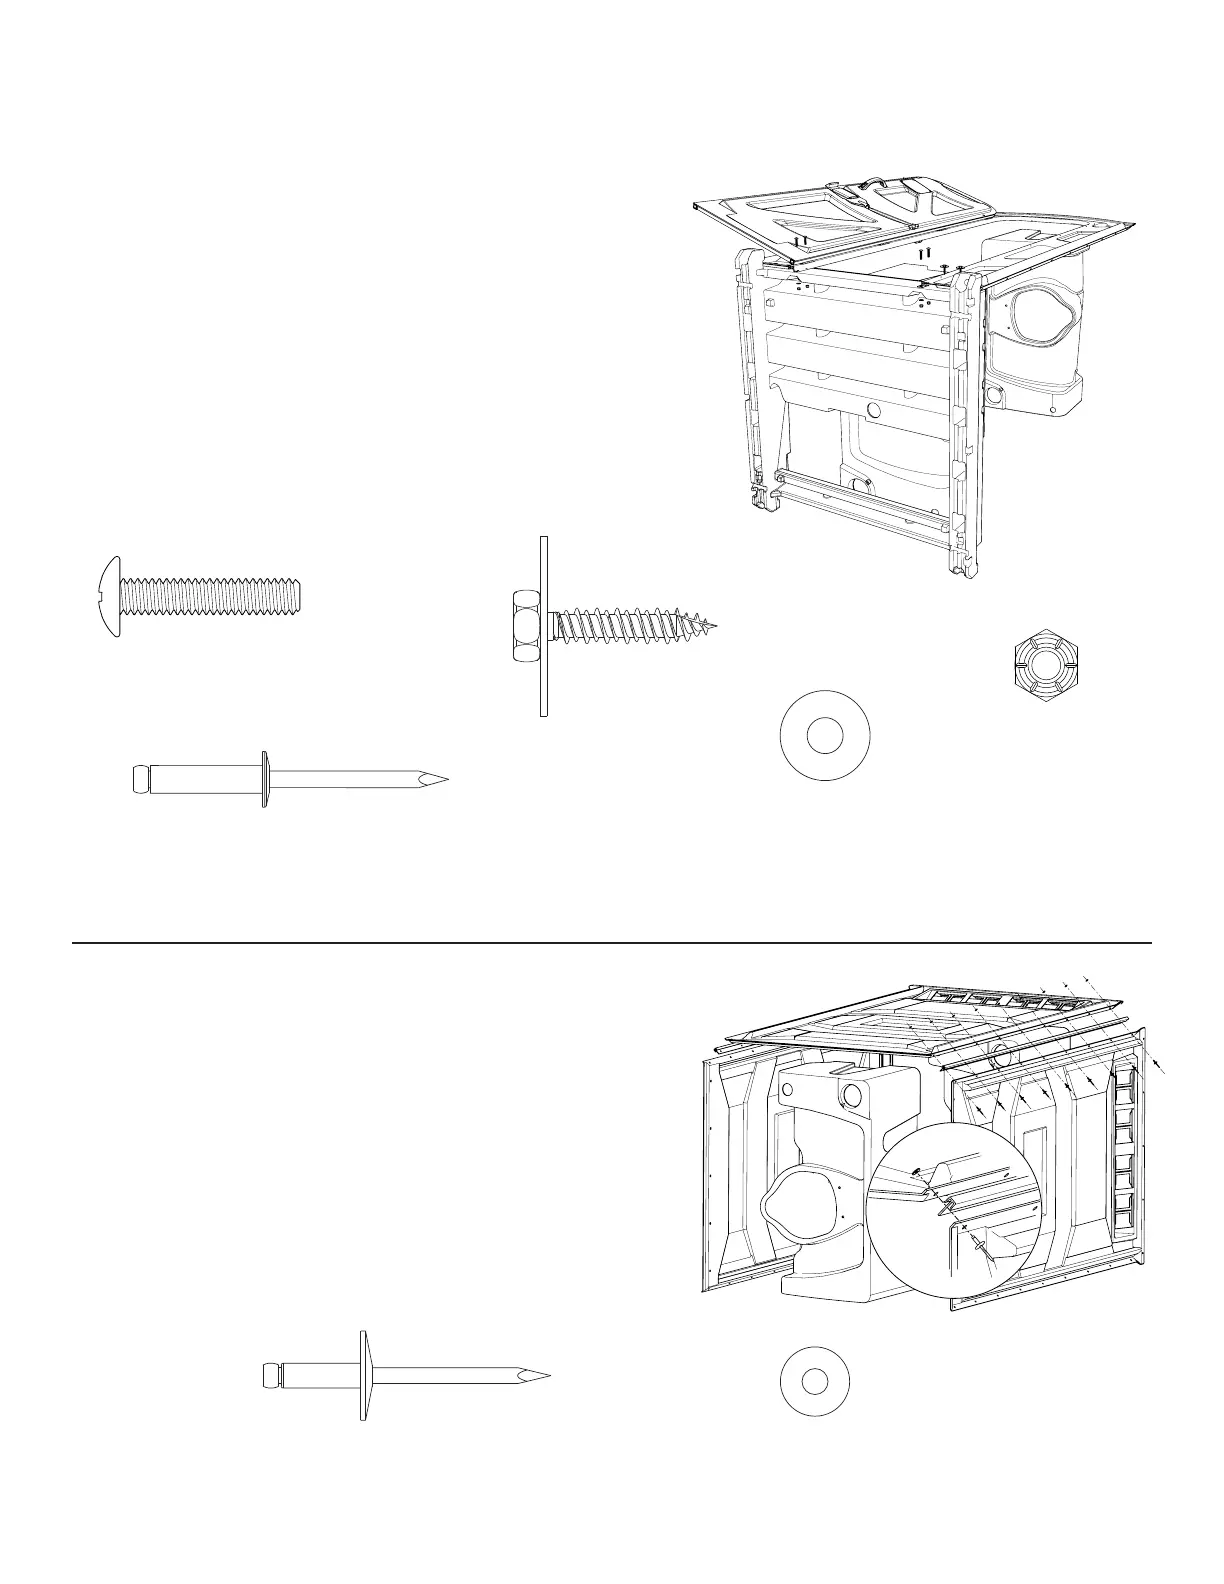
CORNER MOLDINGS TO SIDE PANELS:
Refer to Figure 2. Place a wall panel on top, and one on each side of the tanks. The miter cut
end of the corner moldings go towards the top of the side panel. Slip the corner moldings
onto the edges of the top side panel. Lift and insert an edge of a side panel into the grooves
of the corner moldings. Insert awls into the second hole of the top and bottom edges to hold
the panel and moldings in place. NOTE: Drive all rivet heads from the front of the
restroom, to give the unit a uniform visual appearance. Rivet the 1/4” center hole
first using a PC-000100 rivet and a PC-000106 back-up washer. Repeat for the remaining
holes, then stand the three side panels and two corner moldings upright.
STEP 2:
Figure 2
DOOR JAMB AND FRONT ASSEMBLY TO BASE SKID:
Refer to Figure 1. To assemble the door jamb to the skid, stand two waste tanks on end about
four feet apart (as shown). Stand a base skid with the tank space toward the ground and the
four holes on the floor side of the base skid up. Position the front assembly on top of the tanks
with the bottom of the front assembly resting on the base skid. (You may need to add a 4” x
4” on the tank at the top of the front assembly to level the top with the base skid). Cut the strap
holding the door closed. Open the door and install a PC-000104 rivet into the hole where the
cut strap went through the door jamb. Match up the four holes in the door jamb with the four
holes in the base skid. Fasten the door jamb to the base skid with (4) PC-000174 screws, (4)
PC-000123 washers, and (4) PC-000140 nuts using a Phillips cross-head screwdriver and a
7/16” socket wrench. Drive (4) PC-000192 sems lag screws through the two holes on the left
and right sides of the front panel into the base skid. CAUTION: DO NOT OVER-TIGHTEN;
TIGHTEN ONLY UNTIL SNUG. Stand the skid and front assembly upright.
STEP 1:
Figure 1
PC-000174 Screw
4 used in this step
PC-000140 Nut
4 used in this step
PC-000192 Sems Assembly
4 used in this step
PC-000104 Rivet Small
1 used in this step
PC-000100 Rivet
18 used in this step
PC-000123 Washer
4 used in this step
PC-000106 Washer
18 used in this step
ASSEMBLY INSTRUCTIONS
 Loading...