Page 6 of 20
March 2024
PJN3 SERIES
RECIRCULATING FLUSH
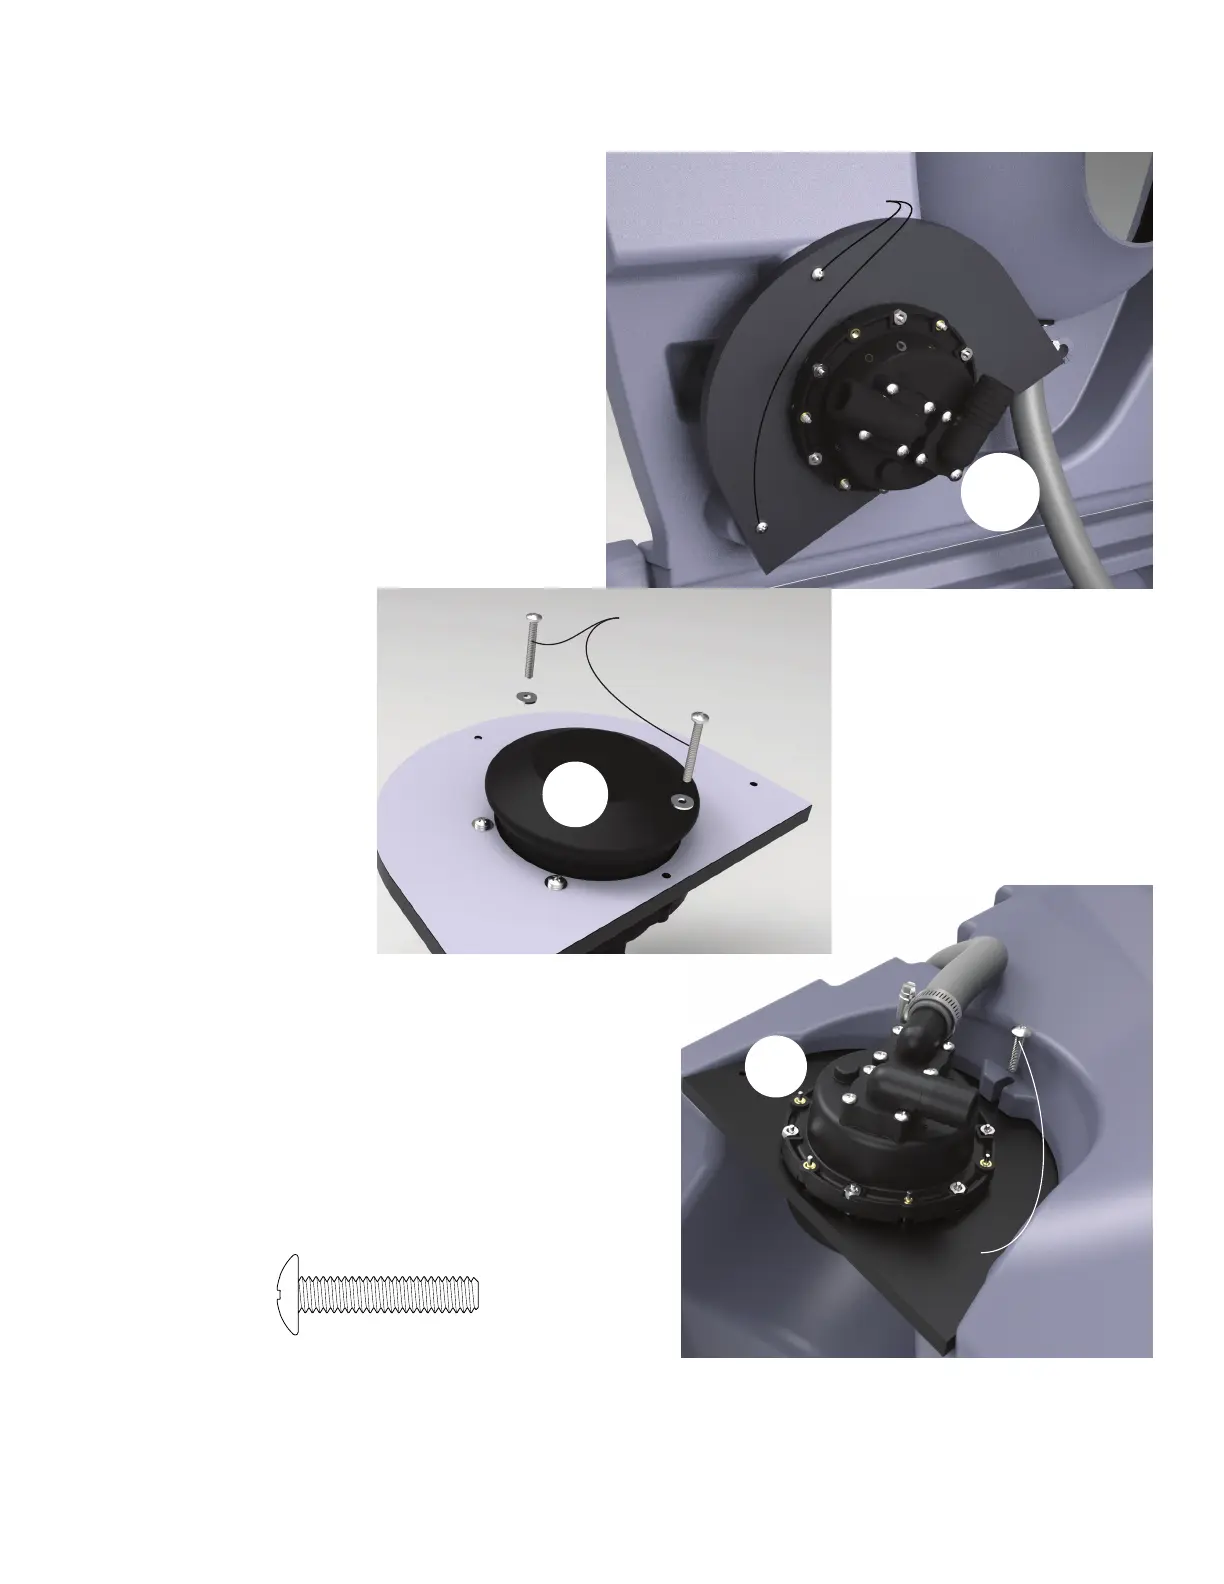
Use the PC-000174 Screw to secure
the foot pump plate in the groove at
the bottom of the tank
3
Figure 5
ASSEMBLY INSTRUCTIONS
REMOVE FOOT PUMP ASSEMBLY:
Remove the foot pump assembly from the underside of the lid by
removing the 2 - PC-000231 screws.
STEP 3:
Remove mounting screws
1
STEP 4:
SECURE FOOT PUMP TO FOOT PUMP PLATE:
Using the mounting screws used for shipping along with the PC-
000106 washers supplied, secure the foot pump to the foot pump
mouting plate
FLUSH TANK ASSEMBLY
Figure 3
Use the mounting screws with
PC-000106 washers to finish
mounting the pump to
the foot pump plate
2
Figure 4
PC-000174 Screw
1 used in this step
STEP 5:
ATTACH FOOT PUMP ASSEMBLY TO BOTTOM OF TANK:
Slide the foot pump assembly into the groove at the bottom of the tank.
Secure in place using a PC-000174 screw through the slot and into the hole
of the plate. Be sure not to overtighten and strip out the screw. Pull
the discharge hose out of the side of the tank and place a PC-000352 clamp
over the end. Push the hose onto the discharge port on the pump and tighten
the clamp to secure in place.