13
Mounting the jaw pusher (fig. 4 & 5)
• Select the correct jaw pusher or jaw pusher assembly (R) that matches the Nose Piece selected. Ref.
the Accessories Manual for appropriate nose equipment
• Insert jaw pusher (R) into jaw pusher spring (S).
• Reassemble jaw set (Q) and jaw guide (P) onto front clutch (U)
Note: Do NOT use spanners to mount jaw guide (P) onto front clutch (U). Manual tightening of Jaw
guide (P) is enough to lock onto front clutch (U)
4.2. CHARGERS
Your tool uses a
DEWALT/POP-AVDEL
charger. Be sure to read all safety instructions before using your charger. The
charger requires no adjustment and is designed to be as easy as possible to operate.
Charging Procedure (fig. 2)
•
Plug the charger into an appropriate outlet before inserting the battery pack. (Refer to the Charger
Specifications in Section 2)
•
Insert the battery pack (K) into the charger, making sure the pack is fully seated in the charger. The red
(charging) light will blink continuously indicating that the charging-process has started.
•
The completion of charge will be indicated by the red light remaining ON continuously. The pack is fully
charged and may be used at this time or left in the charger.
NOTE: To ensure maximum performance and life of Li-Ion battery packs, charge the battery pack fully before
first use.
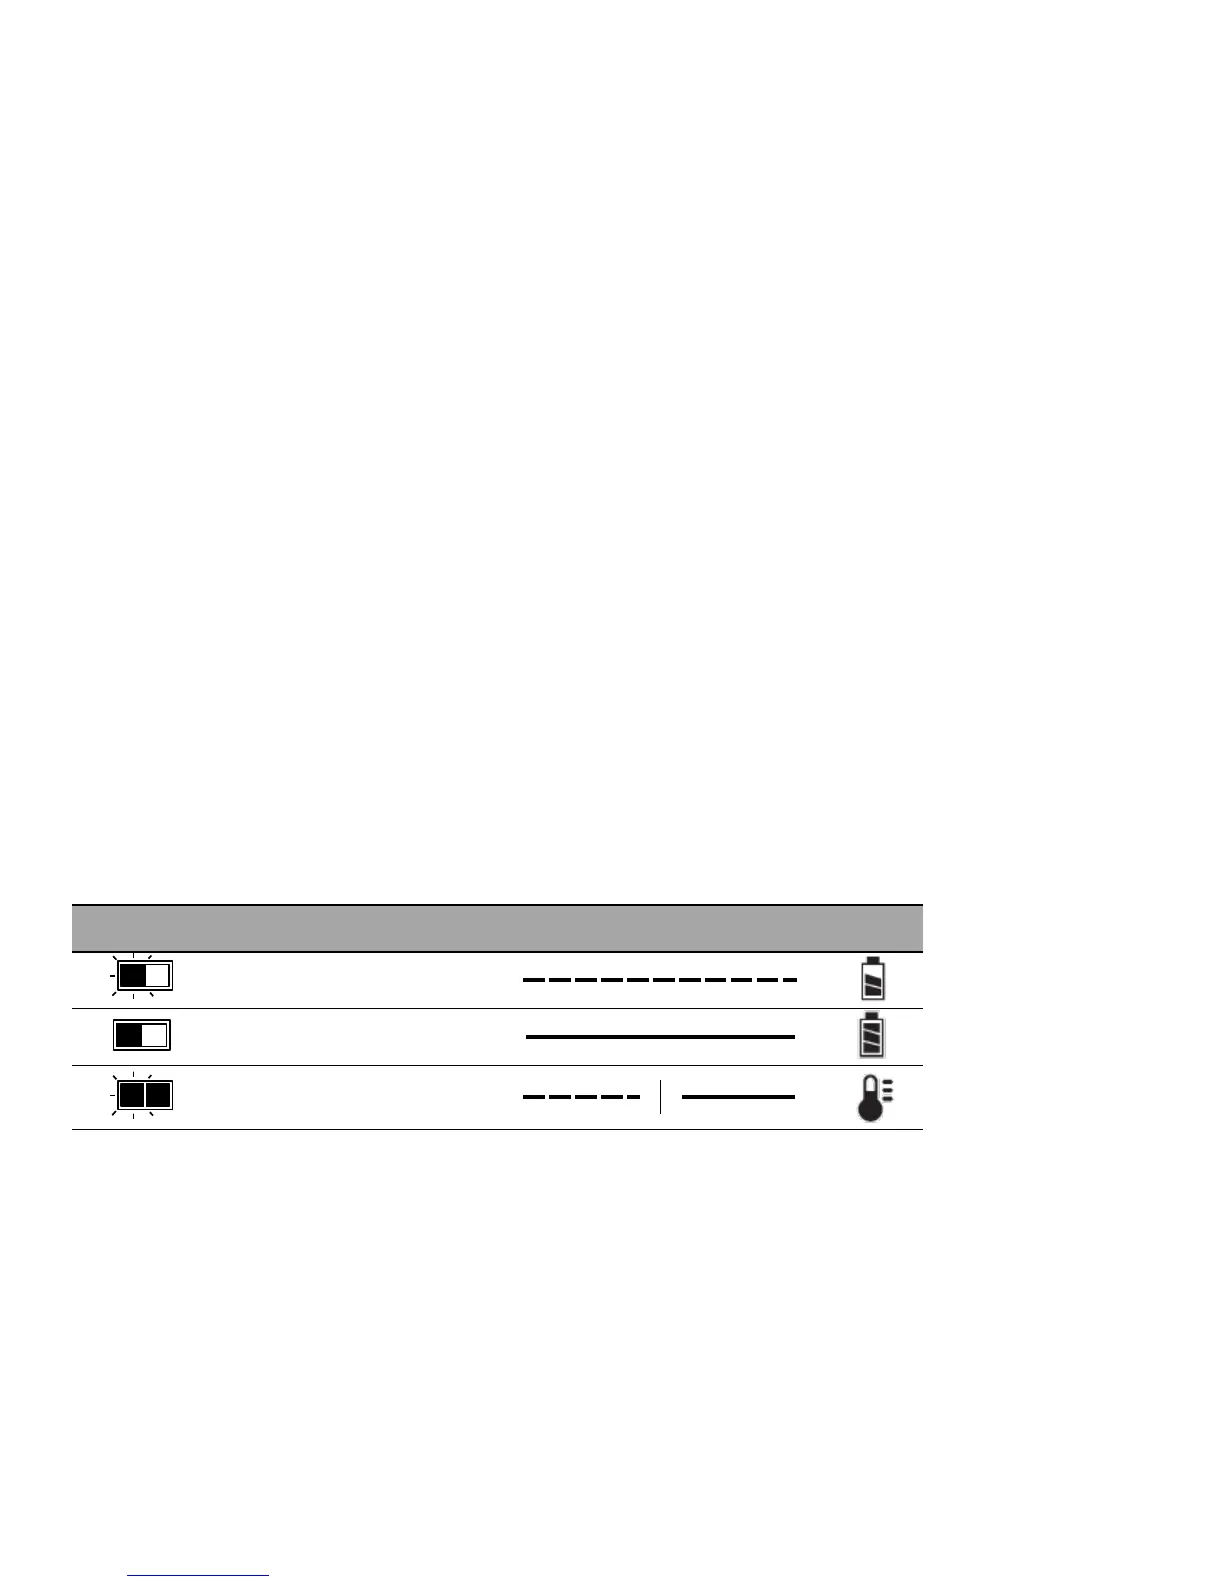
Charging Process
Refer to the table below for the state of charge of the battery pack.
Charge indicators
charging
fully charged
hot/cold pack delay*
*The red light will continue to blink, but a yellow indicator light will be illuminated during operation. Once the battery
has reached an appropriate temperature, the yellow light will turn off and the charger will resume the charging
procedure.
This charger will not charge a faulty battery pack. The charger will indicate faulty battery by refusing to light.
NOTE: This could also mean a problem with a charger.
If the charger indicates a problem, take the charger and battery pack to be tested at an authorised service centre.