Page 8
Calibration Settings
Calibration, Verification and Adjustment
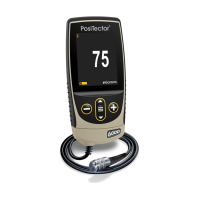
The PosiTector 6000 non-destructively measures the thickness of coatings on metals.
Three steps ensure best accuracy:
1. Calibration: typically performed by the manufacturer. All probes include a Certificate
of Calibration.
2. Verification of Accuracy: typically performed by the user on known reference
standards such as the included plastic shims or optional coated thickness standards.
3. Adjustment: Adjustment, or Calibration Adjustment is the act of aligning the Gage’s
thickness readings to match that of a known sample in order to improve the
effectiveness of the Gage on a specific surface or in a specific portion of its
measurement range. 1-point or 2-point Cal adjustments are possible.
Probes are factory calibrated and perform an automatic self-check each time a
measurement is taken. For many applications no further adjustment is necessary after a
Reset. Just check ZERO on the uncoated substrate, then measure. However,
sometimes readings can be influenced by changes in substrate, such as shape,
composition, and surface roughness. That is why Cal adjustments are made possible.
The factory calibration symbol disappears whenever a Cal adjustment is made to the
Gage.
Where a Cal adjustment method has not been specified, use a Zero or 1-point method
first. If measuring the included shims on your surface reveals inaccuracies, use the
2-point method. Factory Cal settings can be restored at any time by performing a Reset,
creating a NEW Cal setting, or by DELETING the adjustments made to the Cal 1
calibration setting. The factory calibration symbol appears on the display whenever
factory Cal settings are in use.
For FN gages, calibration adjustments are made independently to the F or N modes,
and are stored together within a particular Cal.
1pt Adjustment
When measuring coating thickness over a rough substrate, it is preferable to adjust the
Gage to a know thickness, such as a shim, rather than adjusting it to zero.
Press (+) to select the number of readings to be used to obtain an average, typically 3
to 10 readings. The greater the variation between readings, the more readings should
be taken to obtain an average.

 Loading...