7
WARRANTY
CENTER
C
E
R
T
I
F
I
E
D
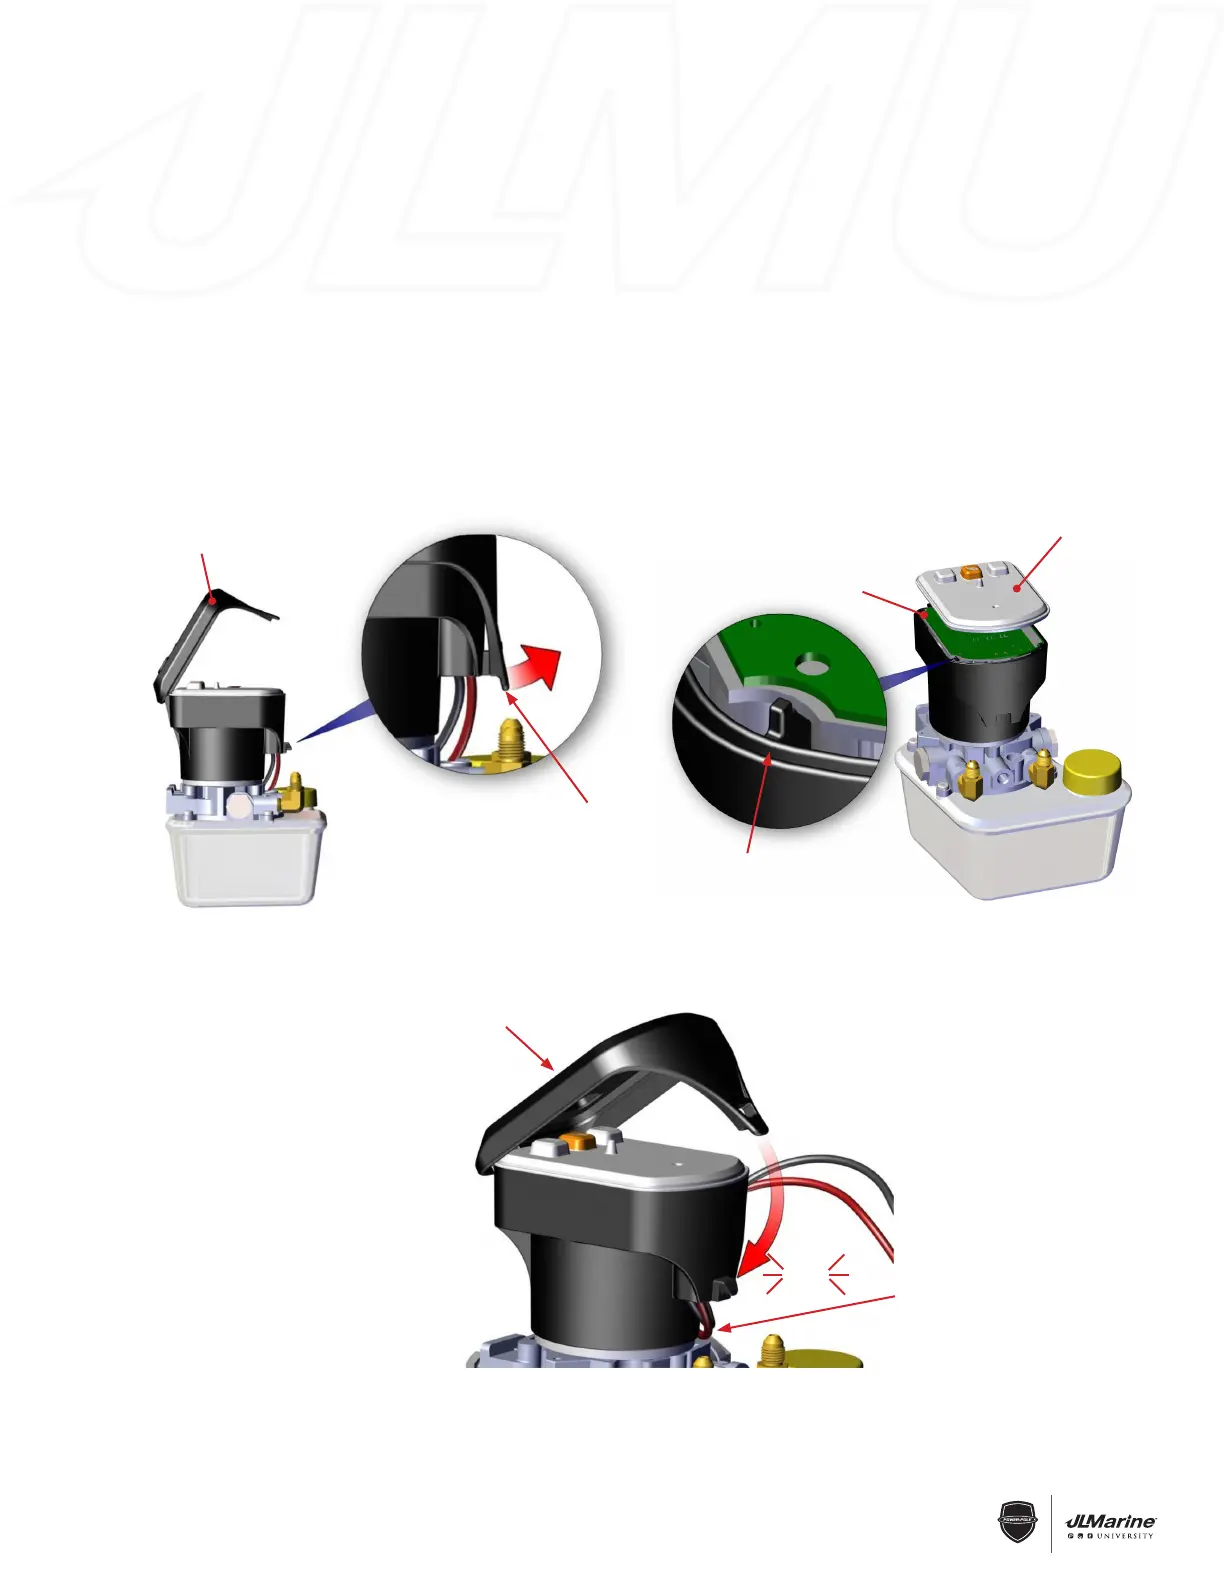
Figure 1
Figure 3
Power Cord
Motor Cover
Circuit board
Pump casing groove made
for circuit board.
Figure 2
Rubber Membrane
CLICK
Motor Cover
Motor Cover Tab
SECTION 1.4 – Electronics & Controllers
C-Monster 2.0 Motor Cover Installation
REMOVAL:
STEP 1 Pull on the Motor Cover Tab to release Pump Cap. FIG 1
INSTALLATION:
STEP 1 With the Rubber Membrane, Power Cord and Circuit Board fully seated into the Pump
Casing Groove, re-install the Motor Cover. FIG 2 & 3
 Loading...