Do you have a question about the Powermatic 2000 and is the answer not in the manual?
Details the limited warranty coverage and exclusions for POWERMATIC products.
Procedure for obtaining service or repair, including product return instructions.
Outlines warranty limitations, implied warranties, and liability disclaimers for product use.
Instructions for safely removing the saw from its packaging and checking for damage.
Guidance on cleaning exposed metal surfaces using specific solvents and avoiding abrasive pads.
Step-by-step guide for attaching extension wings to the table, ensuring flush alignment and leveling.
Instructions for installing and tightening swivel handles and lock knobs on the handwheels.
Details on how to disconnect and remove the dust chute assembly for specific operations.
Procedure for safely installing or replacing the saw blade, including lock knob and arbor nut steps.
Steps for correctly positioning and securing the switch assembly to the machine's rail and guide tube.
Instructions for aligning and installing the motor cover using hinge pins and checking the locking mechanism.
Detailed steps for installing the riving knife, anti-kickback pawl, and blade guard assembly.
Information on checking and verifying the alignment of the blade guard and riving knife assembly.
Instructions for adjusting blade height and blade tilt using the machine's handwheels.
Guide to setting the miter gauge angle using its rack and pinion adjustment.
Procedure for checking and adjusting the miter gauge for squareness to the miter slot.
Steps to adjust belt tension by loosening screws and pivoting the motor.
Procedure for removing and replacing the poly-V belt and adjusting tension.
Ensuring the saw blade and riving knife are aligned to prevent kickback.
Adjusting the gap between the saw blade and riving knife to be between 3mm and 8mm.
Instructions for operating the power switch, including the power indicator light.
Details on the magnetic safety key function and how to use it for operation and storage.
Familiarization with controls, adjustments, and accessories like miter gauge and rip fence.
Explanation of kickback causes, how to prevent injury, and safety precautions.
Performing bevel cuts, including safety tips for positioning the fence or miter gauge.
Information on dado operations, required inserts, and safety precautions.
Information on optional feather boards and push blocks for enhanced safety.
Details on the use of a push stick for operator safety during operations.
Explanation of the filler piece's necessity for narrow ripping and blade guard compatibility.
Daily, weekly, and periodic cleaning schedules for the saw's components.
Guidance on greasing specific components like worm gears and trunnion areas.
Routine checks of mounting bolts, power switch, saw blade, and blade guard.
| Brand | Powermatic |
|---|---|
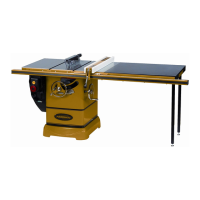
| Model | 2000 |
| Category | Saw |
| Language | English |