EasyManua.ls Logo

Powermatic PM2000B User Manual

Powermatic PM2000B
52 pages
To Next Page IconTo Next Page
Page #1 background imageLoading...
Page #1 background image
Operating Instructions and Parts Manual
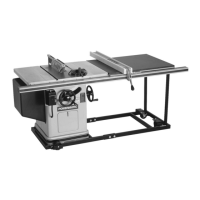
10-inch Cabinet Saw
Model PM2000B & PM2000BT
For models with serial no. 22022000B2883 and higher
Powermatic
427 New Sanford Road Part No. M-PM231B
LaVergne, Tennessee 37086 Edition 6 04/2023
Ph.: 800-274-6848 Copyright © 2017 Powermatic
www.powermatic.com

Table of Contents

Other manuals for Powermatic PM2000B

Questions and Answers:

Powermatic PM2000B Specifications

General IconGeneral
TypeCabinet Saw
Motor Power3 HP
Blade Diameter10 inches
Max Depth of Cut at 90 Degrees3-1/8 inches
Motor Voltage230V
Table Size27 x 40 inches
Maximum Rip Capacity50 inches
Arbor Size5/8 inches

Summary

Safety Warnings

Kickback Prevention

Explains kickback causes and prevention methods, including tips for protection against ejected workpieces.

About This Manual

Terminology

Specifications

Kit Configurations

Lists available machine configurations and corresponding stock numbers for different models.

Setup and Assembly

Shipping Contents

Lists all components included in the shipping package for verification.

Tools Required for Assembly

Specifies the necessary tools for correctly assembling the table saw.

Unpacking and Cleanup

Provides instructions for safely unpacking and cleaning the machine surfaces.

Installing Extension Wings

Details the procedure for attaching and leveling the extension wings.

Handwheel, Knobs, Levers

Instructions for installing and securing handwheels, knobs, and levers.

Rails and Fence

Guide for mounting the rails and Accu-Fence assembly to the saw.

Motor Cover

Steps for installing the motor cover onto the saw.

Table Insert

Procedure for installing and ensuring the table insert is flush with the surface.

Installing and Removing Blade

Safe procedures for installing and removing the saw blade.

Installing Guard/Knife Assembly

Instructions for installing the blade guard and riving knife assembly.

Anti-Kickback Pawls

Detailed steps for installing the anti-kickback pawl safety feature.

Blade Guard

Guidance on correctly installing the blade guard assembly.

Dust Port

Information on connecting a dust collection system to the saw.

Electrical Connections

Grounding Instructions

Explains the critical importance and procedure for proper electrical grounding.

Voltage Conversion (3-phase model only)

Details the process for converting voltage settings on 3-phase models.

Extension Cords

Recommendations for selecting appropriate extension cords for safe operation.

Magnetic Switch and Safety Key

Operation and safety features of the magnetic switch and key.

Adjustments

Tools Required for Adjustments

Lists the tools necessary for performing various machine adjustments.

Fence Alignment

Procedure to align the rip fence accurately with the saw blade.

Blade Raising and Tilting

Instructions for adjusting the blade height and tilt angle for cuts.

Caster Mechanism

How to engage and disengage the machine's caster system.

Miter Gauge

Details on setting angles, indents, fence, and squaring the miter gauge.

Blade Tilt Stop Adjustment

Procedure to set and verify the 90° and 45° blade tilt stops.

Riving Knife Alignment

Ensures proper lateral and proximity alignment of the riving knife with the blade.

Table to Blade Alignment

Procedure to check and ensure the table is square to the saw blade.

Belt Adjustment

Instructions for adjusting drive belt tension and replacement.

DRO Calibration and Operation

Steps for calibrating and operating the Digital Readout (DRO) system.

Operations

Kickback Prevention

Lists conditions causing kickbacks and methods to prevent them.

Rip Sawing

Explains the process and safety precautions for ripping wood with the grain.

Resawing

Details on performing resawing operations safely on the table saw.

Crosscutting

Instructions for performing crosscuts using the miter gauge.

Bevel and Miter Operations

Guidance on performing angled cuts (bevels) and miters.

Dado Cutting

Instructions for cutting grooves (dadoes) and rabbets with a dado insert.

Safety Devices

Feather Board

Information on using feather boards for workpiece control and safety.

Push Stick and Push Block

Explains the importance and usage of push sticks and blocks for safety.

Maintenance

General Inspection

Guidance on routine inspection of machine components for wear and damage.

Cleaning

Daily and weekly cleaning procedures for maintaining the saw.

Lubrication

Procedures for lubricating critical moving parts for smooth operation.

Arbor/Arbor Bearing Removal

Information regarding the removal of the arbor for bearing replacement.

Additional Servicing

Notes on servicing that should be performed by authorized personnel.

Optional Accessories

Troubleshooting

Motor and Electrical Problems

Table listing common motor and electrical issues and their remedies.

Mechanical and Operational Problems

Table listing common mechanical and operational issues and their remedies.

Replacement Parts

Table and Cabinet Assembly – Parts List

List of part numbers and descriptions for the table and cabinet assembly.

Motor and Trunnion Assembly – Parts List

List of part numbers and descriptions for the motor and trunnion assembly.

Blade Guard Assembly – Parts List

List of part numbers and descriptions for the blade guard assembly.

PM2000B Miter Gauge Assembly – Parts List

List of part numbers and descriptions for the PM2000B miter gauge.

PM2000BT Miter Gauge Assembly – Parts List

List of part numbers and descriptions for the PM2000BT miter gauge.

Motor Cover Assembly – Parts List

List of part numbers and descriptions for the motor cover assembly.

Electrical Connections Diagrams

Wiring diagram – 3HP, 230V, 1PH

Wiring diagram for the 3HP, 230V, 1PH motor configuration.

Wiring diagram – 5HP, 230V, 1PH

Wiring diagram for the 5HP, 230V, 1PH motor configuration.

Wiring diagram – 5HP, 230V, 3PH

Wiring diagram for the 5HP, 230V, 3PH motor configuration.

Wiring diagram – 5HP, 460V, 3PH

Wiring diagram for the 5HP, 460V, 3PH motor configuration.

Warranty and Service

Related product manuals