NOTE: A low-profile riving knife is also provided, for
making non-through cuts on the table saw.
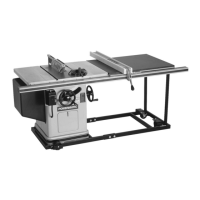
6.10.2 Anti-Kickback Pawls
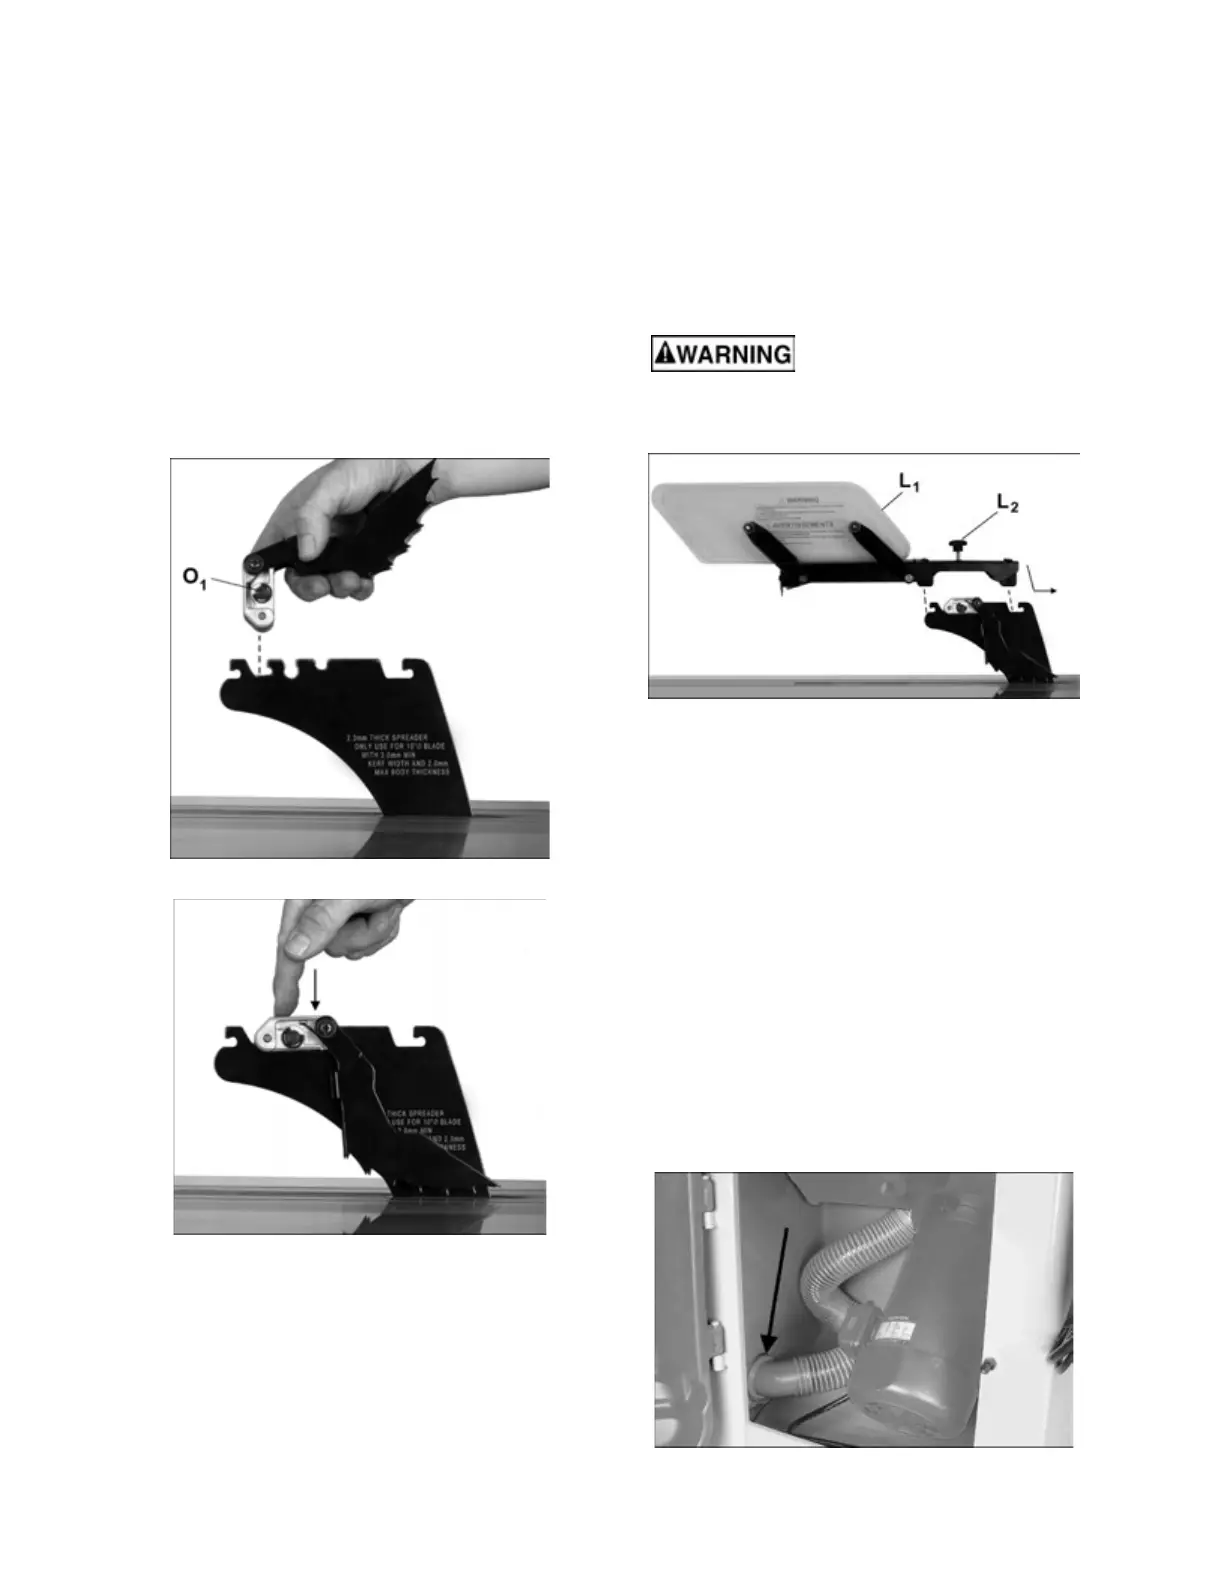
See Figures 6-11 and 6-12.
1. Install insert plate into table.
2. Push and hold button (O
1
) on opposite side of
the head to release the catch pin. Mount pawl
assembly straight down, in the location shown
in Figure 6-11.
3. Pivot head and push it downward (Figure 6-12)
until there is an audible click. Make sure you
hear the click to verify that pawl assembly is
secure.
Figure 6-11
Figure 6-12
6.10.3 Blade Guard
See Figure 6-13.
1. Push up guard leaves (E, Figure 6-12) until they
catch and hold on the peg (F).
2. Lower blade guard assembly onto riving knife
and push it backward to seat it.
3. Tighten knob (G).
4. Pull down guard leaves (E) and allow them to
drop to the table.
5. Reverse procedure to remove guard.
IMPORTANT: Knob (G) must be tightened before
operating saw with guard in place.
Guard, riving knife, and pawl
assemblies must be securely installed, and
leaves must be in contact with table, before
beginning any through-cutting operation.
Figure 6-13
The riving knife clamping base is adjusted by the
manufacturer and no further adjustment of blade
guard and riving knife assembly should be
necessary. However, proper alignment is very
important. Before operating table saw, read sect.
8.7, Riving knife alignment, to verify and follow
adjustment procedure if necessary.
6.11 Dust Port
Use of a dust collection system (not provided) is
strongly recommended during table saw operation.
It will help keep the shop clean, as well as prevent
potential health issues due to dust inhalation.
Make sure internal hose is pushed into external dust
port (Figure 6-14). Attach hose from your dust
collection system to the 4-inch dust port at base of
saw, and secure with wire hose clamp (not
provided).
Figure 6-14