Do you have a question about the Powermatic PM1000 RU and is the answer not in the manual?
Details kickback causes, prevention, and protection tips for safe operation.
Lists all items included in the shipping cartons.
Specifies the necessary tools for assembling the table saw.
Provides instructions for unpacking components and initial cleanup.
Guides on how to install hand-wheels and storage hooks.
Instructions for attaching extension wings to the saw table.
Details on how to level the installed table extensions.
Instructions for mounting rails and fence assembly.
Steps for mounting the switch bracket.
Procedure for installing the motor cover.
Guidance on installing and adjusting the table insert.
Step-by-step instructions for blade installation and removal.
Procedure for installing the riving knife.
Instructions for positioning and installing anti-kickback pawls.
Steps for installing the blade guard assembly.
Instructions for connecting a dust collection system.
Details on proper grounding procedures for electrical safety.
Procedure for resetting the saw's overload protection.
Explanation of the saw's start, stop, and reset controls.
Information on the magnetic switch and safety key operation.
Lists the tools needed for performing adjustments.
Steps to ensure the rip fence is properly aligned with the blade.
Instructions for adjusting blade height and tilt.
Detailed instructions for using and adjusting the miter gauge.
Procedure for adjusting blade tilt stops for accuracy.
Guidance on aligning the riving knife with the saw blade.
Instructions for checking and aligning the table to the blade.
Details on inspecting and adjusting belt tension.
Information on removing the arbor and bearings.
Safety guidelines to prevent kickback accidents.
Instructions and safety precautions for rip sawing operations.
Guidance on performing resawing operations on the table saw.
Procedures and safety for crosscutting with the miter gauge.
Instructions for performing bevel and miter cuts.
Procedure for performing dado cuts with appropriate inserts.
Description and use of feather boards for safety.
Information on using a filler piece for narrow ripping.
Guidance on using push sticks and push blocks for safety.
Daily, weekly, and periodic cleaning instructions for the saw.
Guidelines for lubricating moving parts of the machine.
Checks for general machine condition and parts.
Exploded view diagram of the table and cabinet assembly.
Parts list for the table and cabinet assembly.
Exploded view diagram of the motor and trunnion assembly.
Parts list for the motor and trunnion assembly.
Exploded view diagram of the blade guard assembly.
Parts list for the blade guard assembly.
Wiring diagram for the 3HP, 400V, 50Hz motor configuration.
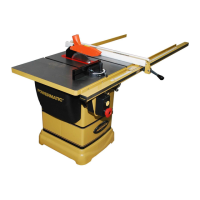
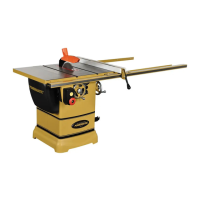
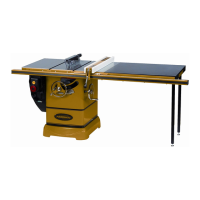
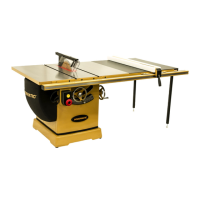
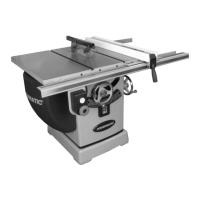
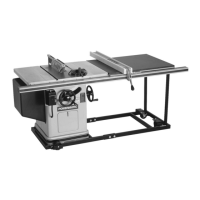
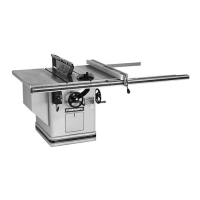
| Motor | 1.75 HP |
|---|---|
| Blade Diameter | 10 inches |
| Arbor Size | 5/8 inch |
| Max Cutting Depth at 90° | 3-1/8 inches |
| Max Cutting Depth at 45° | 2-1/8 inches |
| Table Material | Cast Iron |
| Miter Gauge | Included |
| Dust Collection Port | 4 inches |
| Rip Capacity (Left) | 12 inches |
| Fence System | Accu-Fence |
| Rip Capacity (Right) | 30 inch |