Pentair Water Commercial Pool and Aquatics
Page 22
module. The blower is energized directly through the
“inducer” terminals F1 and F2 of the (Fenwal) ignition
module. The 24V power to the T’STAT terminal of
the ignition module(s) are routed through the safety
interlocks.
The ladder diagram for models 1250, 1500, 1750
and 2000 is shown in Figure 13. These models have
two ignition modules, each with its own blower, and
each controlling part of the input so that startup at
reduced input is provided. The blowers are energized
by the ignition modules indirectly via switching
relays. When either ignition module receives a call for
heat, it switches its blower to high speed and the
blower of the idle ignition module to low speed.
The wiring schematic for the PowerMax 500 –
1000 is shown in Figure 14, and the schematic for the
1250 – 2000 models is shown in Figure 15. All 24V
wiring is routed through the diagnostic PC board.
Wiring harnesses connect between the diagnostic PC
board and the control components, indicator board, or
field wiring terminal strip. The diagnostic board
contains LEDs that indicate open status of the safety
interlocks, and quick-connect terminals that provide
tests points for checking voltage/continuity at various
points in the control circuit.
Certain control elements that may need to be
rewired in the field are connected via the field wiring
terminal strip rather than to the diagnostic PC board.
These include the low-water cutoff (LWCO), external
alarm, and water flow switch.
SECTION 9.
Replacement Parts
Only genuine Pentair Water commercial Pool and Spa
replacement parts should be used.
9.1 General Information
To order or purchase parts for the PowerMax,
contact your nearest dealer or distributor. If they
cannot supply you with what you need, contact
Technical Support (see page 35).
9.2 Parts List
Model Model Model Model Model Model Model
Item Description 500 750 1000 1250 1500 1750 2000
Sheet Metal Components
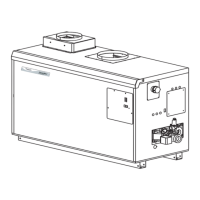
See Figure 9
1 Panel, Jacket, Side Left 5C3420 5C3420 5C3420 5C3420 5C3420 5C3420 5C3420
2 Panel, Jacket, Side Right 5C3520 5C3520 5C3520 5C3520 5C3520 5C3520 5C3520
3 Panel, Jacket, Front 5C3320 7C3320 10C3320 12C3320
3 Panel, Jacket, Front, Left 15C3320 17C3320 20C3320
4 Panel, Jacket, Front, Right 15C3320 17C3320 20C3320
5 Panel, Jacket, Rear 5C3220 7C3220 10C3220 12C3220 15C3220 17C3220 20C3220
5A Panel, Jacket, Rear, Filter Enclosure 15C3026 15C3026 15C3026
6 Panel, Jacket, Top 5C3021 7C3021 10C3021 12C3021
6 Panel, Jacket, Top, Left 15C3021 17C3021 20C3021
7 Panel, Jacket, Top Right 15C3025 17C3025 20C3025
8 Control Door, Access 5C3010 5C3010 5C3010 5C3010 5C3010 5C3010 5C3010
9 Plate, Gas Pipe Seal 5C3304 5C3304 10C3304 20C3304 20C3304 20C3304 20C3304
(2) (2) (2) (2) (2) (2) (2)
10 Plate, Cover, Wiring 5C3502 5C3502 5C3502 5C3502 5C3502 5C3502 5C3502
11 Plate, Vent 5C3004 5C3004 10C3004 20C3004 20C3004 20C3004 20C3004
12 Cover, Vent Plate 20C3006 20C3006 20C3006 20C3006
13 Plate, Cover, Filter 5C3002 5C3002 5C3002 20C3002 20C3002 20C3002 20C3002
14 Collar, Vent 5C3100 7C3100 10C3100 15C3100 15C3100 15C3100 20C3100
15 Air Filter Assembly R2014701 R2014701 R2014703 R2014704 R2014704 R2014704 R2014705