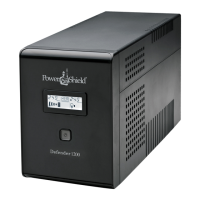
8. Battery replacement
Defender 1200/1600 have user replaceable battery feature. Please read
warning on the front page about battery safety and follow the steps carefully
shown below. Please use only PowerShield approved battery pack to
maximize the performance of the unit.
1. Shutdown all connected equipment and turn the UPS off by pressing on /
off button.
2. Remove input cord from mains and remove all output cord from the UPS.
3. Flip the UPS upside down. There is a front door screw found on the front
panel. Remove the screw using Philips screw driver.
4. Remove the front panel by grabbing the bottom edge of the front panel
forward. Remove hooks from the enclosure. Please be careful not to apply
excess force to the panel as it may cause damage to the LCD cable
attached to it.
5. There is a metal plate holding the battery pack in the enclosure. Remove the
metal plate from the unit.
6. Pull tag of the battery pack and remove the battery from the unit
7. Remove Red ( Positive )and Black ( Negative ) battery wires from the battery
pack.
8. Prepare new battery pack. Connect Black ( Negative ) wire to the new
battery black terminal and connect Red ( Positive ) battery wire to the red
battery terminal. Note : You will see a small spark when you connect red wire
to the battery. This is normal as the unit charges energy to some component.
Please check polarity of battery terminals.
9. Insert the battery back into the unit and put the metal plate back to the front
of the enclosure. Place the front panel and screw the battery door screw.
10. Please recharge the unit for 6 hours before you turn the unit on.
9. Trouble Shooting
Please follow the trouble shooting section below. If the problem cannot be
resolved, please check PowerShield FAQ web page or call our customer support
for further assistance.
 Loading...