The provided document is a user manual for the POWERTEC PT3300Ei 3300W Digital Inverter Generator.
Function Description
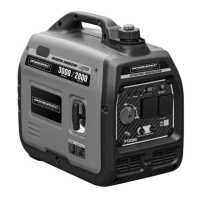
The POWERTEC PT3300Ei is a portable digital inverter generator designed to provide electrical power. It is suitable for various applications, including powering electrical loads during outages, for recreational use, or at construction sites. The inverter technology ensures a clean power output with less than 3% Total Harmonic Distortion (THD), making it safe for sensitive electronics. The generator is equipped with a low idle mode to minimize fuel consumption and noise during periods of reduced electrical output. It also features a durable steel frame for protection and portability.
Important Technical Specifications
- Model: PT3300Ei
- Engine Model: PD230
- Displacement: 208cc
- Engine Type: 4-Stroke OHV
- Running Watts: 3000W
- Starting Watts: 3300W
- Phase: Single
- Frequency: 50Hz
- Voltage: 230V
- Rated Current: 13 A
- Fuel Capacity: 14 L
- THD (Total Harmonic Distortion): <3% (Pure Sine Wave)
- Spark Plug Gap: 0.7 - 0.8 mm (0.028 - 0.031 in.)
- Recommended Oil Type: SAE30 automotive oil (or Full Synthetic 5W-30/10W-30/10W-40 depending on ambient temperature)
- Oil Capacity: Up to 0.6 L (0.6 qt.)
- Fuel Type: Regular unleaded gasoline with a minimum octane rating of 85 and an ethanol content of less than 10% by volume.
- Clearance Requirements (Operation): At least 5 ft. (1.5 m) from combustible material, and at least 3 ft. (91.4 cm) on all sides for cooling.
Usage Features
Controls and Features:
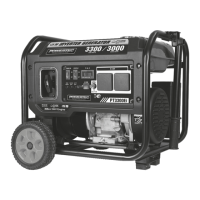
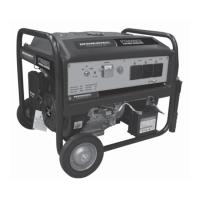
The generator includes a choke, fuel valve (to turn fuel supply on/off), fuel tank with cap, recoil starter, dipstick, power panel, and a durable steel frame.
Assembly:
The generator ships with a spark plug wrench, funnel, and manual. Initial assembly involves adding engine oil and fuel.
Grounding:
It is recommended to properly ground the generator to prevent electric shock. A ground terminal is provided on the power panel for connecting a heavy gauge (12 AWG minimum) copper wire to a copper rod driven into the ground.
Operation Location:
The generator must be operated outdoors only in a well-ventilated area, never inside any building or enclosed compartment. It requires specific clearances from combustible materials and for adequate cooling.
Starting the Engine:
- Ensure the generator is on a flat, level surface and all electrical loads are disconnected.
- Turn the fuel valve to the "On" position.
- Pull the choke lever out to the "Choke" position.
- Turn the engine switch to the "ON" position.
- Pull the starter cord slowly until resistance is felt, then pull rapidly.
- As the engine warms up, push the choke lever to the "Run" position.
- Note: Excessive choking can lead to spark plug fouling/engine flooding.
Low Idle Mode:
This mode minimizes fuel consumption and noise during reduced electrical output. The engine speed automatically returns to normal when an electrical load is connected. For high electrical loads or momentary fluctuations, the low idle mode should be turned OFF.
Connecting Electrical Loads:
- Allow the engine to stabilize and warm up for a few minutes.
- Plug in and turn on desired 230V AC single-phase, 50Hz electrical loads.
- Caution: Do not connect 3-phase loads or overload the generator.
- Power Management: To prolong the life of the generator and connected devices, start the generator with no electrical load, allow it to run for several minutes, then connect and turn on electrical equipment one by one, starting with the largest load first.
Stopping the Engine:
- Turn off and unplug all electrical loads.
- Let the generator run at no-load for several minutes to stabilize internal temperatures.
- Turn the fuel valve to the "OFF" position and let the engine run until fuel starvation stops it.
- Turn the engine switch to the "OFF" position.
- Important: Always ensure the fuel valve and engine switch are in the "OFF" position when the engine is not in use.
Overload Operation:
If overloaded, the overload indicator light will blink, and power to the receptacles will be cut. To recover, shut down the generator, wait until the light turns off, and restart.
Operation at High Altitude:
Engine power is reduced at higher altitudes. This is a natural trend and cannot be adjusted. Increased exhaust emissions and potential hard starting, increased fuel consumption, and spark plug fouling may occur.
Maintenance Features
Maintenance Schedule:
The manual provides a detailed maintenance schedule with intervals for daily, first 5 hours, every 50 hours/season, every 100 hours/season, every 250 hours, and every 3 years.
- Every 8 hours or daily: Check oil level, clean around air intake and muffler.
- First 5 Hours: Change oil.
- Every 50 hours or every season: Clean air filter, change oil (if operating under heavy load or in hot environments).
- Every 100 hours or every season: Change oil, clean/adjust spark plug, check/adjust valve clearance*, clean spark arrester, clean fuel tank and filter*.
- Every 250 hours: Clean combustion chamber.
- Every 3 years: Replace fuel line.
- Items marked with an asterisk may require professional service.
Engine Maintenance:
- Oil: Check oil level regularly. Use SAE30 automotive oil (or appropriate synthetic oil based on temperature). Do not overfill. Change oil after the first 5 hours, then every 50 hours or season.
- Spark Plugs: Inspect, clean, and replace spark plugs as needed. The recommended spark plug gap is 0.7 - 0.8 mm.
- Air Filter: Clean the air filter regularly by removing the foam element, washing it in liquid detergent and water, squeezing thoroughly, drying, and reattaching.
- Spark Arrester: Clean carbon deposits from the spark arrester screen with a wire brush. Replace if damaged. Failure to clean will result in degraded engine performance.
Generator Maintenance:
Keep the generator clean and stored properly. Do not spray the engine with water. Use a damp cloth, soft bristle brush, or air compressor (25 PSI) to clean exterior surfaces. Ensure all air vents and cooling slots are clean.
Storage:
- Short Term Storage (up to 1 year): Add fuel stabilizer, run the generator for 10 minutes, then turn the fuel valve to "OFF" and let the engine run until it stops. Optionally, drain excess gasoline from the carburetor. Remove the spark plug, pour a tablespoon of oil into the cylinder, crank the engine slowly, and reattach the spark plug. Disconnect and charge the battery (if applicable). Clean the generator and store it in a cool, dry place.
- Long Term Storage (over 1 year): The fuel tank and carburetor must be completely drained of gasoline. Follow the short-term storage steps, ensuring complete fuel starvation or draining the fuel tank and carburetor.
Removing from Storage:
If stored improperly with fuel, all fuel must be drained, and the carburetor thoroughly cleaned (may require technical assistance). If stored properly, add fuel, turn the fuel valve to "ON", check for leaks, check oil level, clear the air filter, connect the battery (if applicable), and start the engine.
Warranty:
The product comes with a comprehensive warranty program. Registration with Euroquip is required for full warranty support.
- Registered Warranty Period: 12 Months for Commercial Use, 12 Months for Domestic Use.
- Coverage: Manufacturing and material defects during the specified warranty period.
- Exclusions: Parts subject to wear and tear, failure due to incorrect operation, lack of proper care/maintenance, external damage, contaminated fuel/poor water supply, modifications, attempted repair by unauthorized parties, pre-delivery service/adjustment issues, and incidental/consequential losses.
- Warranty assessment and repair decisions are at the sole discretion of Euroquip. The purchaser is responsible for delivering the product to a service agent.