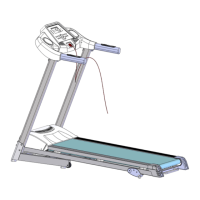
This document describes the Powertrain Motorized Treadmill, Model V30, an exercise machine designed for domestic indoor use.
Function Description
The Powertrain V30 treadmill is designed to provide a comprehensive indoor exercise experience, allowing users to improve physical fitness, tone muscles, and assist with weight loss when combined with a calorie-controlled diet. It features various modes of operation, including manual mode and a selection of automatic training programs, to cater to different fitness levels and goals. The treadmill incorporates a safety key mechanism for immediate shutdown in case of an emergency, preventing severe friction burns. It also includes a body mass calculator to estimate the user's overall body fat content, providing an additional metric for fitness tracking. Multimedia control keys allow for music playback via USB disc or SD card, enhancing the user experience during workouts.
Important Technical Specifications
The treadmill operates on an AC220-240V (50/60Hz) input power voltage. It is equipped with a 1.5HP motor, capable of speeds ranging from 0.8 to 14.8 Km/h. The display shows various data points including time (5:00 - 99.59 minutes), distance (1.0 - 99.9 KM), calories (20.0 - 999 C), and pulse (50 - 199 BPM). The machine requires a constant 220-240V AC power connection. The treadmill offers three levels of manual incline adjustment.
Usage Features
Safety Precautions:
- Users should consult a doctor before starting any exercise program, especially if they have existing health conditions or are on medication that affects heart rate, blood pressure, or cholesterol.
- All bolts and nuts must be tightened before use.
- Do not stand on the running belt when starting the unit.
- Stop immediately if feeling unwell or nauseous, and adjust speed slowly.
- The adjustment of the belt is prohibited during use.
- Wear sports shoes and appropriate clothing.
- Children, elderly, pregnant women, and individuals with medical conditions should only use the treadmill under a doctor's authorization and adult supervision.
- The safety key must be clipped to clothing during use and kept away from children when not in use to prevent choking hazards.
- Silicone oil should be kept out of children's reach. In case of accidental ingestion or eye contact, rinse with water and seek medical assistance.
- The machine must be placed on flat ground and is designed for indoor use only. Avoid slant surfaces, sunlit areas, or proximity to heaters.
- Ensure a 2m clearance around the machine.
- Do not start the machine when it is folded.
- Keep all liquids away from the machine to prevent damage and voiding of warranty.
- Avoid using the machine in poorly ventilated spaces or near flammable objects.
- Do not place any objects on the machine.
- Switch off all functions and disconnect from power when not in use.
- Do not disassemble the machine without manufacturer authorization.
- Ensure the running belt is fastened before use.
- Be careful of children or other objects when folding and unfolding.
- Do not place the machine near wet objects.
Operation:
- Start: The treadmill starts after a 5-second countdown.
- Programs: Offers 1 manual mode, 3 countdown modes, 12 automatic programs (P1-P12), and 1 FAT program.
- Safety Lock Function: Disconnecting the safety key displays an "E7" error, slows down the treadmill, and emits a "Di" tone. Repositioning the key resets the data.
- Key Functions (Start/Stop): The Start button initiates the running mat at 0.8 km/h. The Stop button clears data and brings the treadmill to a complete stop, resetting to manual mode.
- Program Button: Scrolls through manual mode and automatic programs (P1-P12). Manual mode is the default at 0.8 km/h, with a maximum speed of 14.8 km/h.
- Mode Key: In standby mode, scrolls through time, distance, and calorie countdown modes. Speed Up/Down buttons select countdown values, and the Start button begins the treadmill.
- Speed Increase/Decrease Buttons: Adjust speed by 0.1 Km/h intervals. Holding them down for over 2 seconds provides continuous adjustment. These buttons are also on the hand grips.
- Speed Shortcut Keys: Direct speed adjustments for 1.0, 3.0, 5.0, 7.0, 9.0, and 11.0 km/h.
- Manual Mode Training: Allows users to adjust operation to personal requirements. The treadmill runs until stopped, and can be pre-set for session duration, distance, or target calories.
- Multimedia Control Keys: Play, pause, rewind, forward, volume up/down for music from USB or SD card.
- Volume Mute Function: (Not included in models with incline).
- Display Function: Shows current running speed, time (manual/countdown), cumulative distance (manual/programs), distance countdown (automatic), cumulative calories (manual/programs), and calorie countdown (automatic).
- Pulse Function: Place hands on sensors for 5 seconds to calculate and display pulse (50-200 BPM). Heart signal flashes during calculation. This is for exercise reference only, not medical assessment.
- Program Mode Training: 12 automatic programs (P1-P12), each with a standard 30-minute duration (changeable) and 10 different speed segments. Users select programs with the "Prog" button, adjust duration with speed buttons, and start with the "Start" button. A beep indicates speed changes or program completion.
- Physical Fitness Test (FAT): The V30 includes a body mass calculator. Users input gender, age, height, and weight, then place palms on pulse sensors for physical detection to determine BMI. BMI values are categorized as underweight (≤19), normal (20-25), overweight (26-29), or obese (≥30). This is an estimate, not medical data.
Error Codes:
- E1 (Erroneous Connection): Indicates abnormal connection between lower controller and console. Solution: Check all joints and connection lines, ensure full plug-in, replace damaged lines.
- E2 (No Signal from Motor): Indicates no signal from the motor. Solution: Check motor cable connection, reconnect if loose. Check for damage or burnt smell in the motor cable; replace if necessary.
- E5 (Current Overload Protection): Lower controller detects current over 6A for more than 3 seconds. Solution: Overloading or stuck parts causing motor stop. Adjust treadmill, restart. Check for liquid or burnt smell in motor or controller; replace if necessary. Check power supply voltage and adjust if it doesn't match specifications.
- E6 (Explosion-proof Impact Protection): Abnormal voltage or motor causes circuit fault. Solution: Check if power supply voltage is 50% lower than normal; use correct voltage. Check for burnt smell in controller; replace if necessary. Check motor cable connection.
- E7 (No Safety Key): Safety key is not in place. Solution: Put the safety key on the right place.
Maintenance Features
General Maintenance:
- Always disconnect the treadmill from power before cleaning or maintenance.
- Regular comprehensive cleaning extends life.
- Periodically remove dust.
- Clean running belt sides to reduce impurity accumulation.
- Wear clean athletic shoes to prevent dirt on running board and belt.
- Clean treadmill belts with a damp cloth and mild soap.
- Prevent liquids from contacting components or the treadmill to avoid voiding warranty.
- Disconnect power plug before removing motor cover; clean motor at least once a year.
Running Board and Belt Lubrication and Cooling:
- The running board and belt are pre-lubricated from the factory.
- Regular lubrication is crucial due to friction impacting life and performance.
- Check lubrication by feeling the top surface of the running deck; if dry, lubricate.
- To lubricate: Lift the running belt edge, apply a few drops of lubricant (all-purpose household oil or sewing machine oil) along the center of the running deck. Run the treadmill (without user) at a slow speed for up to 5 minutes to distribute lubricant evenly.
- CAUTION: Do not over-lubricate; wipe away excess.
- If the board's surface is damaged, contact customer service for replacement parts.
- Lubrication frequency: Infrequent users (less than 3 hours/week) once per month; frequent users (more than 7 hours/week) once a fortnight.
- To extend life, switch off the machine and allow it to cool for at least 10 minutes after 2 hours of continuous use.
- A loose belt will skid; a too-tight belt reduces motor performance and increases roller/belt abrasion.
- Adjust tightness by lifting both sides of the running belt 50-75mm.
Adjusting Alignment and Tightness:
- The running belt is factory-adjusted but may stretch and require re-tensioning for optimum alignment.
- Running Belt Alignment: Place treadmill flat, do not stand on it. Turn on and set speed to 6-8 km/h.
- If shifting right: Rotate right adjusting bolt 1/2 turn clockwise, then left adjusting bolt 1/2 turn counter-clockwise.
- If shifting left: Rotate left adjusting bolt 1/2 turn clockwise, then right adjusting bolt 1/2 turn counter-clockwise.
Multi-wedge Belt Tension Adjusting:
- The multi-wedge belt may loosen over time due to abrasion, requiring adjustment for continued safe use.
- When to Adjust: If occasional pauses/slipping are experienced during running.
- Step 1 (Identify Loose Part): Remove four screws on the protective cover. Set running speed to 1 km/h. Stand on the running belt, grip armrests, and lightly tread the belt (using user's own weight).
- If instantaneous steps cannot stop the belt, tightness is appropriate.
- If instantaneous steps stop the running belt, but the multi-wedge belt and former roller are still running, the running belt is loose and needs adjustment.
- If instantaneous steps stop both the treadmill belt and multi-wedge belt, but the motor is still running, the multi-wedge belt is loose and needs adjustment.
- Step 2 (Adjust Screws): Use a wrench to adjust screws on the motor base. Gently flip the multi-wedge belt between the motor shaft and front roller. If too loose, flip 100%; if too tight, flip minimally. Aim for 80% flip after adjustment.
- Step 3 (Lock and Re-install): Lock the motor base and re-install the front cover.