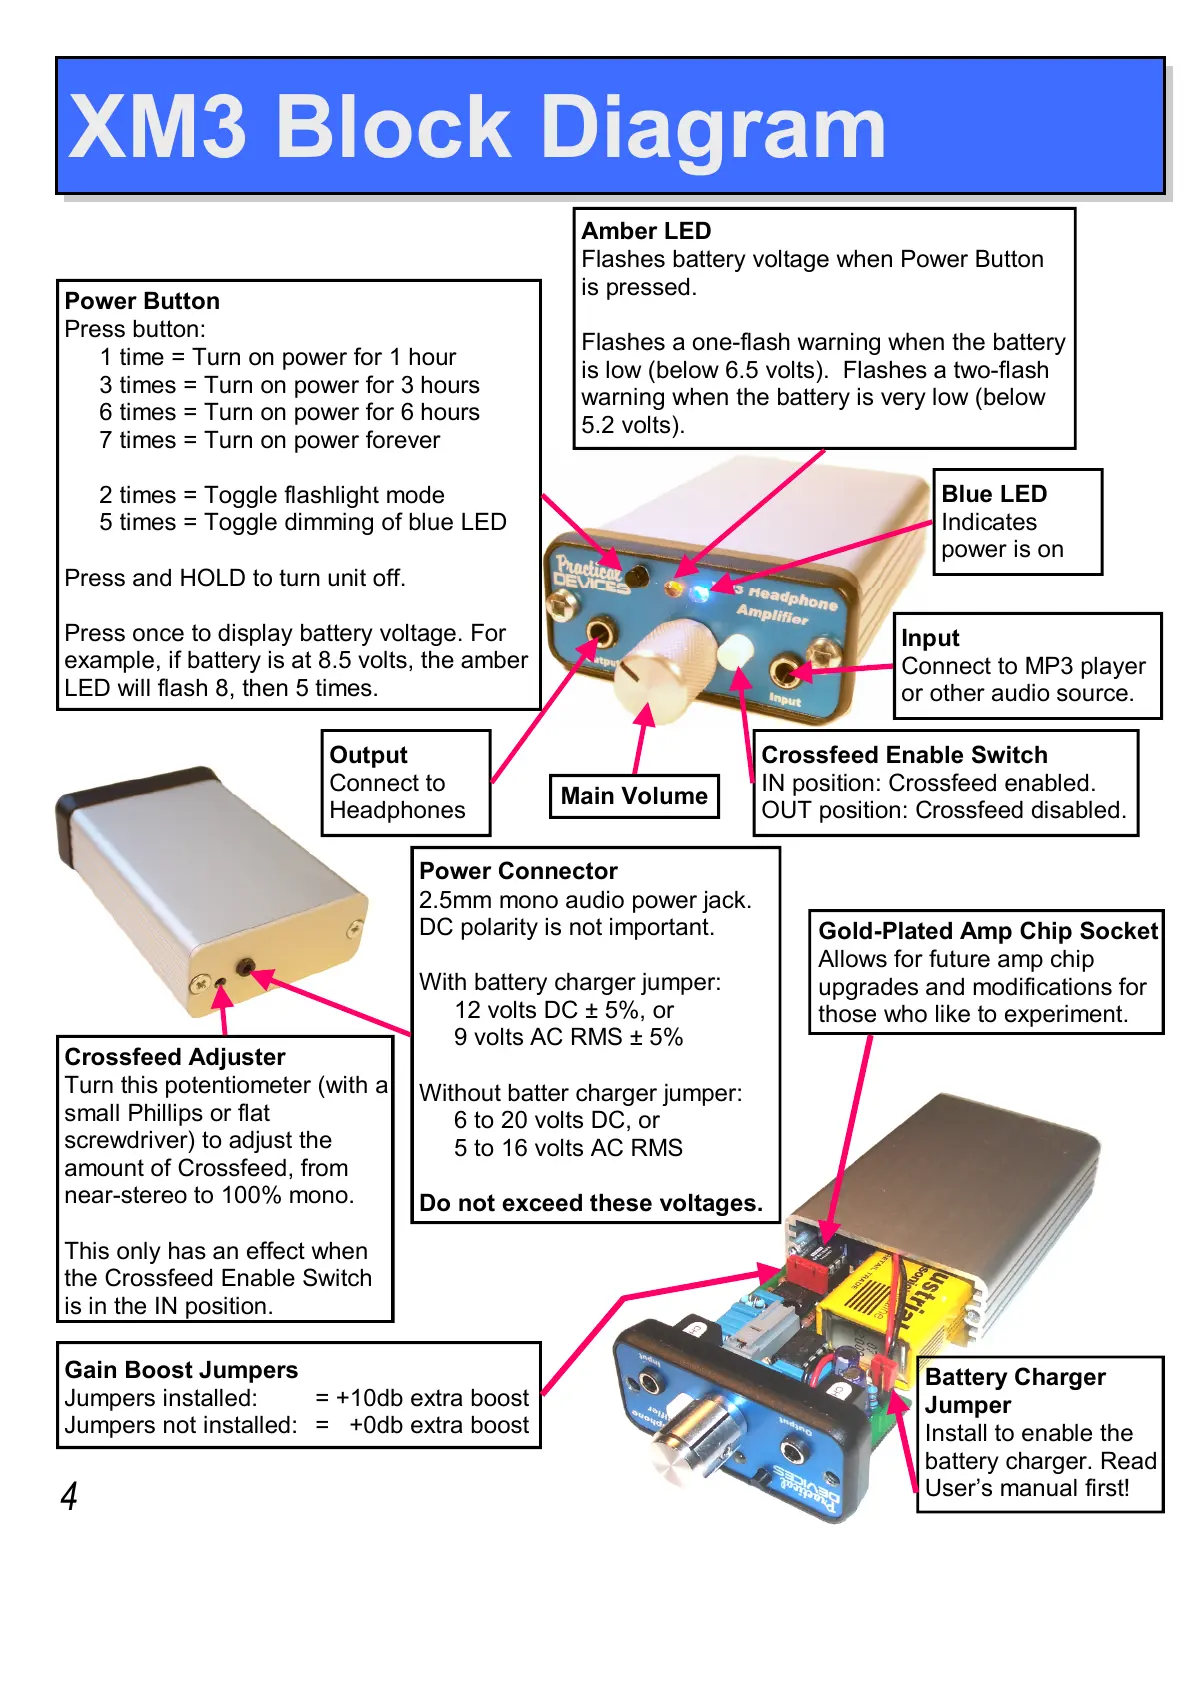
Output
Connect to
Headphones
Power Button
Press button:
1 time = Turn on power for 1 hour
3 times = Turn on power for 3 hours
6 times = Turn on power for 6 hours
7 times = Turn on power forever
2 times = Toggle flashlight mode
5 times = Toggle dimming of blue LED
Press and HOLD to turn unit off.
Press once to display battery voltage. For
example, if battery is at 8.5 volts, the amber
LED will flash 8, then 5 times.
Input
Connect to MP3 player
or other audio source.
Main Volume
Amber LED
Flashes battery voltage when Power Button
is pressed.
Flashes a one-flash warning when the battery
is low (below 6.5 volts). Flashes a two-flash
warning when the battery is very low (below
5.2 volts).
Blue LED
Indicates
power is on
Crossfeed Enable Switch
IN position: Crossfeed enabled.
OUT position: Crossfeed disabled.
Crossfeed Adjuster
Turn this potentiometer (with a
small Phillips or flat
screwdriver) to adjust the
amount of Crossfeed, from
near-stereo to 100% mono.
This only has an effect when
the Crossfeed Enable Switch
is in the IN position.
Power Connector
2.5mm mono audio power jack.
DC polarity is not important.
With battery charger jumper:
12 volts DC ± 5%, or
9 volts AC RMS ± 5%
Without batter charger jumper:
6 to 20 volts DC, or
5 to 16 volts AC RMS
Do not exceed these voltages.
Battery Charger
Jumper
Install to enable the
battery charger. Read
User’s manual first!
XM3 Block Diagram
4
Gold-Plated Amp Chip Socket
Allows for future amp chip
upgrades and modifications for
those who like to experiment.
Gain Boost Jumpers
Jumpers installed: = +10db extra boost
Jumpers not installed: = +0db extra boost