To re-assemble the unit:
1. Slide the unit back together
(make sure the circuit board
slides smoothly on the case's
guide rails)
2. Re-install the two screws. Do
not overtighten.
3. Re-install the battery and rear
panel.
Disassembling the Unit
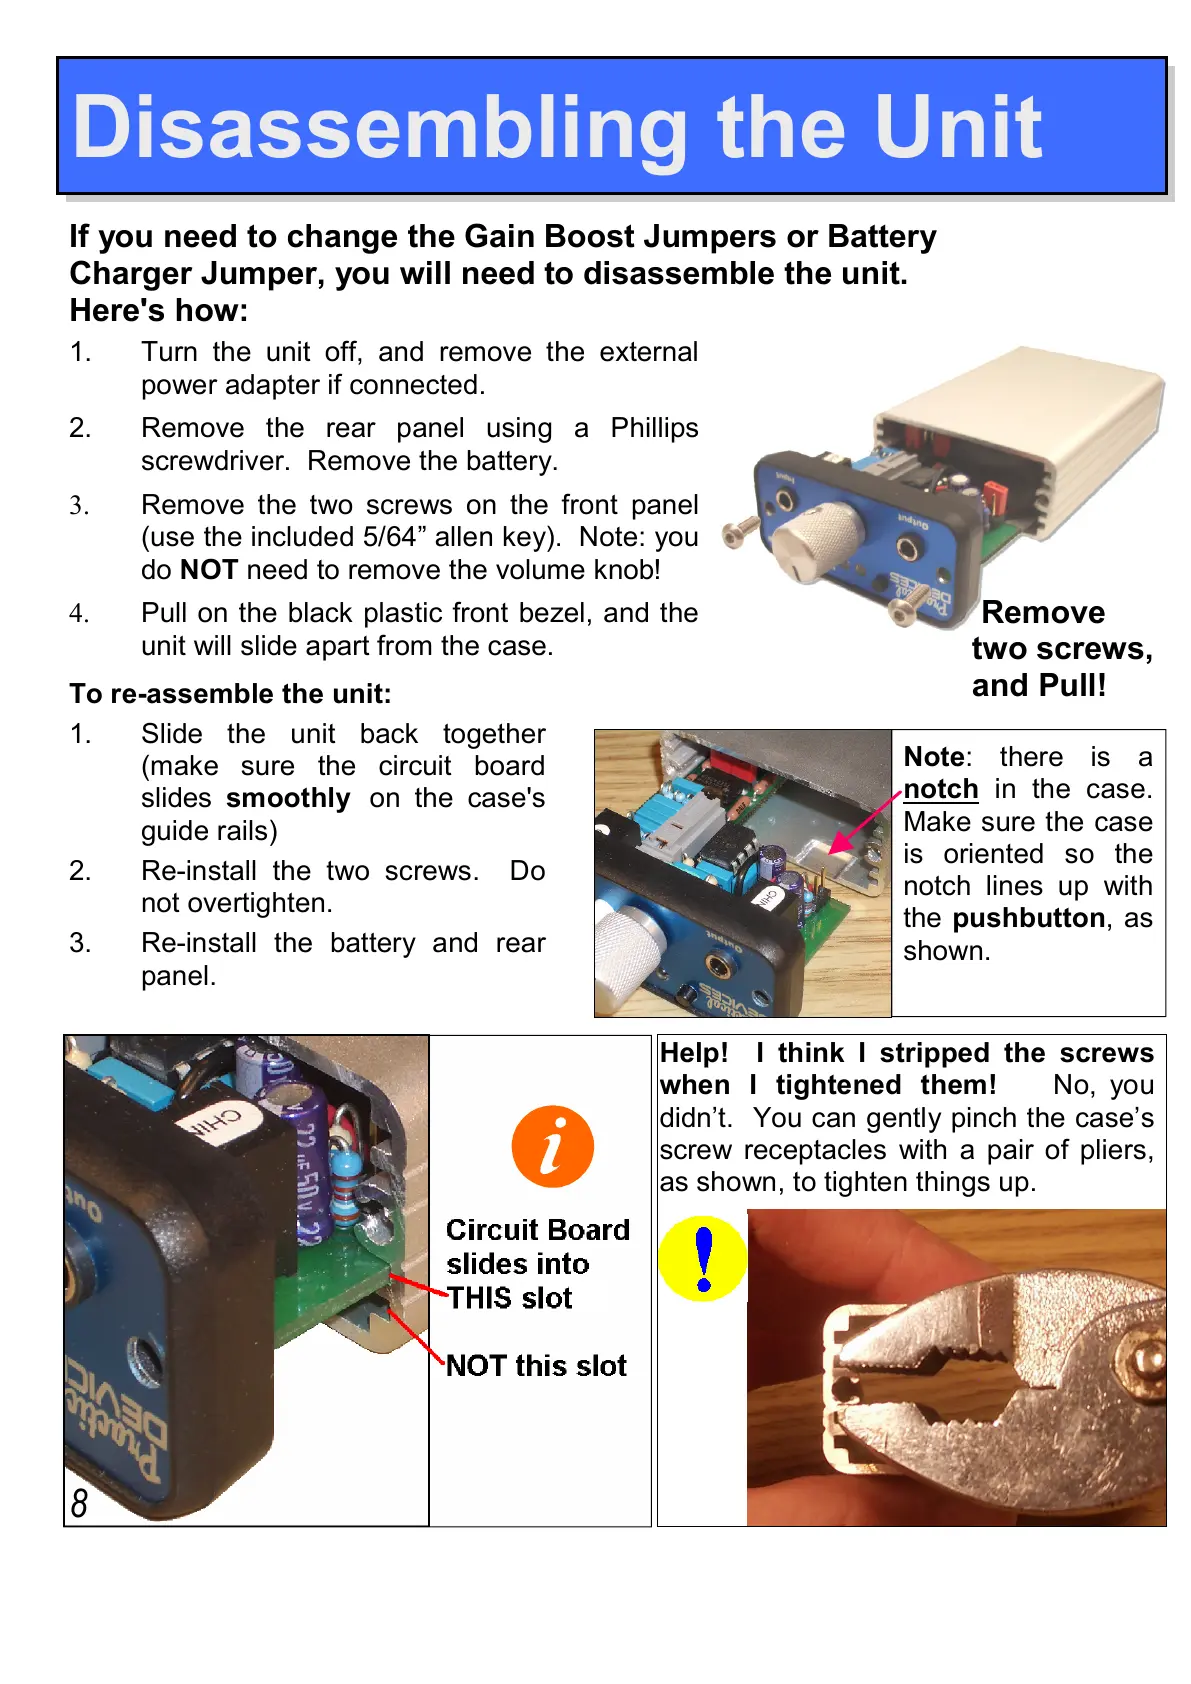
two screws,
and Pull!
8
Help! I think I stripped the screws
when I tightened them! No, you
didn’t. You can gently pinch the case’s
screw receptacles with a pair of pliers,
as shown, to tighten things up.
If you need to change the Gain Boost Jumpers or Battery
Charger Jumper, you will need to disassemble the unit.
Here's how:
Note: there is a
notch in the case.
Make sure the case
is oriented so the
notch lines up with
the pushbutton, as
shown.
1. Turn the unit off, and remove the external
power adapter if connected.
2. Remove the rear panel using a Phillips
screwdriver. Remove the battery.
3. Remove the two screws on the front panel
(use the included 5/64” allen key). Note: you
do NOT need to remove the volume knob!
4. Pull on the black plastic front bezel, and the
unit will slide apart from the case.