12
PM-727MV v6 2020-10
Copyright © 2020 Quality Machine Tools, LLC
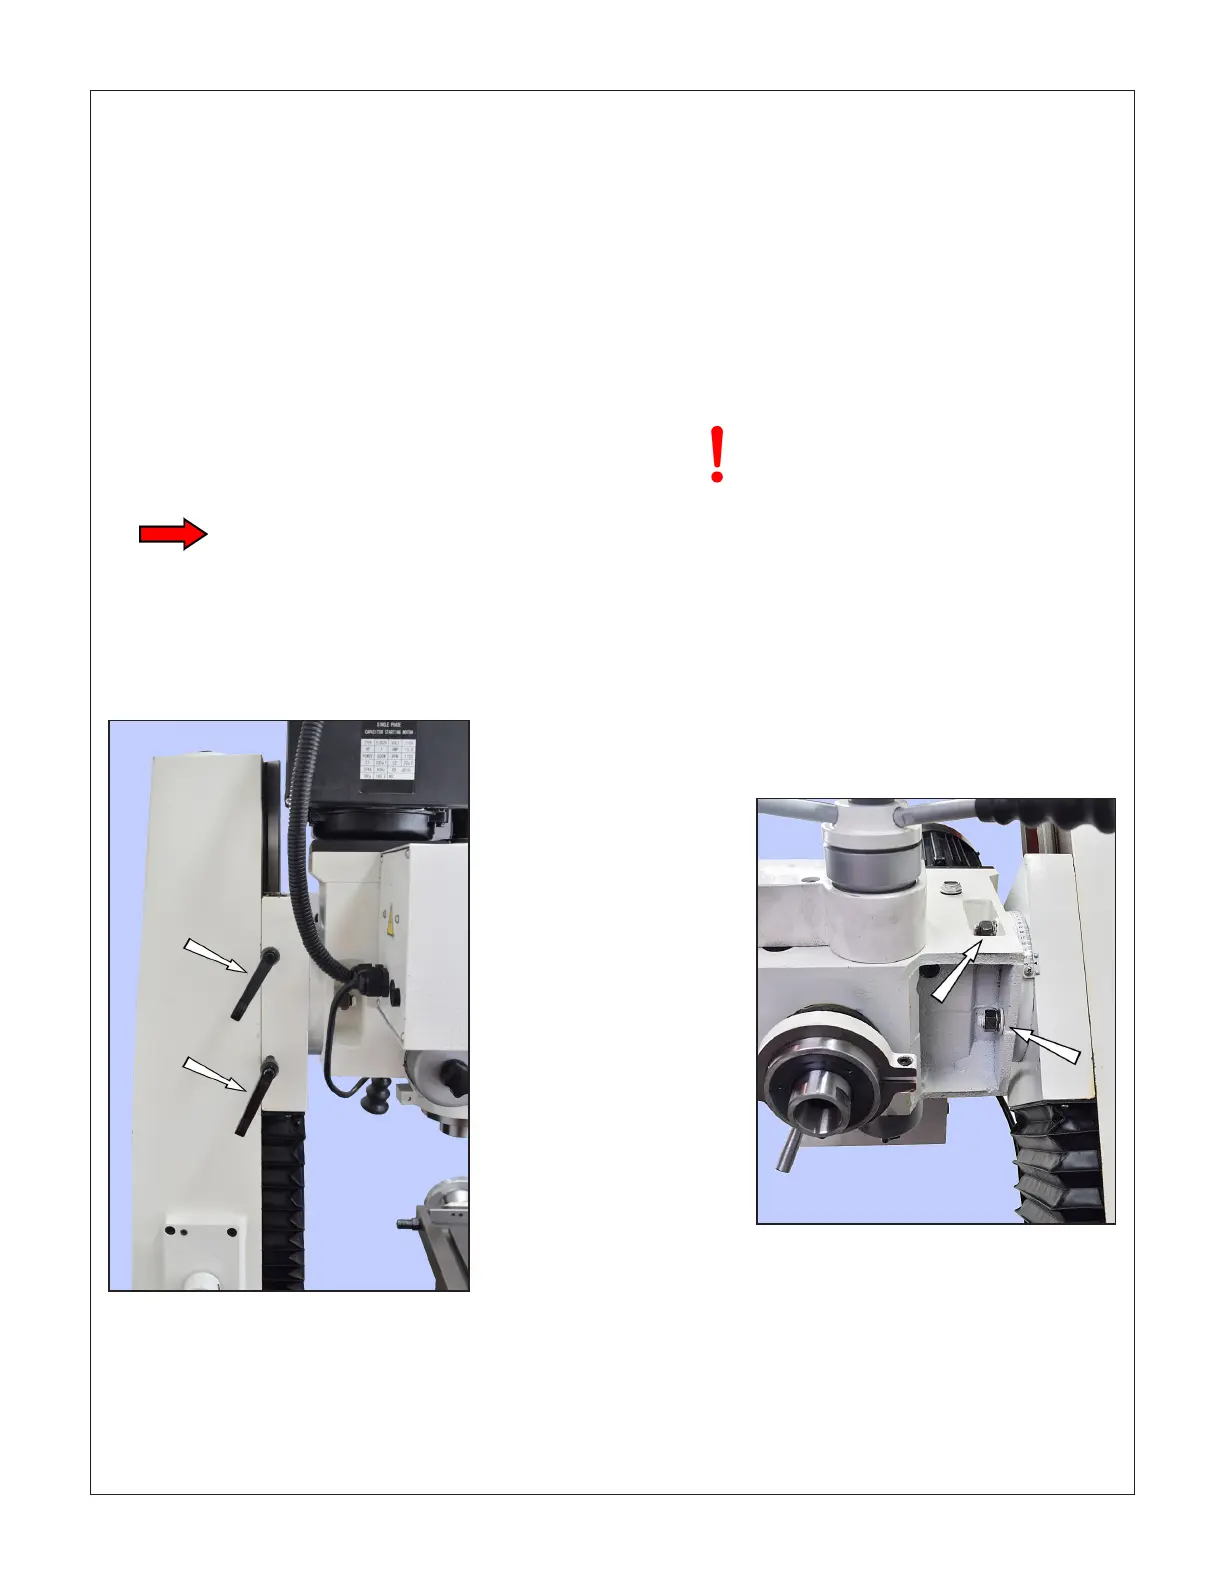
Figure 3-7 Headstock clamp levers
HEADSTOCK ELEVATION (Z-AXIS)
The headstock is elevated by a hand crank on the left
side of the column, Figure 3-1. For milling operations the
headstock is usually locked in position by tightening the
clamp levers, Figure 3-7.
The spindle must come to a
stop before reversing
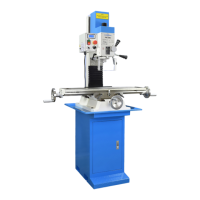
Figure 3-8 Headstock nuts (2 of 3)
TAPPING OPERATIONS
When threading a drilled hole it is essential to align the
threading tap properly in the bore. The mill is often used
for this purpose, ideally with a dedicated (non-slip) tap
holder or, for production work, an auto-reverse tapping
TILTING THE HEADSTOCK
In routine operations the user relies on squareness of
the spindle relative to both axes of the table. Front-to-
back squareness set at the factory, and is not adjust-
able (by everyday methods), but in the other plane the
headstock can be set to any angle up to 90 degrees
either side of the normal vertical position. Because re-
establishing true vertical (tramming) on any mill is a time
consuming process, most machinists look rst for other
ways of handling a project instead of tilting the head.
The headstock is secured by three nuts spaced 120 de-
grees apart, one underneath and one either side, Figure
3-8. The headstock is top-heavy, and may swing sud-
denly to either side unless a helper is on hand to restrain
it. Using an 18 mm wrench, testing for moveability as
you go, carefully loosen the nuts by degrees. Be es-
pecially careful if the head has not been moved before
QUILL DRO
The quill DRO is in metric mode when switched on.
Press the mm/in button to display inches. By pressing
and holding the Up arrow (incrementing) or Down ar-
row (decrementing) the display can be set to a chosen
value. To activate the Up/Down function press and hold
the ZERO button until the letter ‘S’ is displayed at right
(about 3 seconds). The longer the Up or Down buttons
are held down, the faster the change in displayed val-
ue. Press the ZERO button briey to exit the Up/Down
mode.
Switch o the DRO when not in use!
Replace the battery by removing the small molded cover
on the face of the DRO unit. Check the type number and
voltage of the installed battery. Replace with an equiva-
lent silver oxide cell available from local retailers.
attachment. The drill chuck can be used instead for siz-
es up to (say) M6 or 1/4”, beyond which the chuck may
not grip tightly enough to avoid slippage. Tapping can
be done under power, or by hand turning the chuck (see
below). For either method, it is essential to use a tapping
uid. Any cutting oil is better than none, but most users
nd Castrol’s Moly Dee the most reliable for threading
in steel. If power tapping bear in mind that reversing is
not instantaneous, so be careful tapping blind holes. Be
sure the quill locking lever is free, and start trial work
with the lowest spindle speed, L-1.