Page 14 For technical questions, please call 1-888-866-5797. ITEM 62548
SAFETY SETUP OPERATION MAINTENANCE
Tiller Operation
BEWARE of possible buried obstacles such as cable, conduit, irrigation lines, and landscape fabric.
DO NOT till above or near any electrical cables, gas pipes, or any other utility lines.
Contact your local utility company before using the Front Tine Tiller.
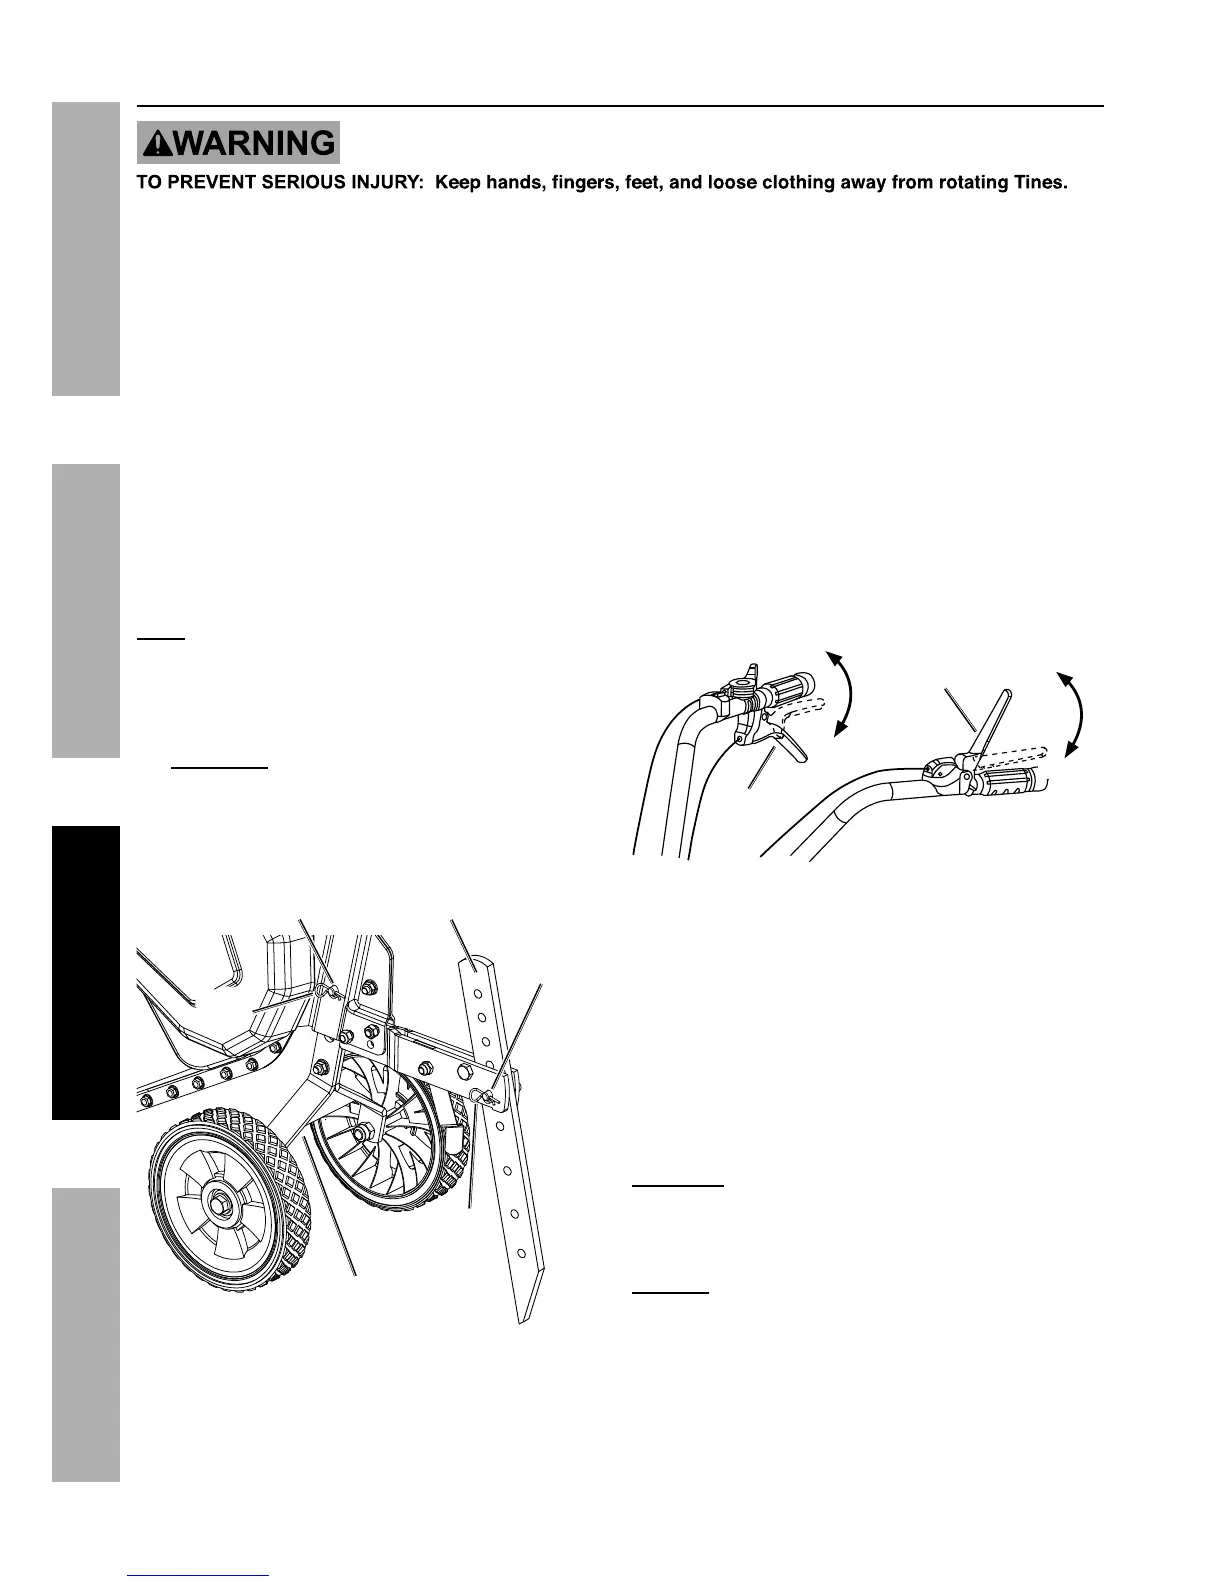
1. Before starting the Engine, set the desired tilling
depth (to a maximum 6.5" deep) by adjusting
the Drag Bar (91) and Wheel Assembly:
a. To adjust the Drag Bar remove the R-Clip (35)
and Clevis Pin (78). Lower the Drag Bar to
increase tilling depth or raise Bar to decrease
depth. Replace the Clevis Pin and R-Clip.
Refer to Figure B.
b. Set the Drag Bar below the level of the
Wheel Assembly. If necessary, remove the
R-Clip (35) and Clevis Pin (77) from the
Wheel Assembly and adjust as needed.
Replace the Clevis Pin and R-Clip.
Note: Optimum tilling depth (generally 4"– 6") will vary
with soil conditions. If Tiller shakes or is difficult to
control, the Drag Bar and Wheel Assembly are not
correctly set for the conditions. Adjustment through trial
and error is required to achieve the correct setting.
2. WARNING! Before first use, practice operating the
Tiller controls with Tines raised off of the ground.
Know how to keep control at all times, how to stop
the Tines from turning, and how to stop the Engine.
For actual field use, operate with Throttle Control
in slow position until familiar with Tiller handling.
Wheel
Assembly
R-Clip
(
35
)
Drag Bar
(
91
)
Clevis Pin
(
78
)
Clevis Pin
(
77
)
R-Clip
(
35
)
Figure B
3. Start the Engine following instructions
in Manual Start on page 12.
4. Grip the Handles firmly with both hands.
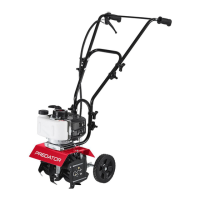
5. To move the Tiller in a forward direction, make
sure the Reverse Clutch Lever (90) is not
engaged and squeeze down on the Forward Clutch
Lever (89) to rotate the Tines and move forward.
Release the Forward Clutch Lever to stop Tine
rotation and forward movement. Refer to Figure C.
6. To move the Tiller in a reverse direction, make sure
the Forward Clutch Lever is not engaged and pull
up on the Reverse Clutch Lever to rotate the Tines
and move in reverse. Release the Reverse Clutch
Lever to stop Tine rotation and backward movement.
Figure C
7. The following soil conditions can affect tilling results:
a. On soil that is too hard and/or dried out for
the Tines to penetrate, the Tiller will shake
excessively and jump across the soil surface.
Moisten dry, hardened soil prior to tilling and use
a shallow depth setting and slow Engine speed.
b. Exceedingly wet soil will form clumps
during tilling and clog the Tines. Allow wet
soil to partially dry before tilling and use a
slow Engine speed to improve results.
CAUTION! DO NOT engage the Forward and
Reverse Clutch Levers at the same time. This will
result in unpredictable Tiller behavior and possible
equipment damage.
NOTICE: Should the Tines jam or the Tiller strike a
foreign object during use, immediately release the
Clutch Lever and turn off the Engine. Wait until the
machine completely stops. Disconnect the Spark Plug
cap, remove foreign objects and inspect the Tiller.
If any damage is found have the problem corrected
before further use.
 Loading...