EasyManua.ls Logo

Prepac SC-4820 User Manual

Prepac SC-4820
8 pages
To Next Page IconTo Next Page
Page #1 background imageLoading...
Page #1 background image
Model / Modèle / Modelo # SC-4820
Cubby Bench
Banc à compartiments
Banca con compartimentos
Assembly Instructions
Instructions de montage
Instrucciones de armado
Prepac Manufacturing Ltd. 6705 Dennett Place, Delta, BC V4G 1N4 LB-0534 2015-06-24
DATE STAMP
CONTACT US FIRST
parts@prepacmfg.com
1-877-PREPAC1
1-877-773-7221
Mon - Fri: 7am - 4pm PST / 10am - 7pm EST
For help with assembly
If you have received a damaged or
defective part or are missing hardware.
We will process replacement parts in 2 business days or less.Parts
are shipped via UPS Ground or mail.
Before you call please:
1) Record the following information from the shipping label
on the outside of the box. You will need it for warranty
purposes:
n Ship To Name
n Sales Order Number
2) Note the product model number.
3) Review the contents of your shipment to determine what
you are missing.
Online Option
Fill out the Replacement Parts Order form in the Product
Support section of our website: www.prepacmfg.com
Option de service en ligne
Complétez le formulaire Commande de Pièces de Rechange
disponible dans la section Soutien à la clientèle de notre site
web : www.prepacmfg.com
Pour parler avec quelqu’un en français, s’il vous plaît
contacter votre détaillant.
Opción de servicio en línea
Complete la forma para solicitud de piezas de remplazo en la
sección de soporte al cliente en nuestra página web
www.prepacmfg.com
O envíenos sus preguntas al correo parts@prepacmfg.com
Para solicitar ayuda en español por favor contacte su
distribuidor.
Question and Answer IconNeed help?

Do you have a question about the Prepac SC-4820 and is the answer not in the manual?

Prepac SC-4820 Specifications

General IconGeneral
Product NamePrepac SC-4820
CategoryIndoor Furnishing
Assembly RequiredYes
MaterialComposite Wood
ColorWhite
Depth12"

Summary

Product Information and Support

Contact Us First

Provides contact details and support hours for assembly assistance and missing parts.

Online Assembly Assistance

Offers online resources and replacement parts order forms via the official website.

Assembly Preparation

Required Tools and Safety Precautions

Lists necessary tools and provides critical advice to avoid overtightening screws during assembly.

Before You Begin Assembly

Instructions to identify all parts and hardware to ensure everything is included before starting.

Parts Identification

Assembly Steps

Step 1: Attaching Side Panels

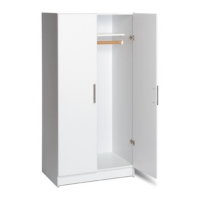
Connects side panels (C2, C4) to the bottom panel (C5) using cam locks and dowels.

Step 2: Installing Front Stabilizer

Attaches the front stabilizer (C6) to the side panels (C2, C4) and bottom panel (C5).

Step 3 & 4: Adding Internal Dividers

Installs internal gables (C3) into the assembled frame using screws and nails.

Step 5: Securing the Top Panel

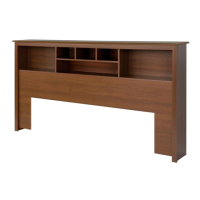
Attaches the top panel (C1) to the main structure using cam locks and dowels.

Step 6, 7 & 8: Installing Moldings and Backer

Attaches top/side moldings (C7, C9) and the backer panel (C8) to complete the unit.

Related product manuals