Do you have a question about the Prepac DBR-0560-1 and is the answer not in the manual?
Provides contact details and operating hours for customer assistance and replacement parts.
Information needed before contacting support, including shipping label details and product model number.
Lists essential and recommended tools for assembling the dresser, including safety precautions.
Identifies various dowel types and cam locking mechanisms used in assembly.
Lists different types of screws, nails, and connecting rods required for the dresser assembly.
Details the left and right cabinet and drawer slides necessary for smooth operation.
Identifies spacers and drawer bottom stabilizers used to position and reinforce components.
Presents various knob and handle options available for different dresser finishes.
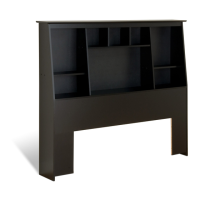
Identifies the primary cabinet panels including top, left, right sides, and center gable.
Details the various mouldings and stabilizers that provide structural support and aesthetic finishing.
Identifies the backer panel and associated mounting hardware like cable ties and screws.
Screw green twister dowels into the side and center moldings as indicated.
Attach moldings to side panels and center gable using small cams and locking them securely.
Attach 1-inch gray spacers, wood dowels, and green twister dowels to the left and right side panels.
Attach 1/2-inch gray spacers to both sides of the unfinished center gable using Euro screws.
Attach metal cabinet slides to all spacers on the side panels and center gable using Euro screws.
Ensure the cabinet slides are correctly oriented with the wheel facing the front and bottom.
Insert large cams into front and rear stabilizers, then attach them to the left side panel and lock the cams.
Insert connecting rod and dowel into stabilizers and attach them to the center gable.
Attach the remaining front and rear stabilizers to the right side panel and secure them by locking the cams.
Screw green twister dowels into the top panel as shown in the diagram.
Insert cams into the sides, attach the top panel, and then tighten the cams to secure it.
Attach the backer panel to the dresser frame using the provided 3/4" nails.
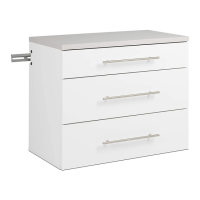
Identifies the individual parts required for assembling the drawers, including fronts, sides, back, and bottom.
Prepare drawer sides by inserting small cams and drawer fronts by screwing in black twister dowels.
Connect the drawer sides to the drawer back using the specified Hi Lo screws.
Attach the drawer front to the assembled drawer sides and tighten the cams.
Turn the drawer upside down and slide the drawer bottom into the grooves.
Secure the drawer bottom to the drawer back using four nails per drawer.
Position and secure the drawer bottom stabilizer in the center groove on the drawer front.
Attach the drawer pulls to the drawer fronts using the supplied screws for different finishes.
Attach the drawer slides to the left and right drawer sides using Euro screws.
Insert the assembled drawers into the cabinet, noting the requirement to lift the drawer front.
Attach mounting bases to the furniture and a wall stud using provided screws.
Feed the cable tie through the mounting bases and locking mechanism to secure the furniture.
| Brand | Prepac |
|---|---|
| Model | DBR-0560-1 |
| Category | Indoor Furnishing |
| Language | English |