EasyManua.ls Logo

Prepac DC-3345 User Manual

Prepac DC-3345
16 pages
To Next Page IconTo Next Page
Page #1 background imageLoading...
Page #1 background image
5-Drawer Chest
Required Tools
Screwdrivers
Flat Head
Using a power screwdriver
will speed up assembly.
Caution
Do not over tighten any screw.
The last few turns of each screw
should be done very slowly or by hand.
Phillips Head
Optional Tools
DATE STAMP
Prepac Manufacturing Ltd.
6705 Dennett Place
Delta, BC V4G 1N4
LB-0594-R
2007-02-16
Online Option:
Fill out the Parts Order Form on our website.
Go to www.prepacmfg.com and choose
Parts Order from the Support menu
Depending on collection, the
style of your product may vary
from this picture.
Model # DC-3345
Assembly Instructions
For the following collections:
Sonoma, Monterey, Montego,
Broadway, Chelsea, Winslow
CALL US FIRST
1-877-PREPAC1
1-877-773-7221
Mon - Fri 7am - 4pm PST
10am - 7pm EST
For help with assembly
If you have received a damaged or defective part or
are missing hardware.
We will process replacement parts
UPS Ground or mail.
Before you call please:
2) Note the
3) Review the contents of your shipment to determine
what you are missing. This unit is shipped in 2
cartons. Make sure you have received both.
in 2 business days or
less. Parts are shipped via
1) Record the following information from the shipping
label on the outside of the box. You will need it for
warranty purposes:
Ship To Name
Sales Order Number
product model number.
Hammer
This product is shipped in
2 cartons
Make sure you have both cartons.
Sometimes cartons shipped on the
same day get separated and are
delivered on different days.
2 of 2
1 of 2
+
Question and Answer IconNeed help?

Do you have a question about the Prepac DC-3345 and is the answer not in the manual?

Prepac DC-3345 Specifications

General IconGeneral
BrandPrepac
ModelDC-3345
CategoryIndoor Furnishing
LanguageEnglish

Summary

Assembly Instructions Overview

Contact and Support Information

Provides customer service phone numbers and operating hours for assembly assistance.

Pre-Assembly Checklist

Details information needed before calling and advises on checking shipment contents.

Required Tools for Assembly

Lists essential tools like screwdrivers and hammers needed for the assembly process.

Optional Tools for Assembly

Suggests optional tools, like a power screwdriver, that can aid in assembly.

Hardware Identification

Cabinet Hardware Identification

Lists and identifies all hardware components used for the main cabinet structure.

Drawer Hardware Identification

Lists and identifies all hardware components specifically for the drawers.

Safety Strap Hardware

Identifies the hardware included for the safety strap attachment.

Cabinet Parts Identification

Main Cabinet Panels

Identifies the primary structural panels for the cabinet, including top, sides, and stabilizers.

Stabilizers and Moldings

Details the identification of stabilizer pieces and decorative moldings for the cabinet.

Backer Panel Identification

Identifies the foldable backer panel for the unit.

Cabinet Assembly Steps

Step 1: Attach Cabinet Slides

Instructions for attaching T-spacers and metal cabinet slides to the side panels.

Step 2: Insert Cams into Top Sides

Procedure for inserting cam locks into the designated holes on the top of cabinet sides.

Step 3: Attach Twister Dowels to Top

Guidance on screwing green twister dowels into the underside of the cabinet top panel.

Step 4: Attach Stabilizers

Instructions for attaching all three stabilizers to the cabinet sides using screws.

Step 5: Secure Top with Cams

Procedure for attaching the cabinet top to the sides and locking the cams.

Step 6: Insert Moldings Dowels

Instructions for hammering plastic dowels halfway into side and top moldings.

Step 7: Attach Top and Side Moldings

Guidance on attaching the top and side moldings to the cabinet structure.

Step 8: Attach Backer and Levelling Feet

Instructions for turning the chest over and attaching the backer and levelling feet.

Drawer Parts Identification

Drawer Front, Sides, and Back

Identifies the key components for constructing the drawer box: front, left/right sides, and back.

Drawer Bottom Panel

Identifies the drawer bottom panel, typically made of unfinished material.

Drawer Assembly

Step 9a: Insert Cams into Drawer Sides

Procedure for inserting cam locks into the sides of the drawer panels.

Step 9b: Attach Twister Dowels to Drawer Fronts

Instructions for screwing green twister dowels into the drawer front panels.

Step 9c: Attach Drawer Sides to Back

Guidance on connecting the drawer sides to the drawer back using Hi-Lo screws.

Step 9d: Attach Drawer Front with Cams

Instructions for attaching the drawer front and tightening the cam locks.

Step 9e: Insert Drawer Bottom

Procedure for sliding the drawer bottom into the grooves of the assembled drawer box.

Step 9f: Secure Drawer Bottom with Nails

Instructions for securing the drawer bottom to the drawer back using nails.

Step 9g: Attach Drawer Slides

Procedure for attaching the drawer slides to the sides of the completed drawer.

Step 9h: Attach Drawer Knobs

Instructions for attaching the drawer knobs to the drawer fronts using machine screws.

Inserting Drawers into Cabinet

Step 10: Proper Drawer Insertion

Guidance on how to correctly insert the assembled drawers into the cabinet slides.

Safety Strap Installation and Care

Step 11: Secure Furniture to Wall

Instructions for attaching the safety strap to the furniture and wall for stability.

Furniture Care Instructions

Provides guidance on cleaning, painting, and water resistance of the furniture.
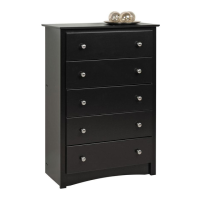
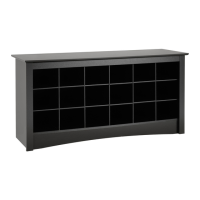
Related product manuals