EasyManua.ls Logo

Prepac BT-4100-2K User Manual

Prepac BT-4100-2K
22 pages
To Next Page IconTo Next Page
Page #1 background imageLoading...
Page #1 background image
Right Drawer Side
Côté droit du tiroir
2.
LB-0573 Page 1 of/de 2
1.
Screw green twister dowels into drawer front
Vissez les goujons de torsion vert dans des
devant du tiroir
Insert cams into drawer sides
Insérez les ferrures dans des côtés de tiroir
3.
Left Drawer Side
Côté gauche du tiroir
Drawer Front
Devant du tiroir
Drawer Bottom - 1/8” thick
Fond du tiroir - 1/8” épais
Each Drawer requires the following pieces
and hardware
Chaque tiroir exige les morceaux et le
matériel suivants
Insert cams in the unlocked position, with the opening facing
toward the hole for the connecting bolt.
Insérez les ferrures dans la position déverrouillée, de façon
à ce que l’overture soit face au trou de la vis d’assemblage.
Drawer Assembly Instructions -
Supplement to Product Assembly
Mode d'assemblage de tiroir -
Supplément à l'Assemblée de produit
12mm Zinc Cam (4)
Ferrure en zinc 12mm
RM-0502
Drawer Slide Screw (4)
Vis pour glissement de tiroir
RM-0074
#8 - 1½” Screws (4)
Vis no.8 - 1½”
RM-0504
Left & Right Glide
for Drawer Side
Glissement de tiroir
gauche et droit pour
le côté de tiroir
RM-0469
Drawer Back
Arrière du tiroir
4.
Attach Drawer Glides
Attachez les glissements de tiroir
Right Side
Côté droit
Left Side
Côté gauche
Note wheel location
Notez l'endroit de roue
Attach Drawer Back
Attachez les arrière du tiroir
Nail (4)
Clou
RM-0022
Drawer Slide Screw
Vis pour glissement
de tiroir
Green Twister Dowel
Goujon de torsion vert
© 2007-02-16
Green Twister Dowel (4)
Goujon de torsion vert
RM-0501
#8 - 1½” Screws
Vis no.8 - 1½”
Question and Answer IconNeed help?

Do you have a question about the Prepac BT-4100-2K and is the answer not in the manual?

Prepac BT-4100-2K Specifications

General IconGeneral
BrandPrepac
ModelBT-4100-2K
CategoryIndoor Furnishing
LanguageEnglish

Summary

Drawer Assembly Instructions

Drawer Components and Hardware

Identifies all necessary drawer parts and hardware for assembly.

Step 1-4: Drawer Body Assembly

Guides initial steps: inserting cams, dowels, attaching glides, and back panel.

Step 5-8: Complete Drawer Assembly

Details attaching the front, tightening cams, inserting, and securing the drawer bottom.

Twin Platform Storage Bed Assembly

Product Overview and Tools

Provides product details, shipping information, and lists required tools.

Hardware and Parts Identification

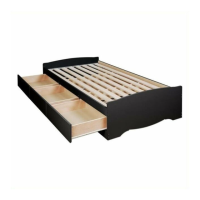
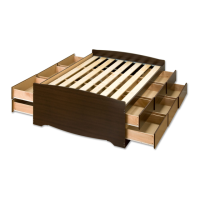
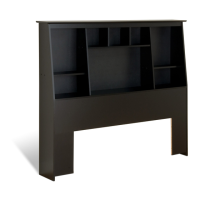
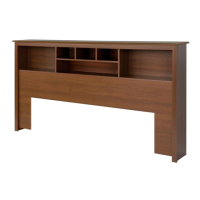
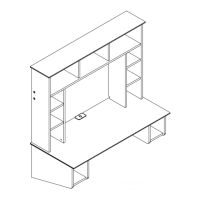
Identifies all hardware and major components for the bed frame.

Step 1-2: Prepare Outer Gables

Attaches U-channels and 'T' spacers to the outer gables.

Step 3: Attach Glides to Outer Gables

Affixes drawer glides to the 'T' spacers on the outer gables.

Step 4-5: Prepare Inner Gables and Stabilizers

Inserts JRN nuts into inner gables, side panels, and stabilizers.

Step 6: Attach Glides and Spacers to Inner Gables

Attaches 'T' spacers and drawer glides to the inner gable panels.

Step 7: Assemble Side Panel and Inner Gables

Connects the side panel to both inner gables using JCB connectors.

Step 8: Attach Lower Stabilizer

Connects the lower stabilizer to the inner gables below the drawer slides.

Step 9: Attach Upper Stabilizer

Connects the upper stabilizer to the inner gables.

Step 10: Attach Outer Gable

Connects one outer gable to the assembled stabilizers.

Step 11: Install Wooden Slats

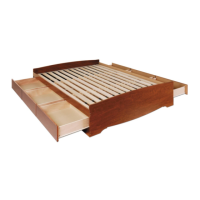
Unfolds and positions wooden slats across the inner stabilizers.

Step 12: Attach Second Outer Gable

Secures the second outer gable to the stabilizers, ensuring slat placement.

Drawer Assembly for Bed

Drawer Parts Identification

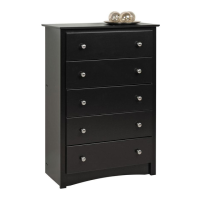
Identifies individual parts for constructing the drawers (D1-D5).

Step 13a-13b: Prepare Drawer Front and Sides

Inserts cams into drawer sides and screws dowels into drawer fronts.

Step 13c-13d: Assemble Drawer Box

Connects drawer sides to back, and attaches front, tightening cams.

Step 13e-13f: Secure Drawer Bottom

Slides drawer bottom into grooves and secures it with nails.

Step 13g: Attach Drawer Slides

Affixes the drawer slides to the left and right drawer side panels.

Final Steps and Product Care

Step 14: Insert Drawers

Guides the insertion of the assembled drawers into the bed frame.

Furniture Care and Q&A

Provides advice on cleaning, painting, and water resistance of the furniture.

Contact Information

Lists phone numbers and email for customer support and feedback.

Related product manuals