Do you have a question about the Prepac SH-6656 and is the answer not in the manual?
Provides contact numbers and hours for assembly help, damaged parts, or missing hardware.
Instructions to record shipping label info and model number before calling for assistance.
Lists and identifies all hardware components, including screws, dowels, cams, and connectors.
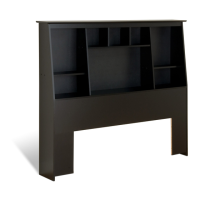
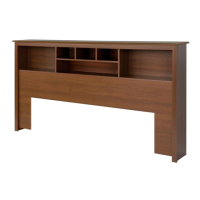
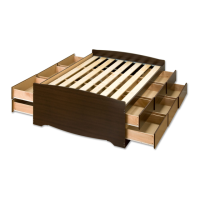
Identifies and labels all individual wooden components of the headboard assembly.
Lie stabilizers and large fixed shelf on the floor and insert cams into all pieces.
Insert connecting rods and dowels into the large stabilizer and attach small stabilizers.
Insert cams into gables and sides, and green twister dowels into sides.
Position and attach one side of the fixed shelf to stabilizers and tighten cams.
Repeat step 4 to attach the second side, ensuring pieces are square.
Attach L-brackets to secure the large stabilizer to the fixed shelf and hammer leveling feet.
Attach inner gables to inner fixed shelf and then to left/right gables with screws.
Attach the assembled center shelf section to the large fixed shelf using Confirmat screws.
Attach the outer fixed shelves to the main structure using Confirmat screws and cover caps.
Hammer plastic dowels into the top panel and attach the front molding.
Lower the top and gables onto the sides and tighten cams to secure the structure.
Attach the backer board to the rear of the headboard using nails, positioning them centrally.
Move the headboard to its desired location and position the bed against it. Includes moving notes.
Provides guidance on cleaning, product limitations, and contact information for support.
| Brand | Prepac |
|---|---|
| Model | SH-6656 |
| Category | Indoor Furnishing |
| Language | English |