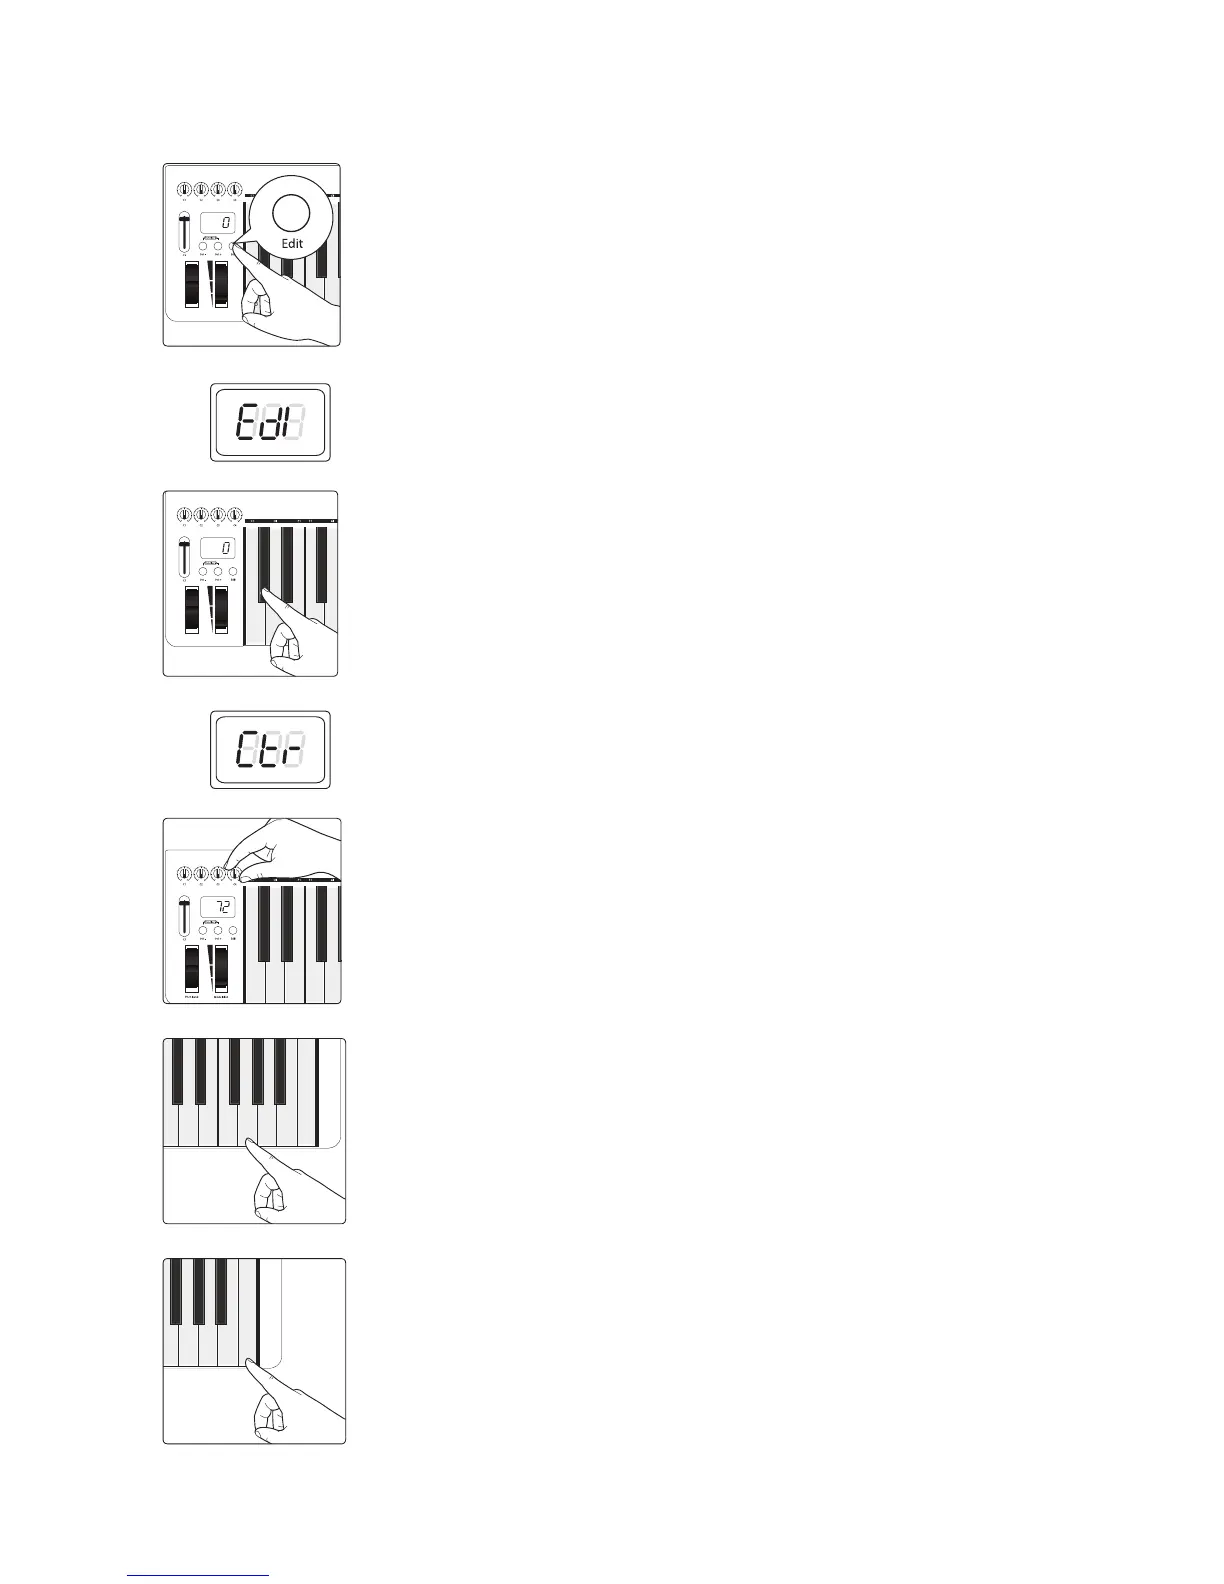
7
To change the controller message for any of the controls:
1. Press the Edit button.
2. The LED display will blink “Edi.”
3. Press the C#1: Controller Assign key.
4. The LED display will blink “Ctr.”
5. Move the control you want to reassign. The LED display will show the MIDI
Continuous Controller (CC) number assigned to it.
6. Enter the controller assignment you’d like to use by pressing the corresponding
Numeric Entry Keys. For example, if you’d like to use CC# 07, you’d press G4: 07. The
LED display will show the value you’ve entered.
7. Press C5: Enter to make your change effective and exit Edit mode.
Power User Tip: If you change the default CC number for any of the controls on your PS49,
you will need to reconfigure the control to work with Studio One and its Control Link
system. Only change these numbers if you are an experienced MIDI user.