CONTROLS/INSTRUMENTS
2 - 9
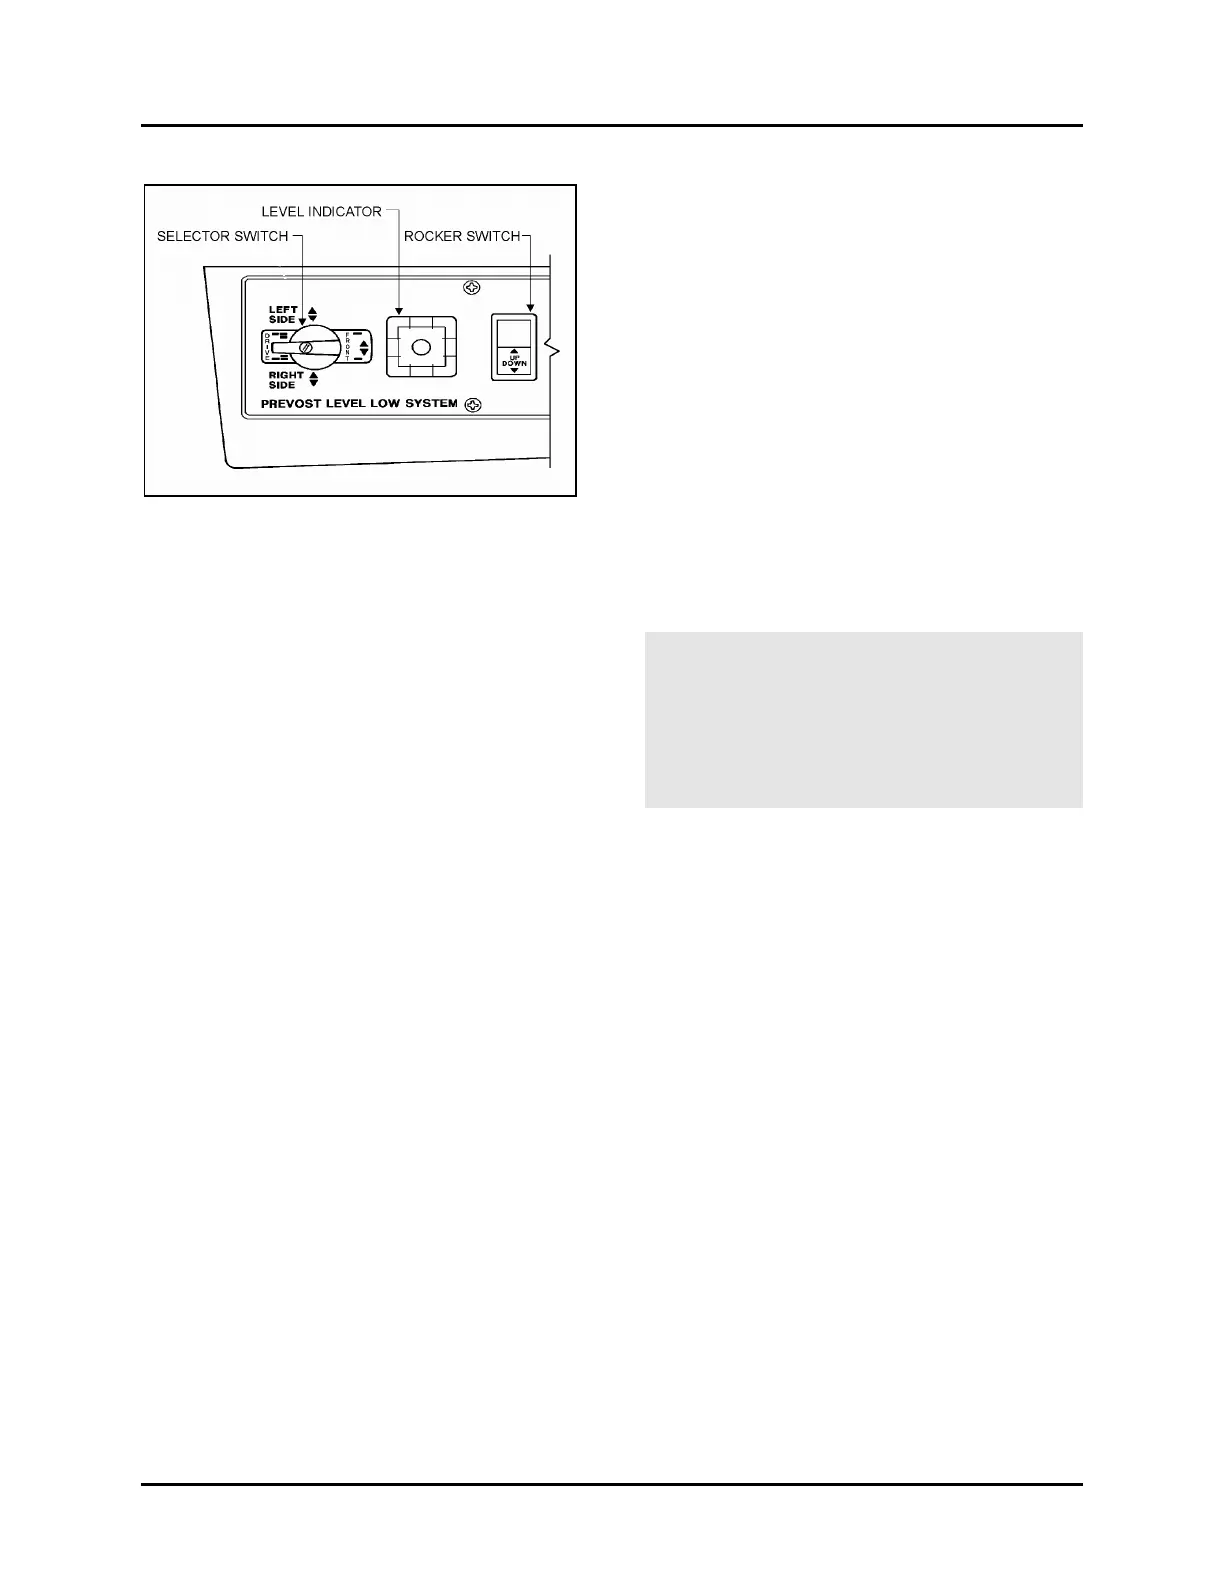
Level Low System Controls (optional)
18012
During driving, the conventional air leveling sys-
tem of the vehicle controls the height at three
points: the front, the left rear and the right rear.
Your vehicle is equipped with a suspension sys-
tem that consists of air springs (pressurized air
bellows) located near each wheel. The amount
of air in each air spring (and thus the vehicle
height) is controlled by automatic leveling valves
that operate between the chassis and the axles
of the vehicle.
The three (3) leveling valves are located as fol-
lows: one at the front which controls the amount
of air in both front air springs, one at the left rear
which controls the left rear corner of the vehicle
and one at the right rear which controls the right
rear corner of the vehicle. During normal driv-
ing, these valves work automatically to maintain
the chassis at the proper level above the axles,
indifferent of road conditions or vehicle weight.
When parked, and ONLY when parked, the level
of the vehicle can be manually adjusted within
the range of travel of the air springs. Thus, if the
vehicle is parked on uneven ground, the manual
override leveling system can be used to level the
chassis of the vehicle. With the ignition "ON"
(engine running or not), turn the selector switch
(located on L.H. side control panel, page 2-5) to
the area of the vehicle requiring leveling, then
press the rocker switch accordingly (up or down)
to inflate or deflate the selected set of air
springs. The front position raises or lowers the
front only and does not tilt the vehicle to its
sides. Each rear position raises or lowers its re-
spective side, therefore, the rear positions can
be used to tilt the vehicle to one side or the
other, or they can be used to raise or lower the
rear of the vehicle. When leveling vehicle, it is
often necessary to run the engine in order to get
an adequate air supply.
Note: It's always better to first, level the rear of
the vehicle (right to left) before raising or lower-
ing the front. After adjusting the rear, watch the
level as you adjust the front. If the level shows
that the vehicle is starting to tilt to either side,
then stop adjusting the front as one of the air
springs has come to the end of its travel range.
After manual leveling, turn off the engine. The
vehicle will stay in the leveled position (the air is
"locked" in air springs) as long as there are no
air leaks. The vehicle will hold this position for
several days. When engine is restarted and air
pressure is adequate, the vehicle will automati-
cally level itself for driving conditions.
Warning: Do not drive the vehicle with the
level low selector switch in any position other
than "DRIVE", as this may render the vehicle
unsafe and uncontrollable. If this is the case,
the "LEVEL LOW" warning light in dashboard
(item #4, page 2-11) will flash, reminding you
that the selector is not in the "DRIVE" position.
Note: If, for any reason, you wish to start-up
the engine without moving vehicle (to warm up
engine for instance) while keeping the vehicle in
the manually leveled position, place selector
switch in any position except "DRIVE". When
ignition switch is turned to the "OFF" position,
reset the selector switch to the "DRIVE" position.
 Loading...