32 Pathrider
www.pridemobility.com
VIII. DISASSEMBLY AND ASSEMBLY
No tools are required to disassemble your scooter. Always disassemble or assemble your scooter on a level,
dry surface with sufficient room for you to work and move around your scooter. Keep in mind that the
disassembled sections of the scooter will take up more floor space than the assembled scooter.
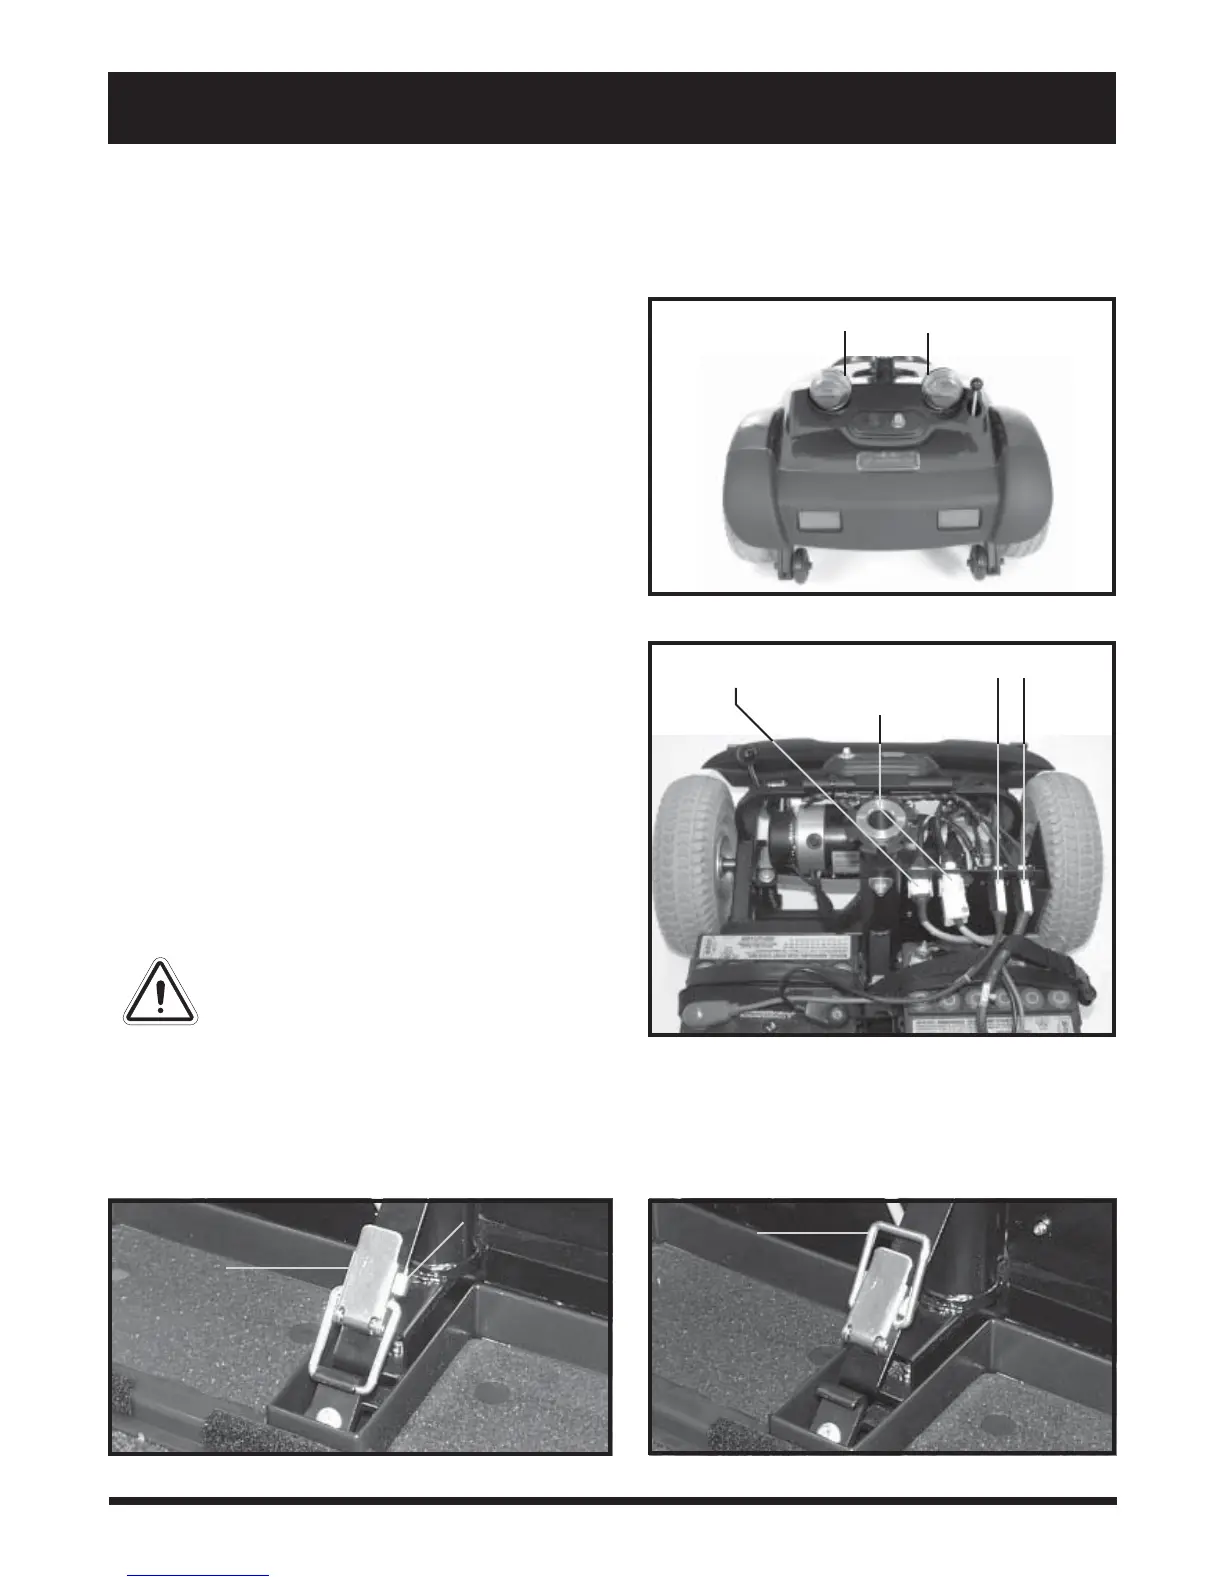
SHROUD LOCKS
Figure 17. Shroud Locks
BATTERY HARNESSES
FRONT-TO-REAR HARNESS
Figure 18. Rear Harness Connections
CHARGER PORT HARNESS
DISASSEMBLY
1. Remove the key from the key switch. See III.
“Your Scooter.”
2. Push down on the manual freewheel lever. See
III. “Your Scooter.” Putting your scooter in drive
mode may make it easier for you to maneuver the
rear section because the drive wheels are stabilised.
3. Remove the seat.
4. Loosen the shroud locks (turn each shroud lock
counterclockwise a quarter turn) and gently lift
the rear shroud off of your scooter. The rear shroud
is held in place with a reusable fastener. See fig-
ure 17.
5. Disconnect the rear lighting harnesses that extend
from the rear shroud (not shown).
6. Unplug both battery harnesses. See figure 18.
7. Loosen the battery strap, then lift both batteries
from the battery wells.
8. Unplug the large, white, 9-pin front-to-rear har-
ness. See figure 18.
9. Unplug the charger port harness. See figure 18.
WARNING! Failing to unplug all of the
harness prior to further disassembly
could result in permanent damage to
your scooter.
Figure 20. Toggle Latch (Unlatched)
TOGGLE LATCH
RELEASE
BUTTON
Figure 19. Toggle Latch (Latched)
TOGGLE
LATCH
BUCKLE
Toggle Latch Release
1. Push in the toggle latch release button while pulling back the toggle latch. See figure 19.
2. Position the toggle latch buckle over the top of the toggle latch. See figure 20.
3. Lower the tiller to the scooter floorboard and fully tighten the tiller adjustment lever.
TOGGLE
LATCH