3
Connecting the CDI10
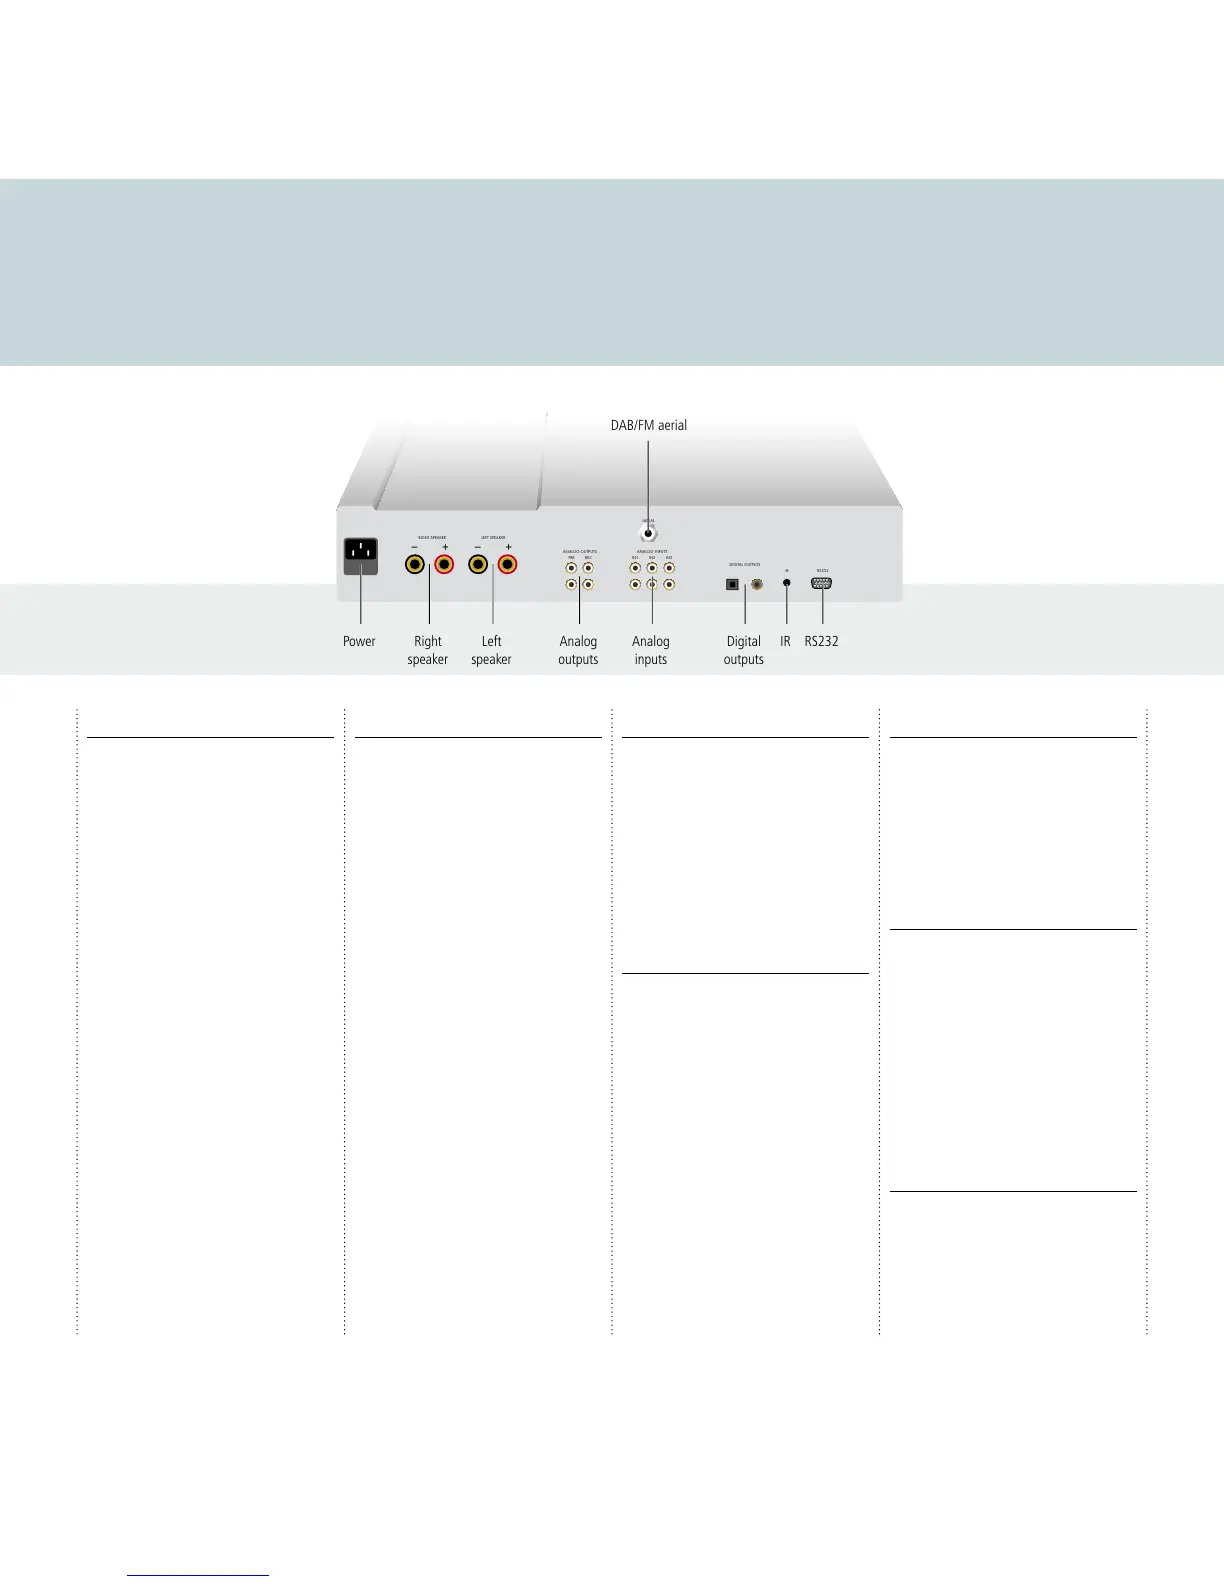
This page shows how to connect your CDI10 to other equipment in your system.
Power
Connect the power connector on the back panel to
your power outlet using the mains cable supplied
with the CDI10.
If this cable is not suitable for your power outlets
please contact your supplier for an alternative
cable.
WARNING: Always disconnect the
CDI10 from the mains power before
connecting or disconnecting any cables.
Speakers
The CDI10 is designed to be connected directly to a
pair of speakers, rated 8
Ω impedance.
Connect the left and right loudspeakers to the
corresponding terminals on the back panel. The
terminals can accept speaker cables terminated
with spade terminals or bare wires.
For the best sound quality connect the red wire
from each speaker to the red terminal marked +
and the black wire from each speaker to the black
terminal marked –.
To connect bare wires unscrew the terminal, pass
the bare wire through the hole in the terminal
bolt, and clamp the wire in place by screwing the
terminal back down hand tight.
Advice on positioning your speakers
For best results your speakers should be positioned
about 2-3m apart, at least 20cm from the rear wall
and at least 50cm from any side wall. The tweeter
or high frequency unit in the speaker should be at
head height when you are seated, listening to the
speaker.
Analogue inputs
Connect up to three sources to the analog input
sockets IN1, IN2, and IN3, using RCA leads.
When the FRONT source is selected, the socket
on the front panel allows you to connect a fourth
source, such as an MP3 player, using a 3.5mm jack
plug.
WARNING: Disconnect your MP3
player before selecting a source other
than FRONT or it may be damaged.
Analogue outputs
The CDI10 provides a 3.5mm headphone output
on the front panel, for use with all sources except
FRONT.
It also provides two pairs of analogue outputs.
The TAPE output gives a fixed-level output. Use this
to record from the CDI10.
The PRE output gives a variable-level output. Use
this if you want to connect to a second preamplifier
or power amplifier.
Connect using a pair of analogue RCA leads.
Digital outputs
The CDI10 also provides both optical and coax
digital outputs, to allow you to record from the
CDI10 to a digital recorder. The CDI10 includes an
analogue to digital converter, so every source is
available on the digital output.
Connect using an optical cable or coax digital cable
as appropriate.
Radio aerial
The CDI10 includes a combined FM/DAB (Digital
Audio Broadcasting) radio receiver, and to receive
stations on either of the DAB or FM wavebands
you need to connect a suitable aerial to the aerial
connector on the back panel. The FM/DAB aerial
connector is an F-type screw connector.
Connect the aerial by pushing the pin into the
hole in the center of the connector, then screwing
the sleeve onto the outside. For more information
about connecting and positioning the aerial for
best reception see
Using the radio
, page 7.
IR input and RS232
For advanced applications; see
Additional
information
, page 8.