5
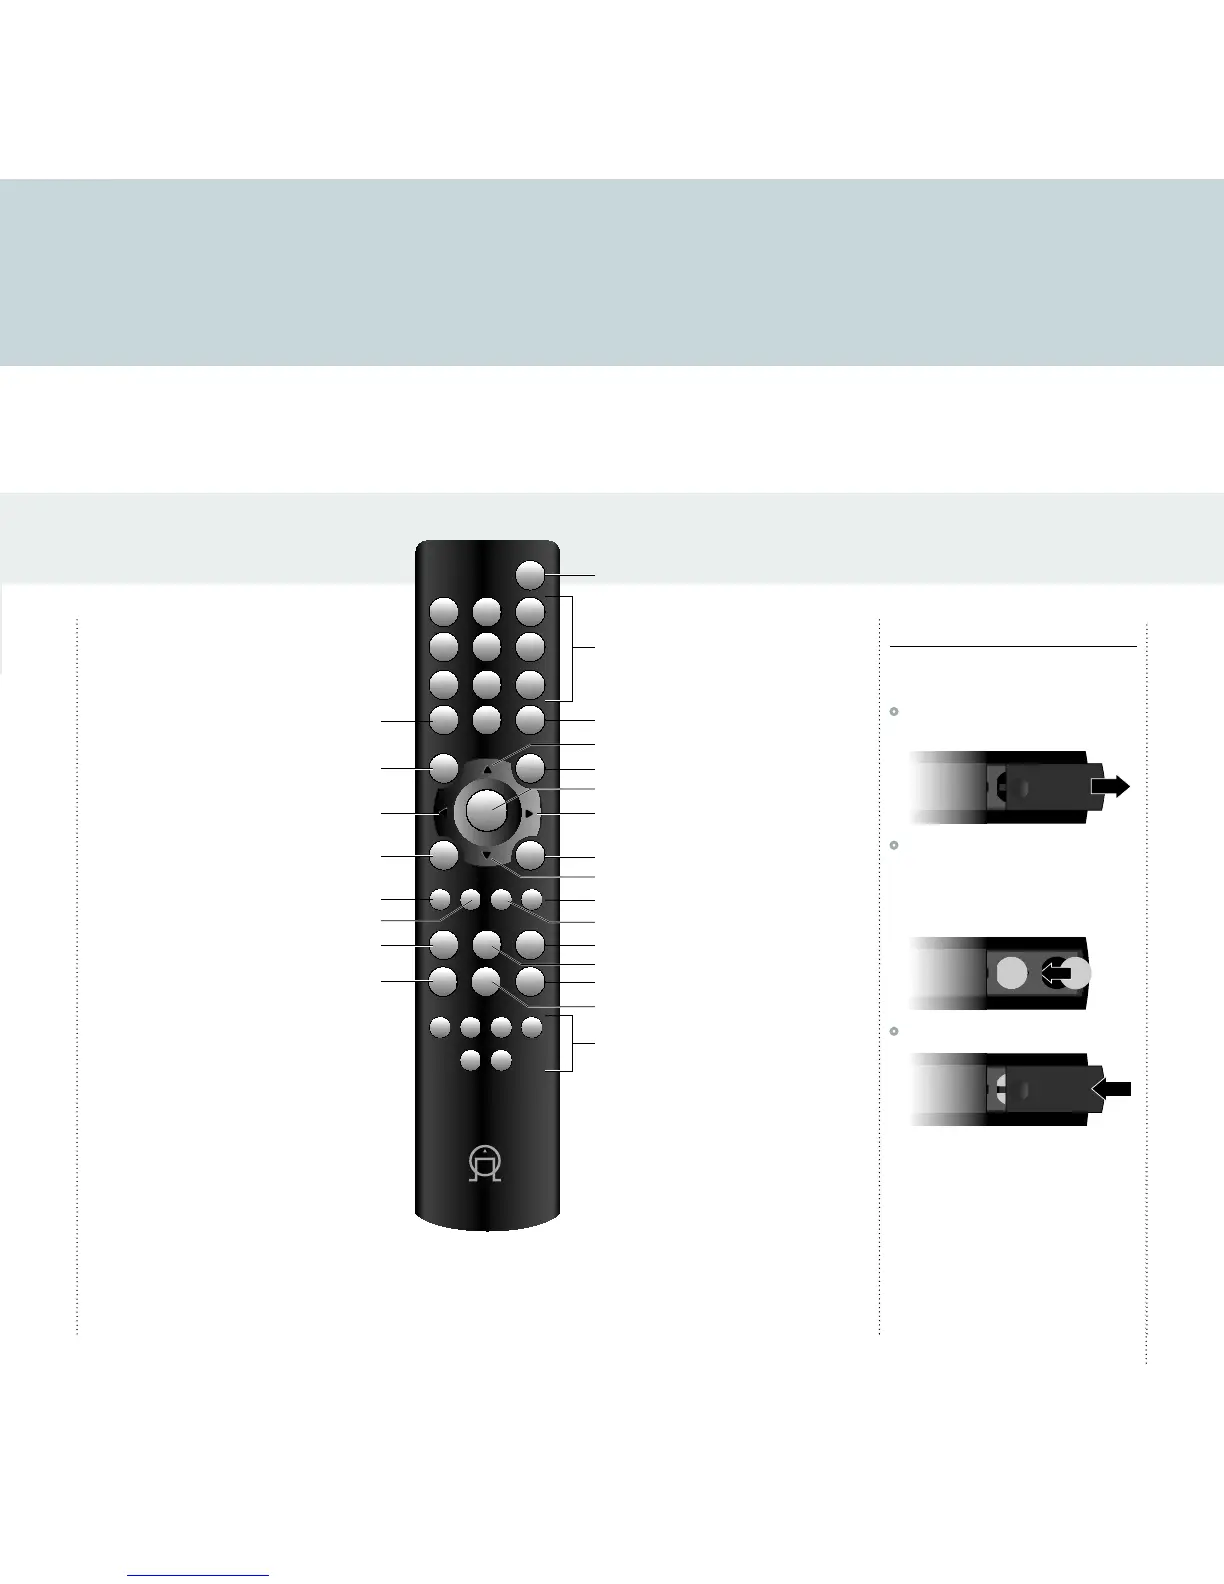
Using the CDI10 remote control
This page explains how to use the CDI10 remote control to operate the CDI10, and how to fit the batteries into the remote control.
REPEAT
SELECT
0 +10
MEM
DIM MODE DISP OPEN
IN 1 IN 2
CD
IN 3
DAB
FM
IN 4
8 9
5 6
2
C
+
–
7
4
1 3
Fitting the batteries
Before using the remote control you need to insert
the two button cells supplied with the CDI10.
•
Gently slide open the cover on the back of the
remote control:
•
Insert the two button cells face downwards
into the two circular recesses, making sure that
the + side of each button cell is uppermost,
and push them so that they slot gently in place
under the lip at the top of each recess:
•
Slide back the cover until it clips into place:
Note: Replace only with Lithium
batteries type CR2025 or equivalent.
Dispose of old batteries considerately.
You can operate all the functions of the CDI10
using the CDI10 remote control: