10 Hardware and Software Settings
D. INSTALLING THE INK CARTRIDGE
Your printer has a built-in ink tracking system. This system is
designed to warn you if your ink cartridge is low on ink. This
ensures your labels will print properly.
In order to make this system work properly, the Ink Cartridge
must be changed using the procedure listed below. Failure
to follow this procedure could result in inaccurate ink level
tracking and could cause your print quality to suffer.
When you encounter a low ink condition the Ink LED will flash
and a low ink warning message will automatically print. The
Ink Cartridge is changed as follows:
1. Open the Top Cover of the printer.
2. Press the Ink Button to move the Cartridge Holder to the
center of the print area.
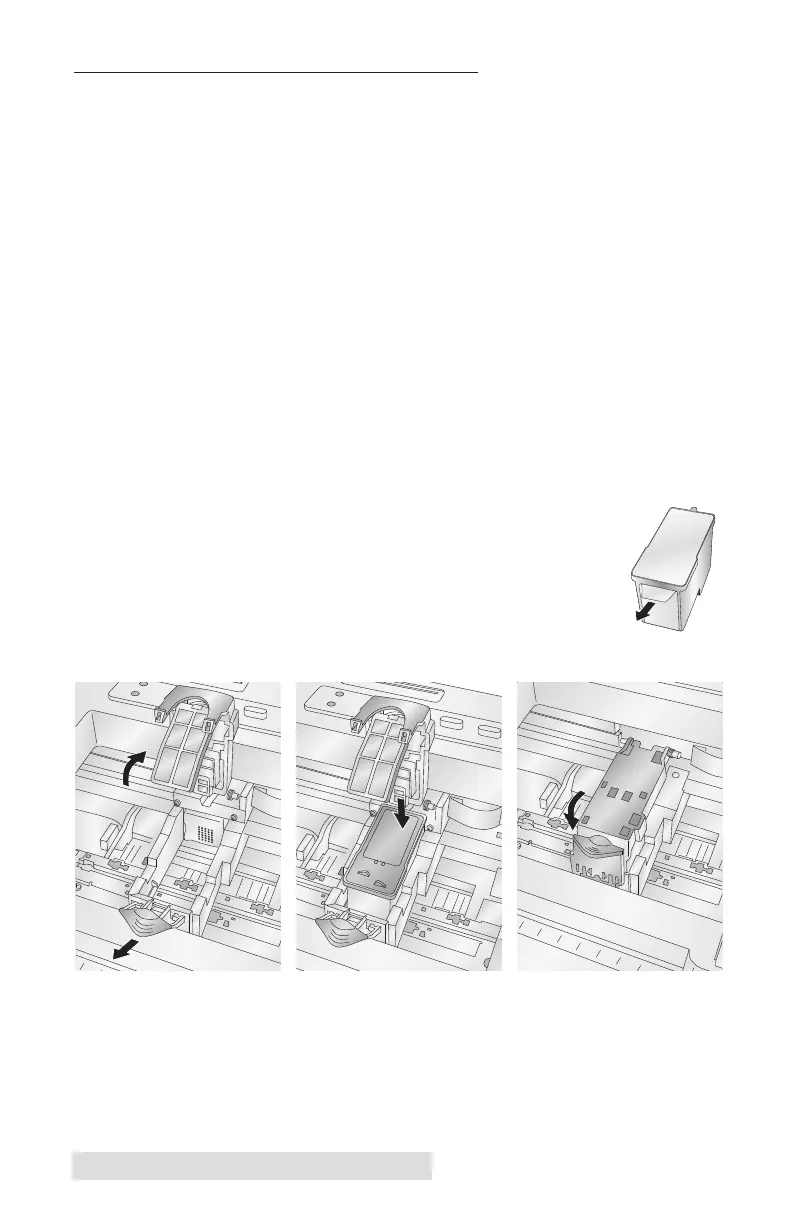
3. Press the Cartridge Cover Release to open the Cartridge
Holder.
4. Remove the new Ink Cartridge from its
packaging. Be sure to remove the protective
tape covering the copper contacts.
5. Install the Ink Cartridge copper end first.
6. Push the Cartridge Cover downward until it snaps in place.
7. Press the Ink Button again.
The Ink LED will turn off and the printer is now ready to print.
 Loading...