27
LAYOUTOPERATION
FRONT PANEL FEATURES AND CONTROLS CONTINUED
FEATURES PARAMETERS PURPOSE
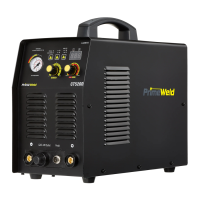
1. Amp Display N/A
Indicates actual amp output while welding. While adjusting
or while not welding, the function of the display changes to
display the selected amperage.
2. On/Temp/ Duty
Cycle
On/O
The On indicator should always be lit while the unit is
plugged in and the power switch is switched on. If the
Overcurrent light is lit, turn the unit o and check for possible
causes including undersized cables, poor connections and
overheating cables. If the Duty cycle is lit, do not turn
o the unit until it has had sucient time to cool (10-15
minutes). Cycle the power switch to reset the machine only
after the machine has had time to cool. The duty cycle and
overcurrent warning lights should go o after cycling the
power switch on the machine. If it does not, contact.
3. Panel/Pedal
Switch
N/A
This switch determines which mode controls the unit, the
torch switch (Panel) or the pedal. Using either one will
determine how the unit reads and sets the maximum output
of the machine.
4. TIG/CUT/
STICK
N/A
This switch selects processes. Do not switch this switch
while welding or cutting, Do not switch it with the wrong
torch connected or immediate failure of the unit may result.
Improper polarity can contribute to torch failure as well. Make
sure all connections are installed properly before cutting or
welding.
5. Amp Control N/A
Controls amperage while welding or cutting by using the knob
to preset maximum amperage.
6. Post Flow
Control
2-8 Seconds
Sets the post ow time of the shielding gas while welding in
TIG mode. While in plasma (cut) mode, it sets the post ow
time of the air. Time is an approximation only and can vary a
little from the setting posted on the dial. The air or shielding
gas may stop owing before full maximum time is reached.
Consider the maximum setting mark a reference guide only.
7. Pilot Arc N/A
This connection is only used with the plasma cutting torch.
The small ringed wire connects here. Unscrew the plastic
thumb nut and attach the wire to the post. Reinstall the
thumb nut over the wire with nger pressure only. Do not
overtighten
8. Negative
Connector
DINSE 25
Location of the negative terminal connection. Dinse-style. For
Stick: Work Clamp Connection. For TIG: Torch Connection.
For Plasma: Torch Connection.
9. Quick Connect
Gas Outlet
9mm
Connects the shielding gas to the TIG torch. To connect:
Push the torch tting into the connector until the collar slides
forward with a click. To Release: Slide the collar back and it
will automatically release. Do not turn or twist the connector.
10. Control
Connector
5 Pins
Connect the foot pedal or torch switch to this socket to
control the welder. Only the foot pedal or torch control
connector can be plugged in at one time. If the torch has a
torch switch feature, tie the loose connector back and leave it
disconnected while using the pedal.
 Loading...