EasyManua.ls Logo

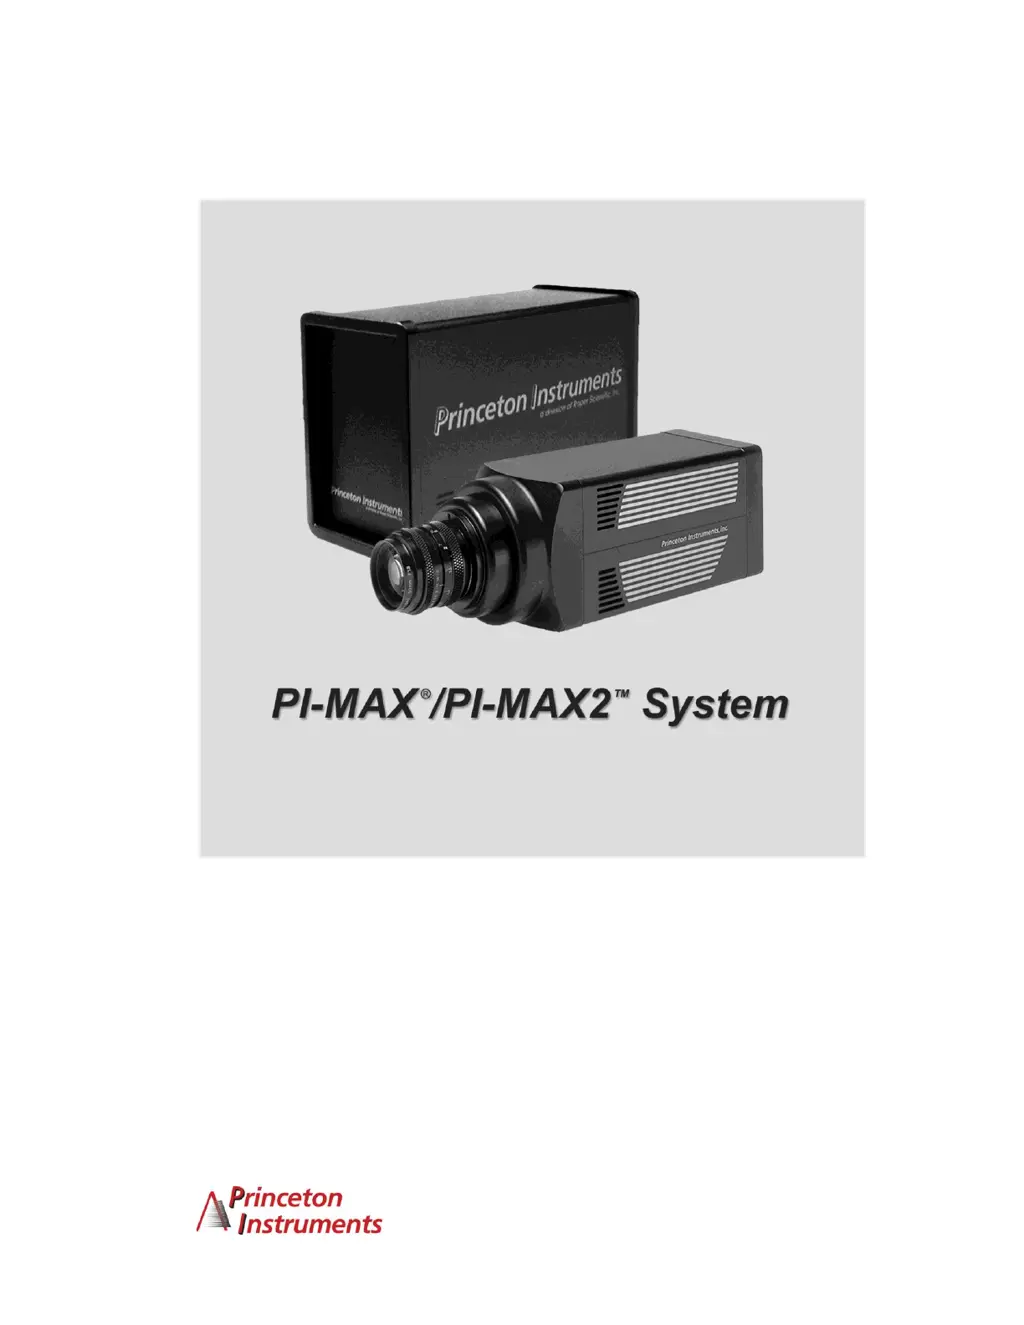
Princeton Instruments PI-MAX System - User Manual

Princeton Instruments PI-MAX System
238 pages
Print Icon
To Next Page IconTo Next Page
Loading...
4411-0069
Version 5.F
September 9, 2009
*4411-0 069*

Table of Contents

Questions and Answers

  • W
    Wanda BrownAug 16, 2025
    What to do if a 'Data Overrun Has Occurred' message appears on my Princeton Instruments PI-MAX System Security Camera?
    • J
      juan03Aug 16, 2025
      If you receive a 'Data Overrun Has Occurred' message while using your Princeton Instruments Security Camera, try the following: * Minimize the number of programs running in the background during data acquisition with WinX application software (WinView/32 or WinSpec/32). * Run data acquisition in Safe Mode. * Add memory. * Use binning. * Increase the exposure time. * Defragment the hard disk. * Update the Orange Micro USB 2 driver.
  • C
    Christine JonesAug 19, 2025
    How to fix 'Data Overrun Due to Hardware Conflict' message on Princeton Instruments PI-MAX System Security Camera?
    • S
      Shannon GallowaySep 12, 2025
      To resolve a 'Data Overrun Due to Hardware Conflict' message on your Princeton Instruments Security Camera, follow these steps: 1. Check the CCD array size and then check the DMA buffer size. 2. Increase the DMA buffer size to a minimum of 32 Mb (64 Mb if it is currently 32 Mb or 128 Mb if it is currently 64 Mb), click on OK, and close the WinX application software. 3. Reboot your computer. 4. Restart the WinX application software and begin acquiring data or focusing. If you see the message again, increase the DMA buffer size.
  • E
    Ethan TorresAug 22, 2025
    How to resolve a 'Program Error' message on Princeton Instruments PI-MAX System Security Camera?
    • D
      daniel28Aug 22, 2025
      If you encounter a 'Program Error' message with your Princeton Instruments Security Camera, try these steps: 1. Reboot the WinX application software (WinView/32 or WinSpec/32). 2. Increase the DMA buffer size to a minimum of 32 Mb (64 Mb if it is currently 32 Mb or 128 Mb if it is currently 64 Mb), click on OK, and close the WinX application software. 3. Reboot your computer. 4. Restart the WinX application software and begin acquiring data or focusing. If you see the message again, increase the DMA buffer size.
  • J
    Jaime BautistaAug 26, 2025
    What to do if the alarm sounds continuously on my Princeton Instruments PI-MAX System Security Camera?
    • V
      Valerie PatrickAug 26, 2025
      If the alarm on your Princeton Instruments Security Camera sounds continuously: * Immediately reduce the light entering the camera. This can be done by switching MCP ON/OFF switch on the back of the PI-MAX to "OFF" until you lower the source illumination, by decreasing the lens aperture, or by completely blocking the light into the camera window with a lens cap or equivalent until the light level has be lowered. * If the alarm continues even with low illumination, switch the MCP ON/OFF to "OFF" and turn the ST-133 off. Then contact the factory: this may indicate intensifier damage or another situation that requires immediate attention.
  • D
    Douglas JohnsonAug 28, 2025
    Why temperature lock cannot be achieved on Princeton Instruments PI-MAX System?
    • D
      Daniel SolisAug 28, 2025
      A stable temperature lock on your Princeton Instruments Security Camera might not be achievable due to several reasons: * High ambient temperature. * Blocked airflow through the camera. * The camera fan is not running. * Coolant flow rate is too slow. * The connectors on the Detector-Controller cable need to be secured. * Operating at a temperature colder than the specified limit. In this case, power down and correct the operating conditions that caused the thermal overload.
  • V
    vstewartAug 31, 2025
    What to do if my Princeton Instruments Security Camera stops working?
    • M
      Marilyn GreeneAug 31, 2025
      If your Princeton Instruments Security Camera stops working, try the following steps: 1. Turn off all AC power. 2. Verify that all cables are securely fastened and that all locking screws are in place and all slide latches are in the latched position. 3. Check for a burned-out fuse in the Controller power module. For information about changing a fuse, see "Changing the ST-133 Line Voltage and Fuses" on page 168. 4. Correct any apparent problems and turn the system on. 5. If the system still does not respond, contact Customer Support.
  • E
    Erica JordanSep 3, 2025
    How to fix 'Error Creating Controller' message on Princeton Instruments PI-MAX System?
    • N
      Nicholas RamirezSep 3, 2025
      To fix the 'Error Creating Controller' message on your Princeton Instruments Security Camera, close the WinX application software (WinView/32 or WinSpec/32), run RSConfig, make sure the ST-133 is on, reopen the WinX application software, and begin running the Hardware Wizard.
  • K
    Kristen ZamoraSep 6, 2025
    What to do if the baseline signal suddenly changes on my Princeton Instruments PI-MAX System?
    • D
      Dr. Emily Clarke DVMSep 6, 2025
      If you observe a sudden change in the baseline signal on your Princeton Instruments Security Camera, and the temperature setting hasn't been altered, immediately turn off the system. Correct any excess humidity promptly, as it could cause permanent damage not covered by the Warranty. Have the unit serviced by Princeton Instruments or an authorized service facility of Princeton Instruments.
  • S
    sandovalfrancisSep 9, 2025
    How to prevent data loss or serial violation on Princeton Instruments PI-MAX System?
    • T
      tyler34Sep 9, 2025
      To prevent data loss or serial violations while using your Princeton Instruments Security Camera, ensure that Power Saving features are disabled while you are running WinView/32 or WinSpec/32.
  • S
    Scott HerreraSep 12, 2025
    What to do if an error occurs at computer powerup with Princeton Instruments PI-MAX System?
    • W
      woodwardamySep 12, 2025
      If an error occurs when powering up your computer with the Princeton Instruments Security Camera, turn off the computer, try a new address or interrupt, and reinstall the card.

Summary

Attention!

Intensifier Damage Warnings

Intensified CCDs can be damaged by high light levels; subdue lab lighting.

Intensifier Alarm System

Audible alarm indicates light intensity exceeding threshold; photocathode disabled.

Unwarranted Alarm Caution

Discontinue operation if unwarranted alarms occur; contact factory.

Chapter 1 Introduction

PI-MAX System Components Overview

Overview of standard hardware, software, and optional components.

ST-133 Controller Functions

Contains analog/digital electronics, scan control, exposure timing, and I/O connectors.

Summary of PI-MAX Data Acquisition Process

Explains photon conversion to data, from input image to computer display.

Safety Information and Symbols

Describes safety symbols and their meanings.

Grounding and Safety Precautions

Details electrical grounding requirements and safety for indoor operation.

Intensifier Modes and Safety Considerations

Explains Shutter, Gate, and Safe modes and their safety implications.

Audible Alarm Operation and Response

Details the alarm function for detector damage prevention and response.

High Intensity Light Damage Warnings

Warns about potential damage from excessive light and overload conditions.

General Precautions for System Protection

Lists precautions for system protection, including power and cable connections.

Chapter 2 Installation Overview

System Component Installation Steps

Provides a sequence of actions required to install the system.

Software Installation Procedure

Steps for installing WinX software and interface card drivers.

Communication Interface Setup

Explains requirements for PCI or USB 2.0 interface cards.

PCI Interface Setup Guide

Details PCI card installation and driver setup for TAXI protocol.

USB 2.0 Interface Setup Guide

Guides on setting up USB 2.0 communication, including driver updates.

Connecting Controller-Computer Cables

Instructions for connecting TAXI and USB 2.0 cables.

Connecting Detector-Controller Cable

Steps for connecting the detector to the controller cable.

Connecting to Timing Generator

Details cable connections for PTG and DG535 timing generators.

Setting Default Camera Parameters in WinX

Guides for setting up software parameters for camera systems.

WinX Camera Detection Wizard

Steps for running the camera detection wizard for new installations.

Hardware Setup Wizard Configuration

Guides through the hardware setup wizard for system configuration.

Chapter 4 First Light

Required Equipment and Cables for Setup

Lists essential equipment and cables for initial setup.

Cable Connections for Shutter Mode

Details cabling configurations for Shutter Mode operation.

Pre-Power On System Checks

Pre-power-on checks and settings for imaging or spectroscopy applications.

System Power-On and Software Setup

Steps for powering on the system and launching the WinX application.

Configuring Software for Shutter Mode Operation

Details software configuration for Shutter Mode, including Setup and Cleans/Skips tabs.

Acquisition Menu Parameter Settings

Settings for Exposure Time, CCD Readout, Amplifier, and Intensifier.

Pre-Acquisition Checks

Checks for room illumination and initial setup for imaging or spectra.

Initial Data Acquisition Steps

Steps for acquiring initial data, including MCP switch and Focus mode.

Chapter 5 General Operation Factors

Data Acquisition Sequence Explained

Explains the signal path from camera to computer display.

USB 2.0 and System On;Off Sequences

Specific on/off sequences for the USB 2.0 interface.

Pre-Exposure Charge Removal

Explains the purpose of clean cycles and continuous cleans.

Dark Charge Characteristics

Discusses thermally induced charge accumulation and its reduction.

Clean Cycles Functionality

Details the function of Clean Cycles to minimize dark charge and noise.

Continuous Cleans Cycles Explained

Explains the Continuous Cleans function for External Sync timing.

Temperature Control Methods

Discusses cooling methods and their impact on dark charge and S/N ratio.

Setting the Detector Temperature

Guides on setting the CCD array temperature using the software.

Exposure Process Explained

Defines exposure as integrating signal and readout as transferring charge.

Exposure with Image Intensifier

Explains intensifier role in gating and amplifying images.

Background Subtraction Procedure

Explains subtracting dark charge patterns for improved signal quality.

Array Readout Process

Explains how charge is shifted, amplified, and digitized.

Hardware Binning Explained

Explains binning for reducing readout time and improving S/N.

Software Binning Process

Describes software binning as a post-acquisition process to improve S/N.

Experiment Setup Main Tab Parameters

Details essential parameters on the Main tab of Experiment Setup.

Exposure Time Definition and Use

Defines exposure time and its role in data acquisition and gating.

Intensifier Gain Adjustment

Explains intensifier gain adjustment and its effect on dark charge.

Intensifier Mode Selection

Describes Safe, Shutter, and Gate modes for intensifier operation.

Chapter 6 Shutter Mode Operation

Shutter Control Settings Explained

Explains Normal and PreOpen shutter settings for photocathode gating.

Fast Mode vs. Safe Mode Comparison

Compares Fast Mode (hardware timing) and Safe Mode (computer control).

Timing Modes Overview

Describes Free Run, External Sync, and Internal Sync timing modes.

Timing Modes and Clean Cycles

Provides timing diagrams grouped by mode, explaining clean cycles.

External Sync Timing Options

Flowchart and timing diagram for External Sync timing with Normal/PreOpen control.

External Sync with Continuous Cleans

Timing diagram and explanation of External Sync with Continuous Cleans.

Internal Sync (PTG) Timing Diagrams

Timing diagrams for Internal Sync with PTG and external trigger.

Chapter 7 Gated Operation with a PTG

Gate Mode Operation Explained

Explains Gate Mode complexity and utility for faint signals in high ambient light.

Precautionary Measures for Intensified Detectors

General warnings about intensified CCD detectors and light damage.

Intensifier Modes and Safety Guidelines

Discusses Shutter, Gate, and Safe modes regarding intensifier safety.

Intensifier Alarm System Details

Explains the audible alarm and its operation to prevent detector damage.

Timing Modes with PTG

Explains timing modes for Gate Mode with PTG, including table.

Fast Gating Capability Explained

Highlights PI-MAX fast gating capability with PTG and provides an experimental setup.

MCP Bracket Pulsing Explained

Explains MCP bracket pulsing to improve on/off ratio, especially in UV.

MCP Bracket Pulsing in LIF Measurements

Discusses MCP bracket pulsing benefits for laser-induced fluorescence.

MCP Bracket Pulsing in Pump Probe Experiments

Explains MCP bracket pulsing for absorbance measurements.

MCP Bracket Pulsing Setup with PTG

Details implementing MCP bracket pulsing with a PTG, including Bracket Start choices.

MCP Gating Functionality

Explains MCP gating for nanosecond speed and high UV QE.

MCP Gating Setup and Operation

Steps for setting up and operating PI-MAXMG with PTG.

Fluorescence Experiment Setup

Describes a typical laser-induced fluorescence experiment setup.

Cabling for MCP Gated Operation with PTG

Illustrates cabling for MCP gated experiments using a PTG.

500 Picosecond Gating Option Setup

Details setting up the 500 ps gating option using PTG for fast gate RB intensifiers.

Single Shot Experiment Procedure

Step-by-step guide for capturing single events with a photodiode trigger.

Experiment as Master Clock Setup

Procedure using the experiment as the master clock with WinX software.

PTG as Master Clock Configuration

Using PTG as master clock for experiments with a trigger-in light source.

Swept Gate Experiment Setup (Variable Width;Delay)

Steps for swept gate experiment with variable width and delay.

Static Gate Experiment Setup (Fixed Width;Delay)

Steps for static gate experiment with fixed width and delay.

Chapter 8 Gated Operation with a DG535

Gate Mode Operation with DG535

Explains Gate Mode complexity and utility for faint signals in high ambient light.

Precautionary Measures for DG535 Operation

General warnings about intensified CCD detectors and light damage.

Intensifier Modes and Safety with DG535

Discusses Shutter, Gate, and Safe modes regarding intensifier safety.

DG535 Gate Mode Overview

Overview of DG535 gate mode operation, including frame cycle and parameters.

Timing Modes for DG535 Gate Operation

Details timing modes for Gate Mode with DG535, including table.

External Sync with Continuous Cleans (DG535)

Explains Continuous Cleans function with DG535 external sync.

DG535 Gating Setup Guide

Guides on setting DG535 gating parameters via WinX application.

MCP Bracket Pulsing with DG535

Explains MCP bracket pulsing to improve on/off ratio, especially in UV.

MCP Bracket Pulsing in LIF Measurements (DG535)

Discusses MCP bracket pulsing benefits for laser-induced fluorescence.

MCP Gating for PI-MAXMG Systems

Explains MCP gating for nanosecond speed and high UV QE.

Fast Gating Capability with DG535

Highlights PI-MAX fast gating capability with DG535 and provides an experimental setup.

Chapter 9 Kinetics Operation

PTG Burst Mode Explained

Explains PTG Burst Mode for generating rapid gate pulses.

One Shot Experiments in Kinetics Mode

Describes slow and fast kinetics modes for one-shot experiments.

Gate Mode Experiments Examples

Presents two scenarios for Gate Mode experiments combining PTG and PI-MAX.

Experiment 1: Single Trigger Setup

Details a single trigger experiment setup with PTG.

Experiment 2: Multiple Trigger Setup

Details a multiple trigger experiment setup with PTG.

Chapter 10 PI-MAX2 DIF Camera (Double Image Feature)

Single Trigger Mode for DIF

Details Single Trigger Mode for acquiring two images from one trigger event.

Dual Trigger Mode for DIF

Explains Dual Trigger Mode requiring two triggers for DIF operation.

Chapter 11 Tips and Tricks

Overexposure Protection Measures

Warns about light damage and provides protection measures.

Signal Delay Considerations

Explains the importance of gating on the signal arrival time.

Intensifier Alarm Troubleshooting

Details the intensifier alarm for detector damage prevention.

Chapter 12 Microscopy Applications

Xenon or Mercury Arc Lamp Safety

Critical precautions for operating Xenon or Hg arc lamps due to EMF spikes.

Chapter 13 TTL Control

Chapter 14 System Component Descriptions

ST-133 Controller Description

Details the ST-133 controller's electronics, design, and capabilities.

Standard PI-MAX Controller Rear Panel Features

Details rear panel connectors keyed to a figure.

PI-MAX2 Controller Rear Panel Features

Details rear panel connectors for PI-MAX2 controller keyed to a figure.

Optional Pulsers (PTG and DG535)

Describes optional PTG and DG535 pulsers.

Application Software Overview

Describes WinView/32, WinSpec/32, and PVCAM software.

Chapter 15 Troubleshooting

Troubleshooting Camera Not Responding

Basic hardware checks for a non-responsive camera system.

Troubleshooting Controller Not Responding

Troubleshooting steps if the controller does not respond.

Appendix A Specifications

Internal Pulser Specifications

Describes the internal gate pulse generator and its control.

Appendix C Software

Main Tab Page (Experiment Setup)

Details essential parameters on the Main tab of Experiment Setup.

Appendix F IVUV Detector

Nitrogen Purging Requirements

Discusses continuous nitrogen purging requirements and warnings.

Warranty & Service Information

Limited Warranty Terms

Outlines Princeton Instruments' limited warranties for original purchasers.

Princeton Instruments PI-MAX System Specifications

General IconGeneral
BrandPrinceton Instruments
ModelPI-MAX System
CategorySecurity Camera
LanguageEnglish

Related product manuals