10
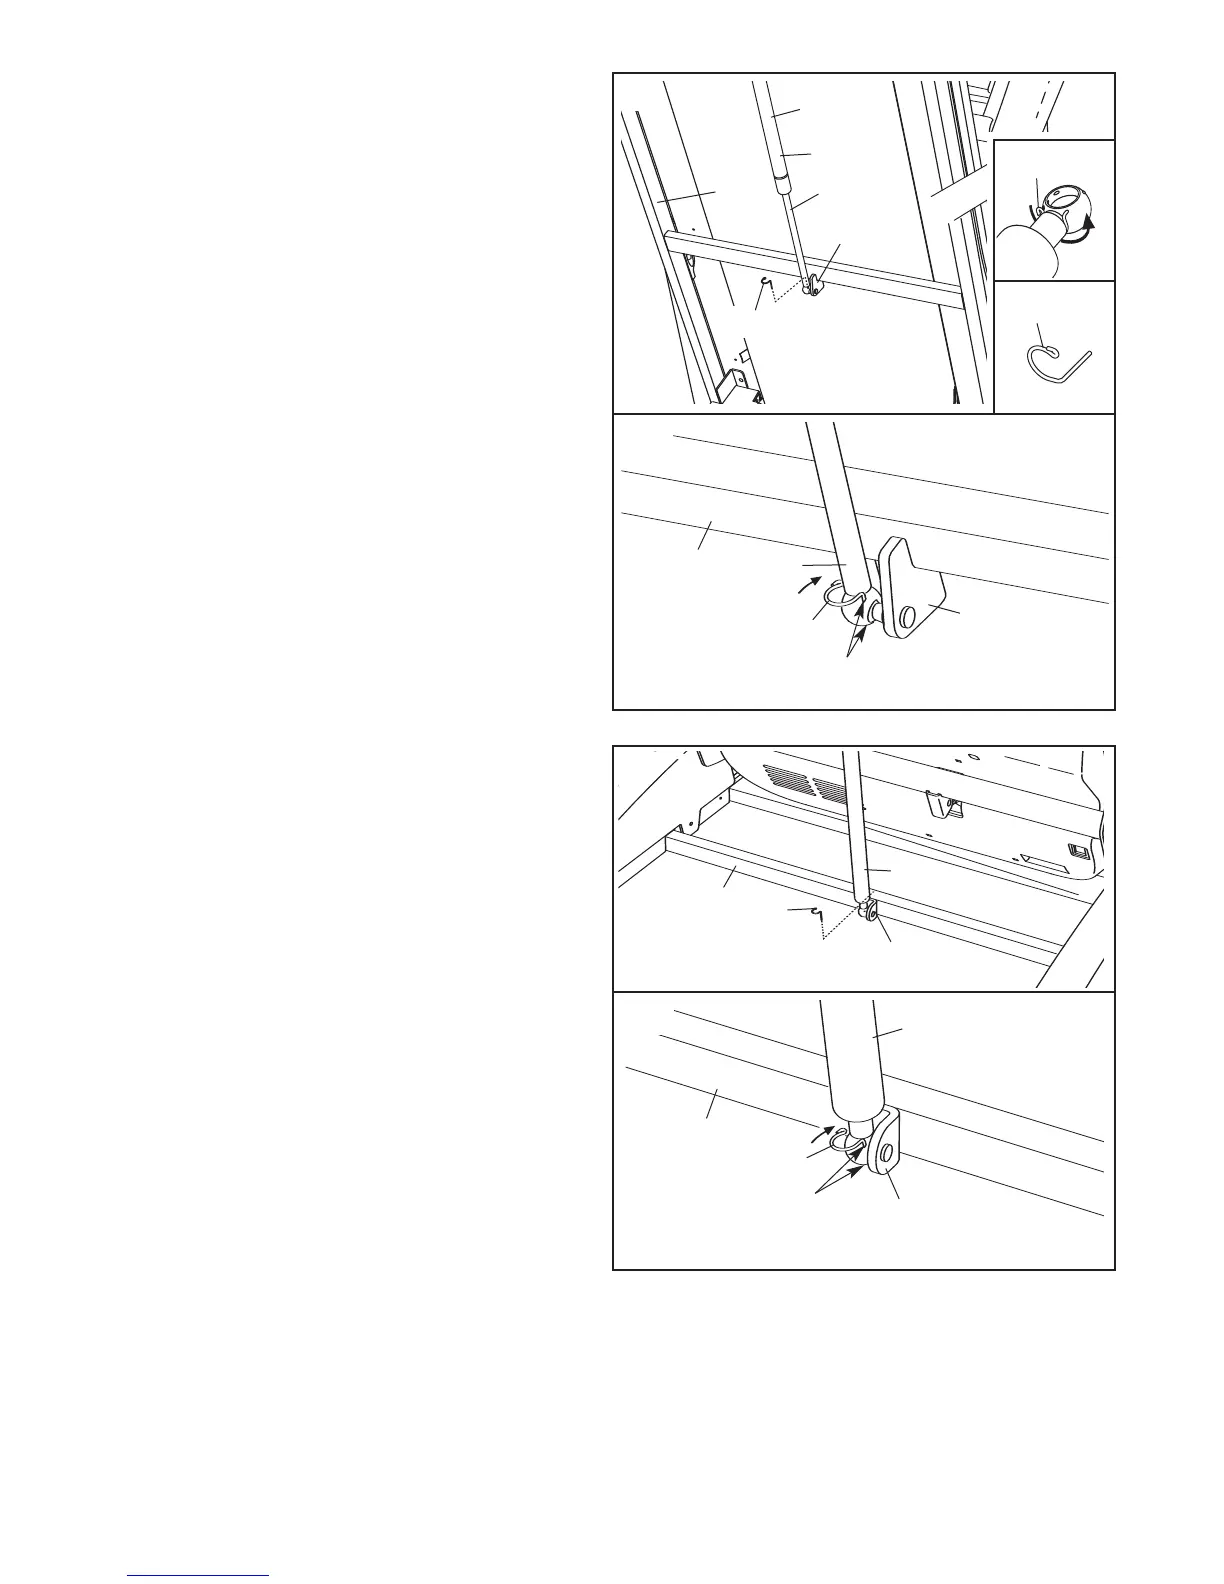
10. Have a second person raise and hold the tread-
mill Frame (74).
Identify the Gas Spring (99). Note that the Gas
S
pring has a cylinder end and a rod end. See the
two small inset drawings. Locate the Spring Clip
(98) in the rod end of the Gas Spring. Using your
fingernail or the end of a screwdriver, press on
the end of the Spring Clip to loosen it, rotate the
Spring Clip, and then pull the Spring Clip out of
the Gas Spring. Be careful to avoid losing the
Spring Clip.
Note: Extra Spring Clips are in-
cluded.
Next, hold the rod end of the Gas Spring (99)
near the bracket in the center of the Frame (74).
Press the end of the Gas Spring as far as possi-
ble onto the ball on the bracket.
See drawing 10a. Insert the Spring Clip (98) into
the two indicated small holes in the rod end of
the Gas Spring (99). Then, rotate the Spring Clip
until it clips onto the Gas Spring.
99
98
99
74
74
Bracket
Cylinder
R
od
Bracket
10a
10
9
8
98
Holes
98
11.Pivot the cylinder end of the Gas Spring (99)
down to the position shown. Remove the Spring
Clip (98) from the end of the Gas Spring.
Next, align the cylinder end of the Gas Spring
(99) with the bracket in the center of the Base
(48). Press the end of the Gas Spring onto the
ball on the bracket. Note: It may be necessary to
pivot the Frame (not shown) forward or backward
slightly to align the end of the Gas Spring with
the ball.
See drawing 11a. Insert the Spring Clip (98) into
the two indicated small holes in the Gas Spring
(99). Then, rotate the Spring Clip until it clips
onto the Gas Spring.
With the
help of a second person, lower the
Frame (not shown) to the floor.
98
99
99
48
48
Holes
98
11a
Bracket
Bracket
11
 Loading...