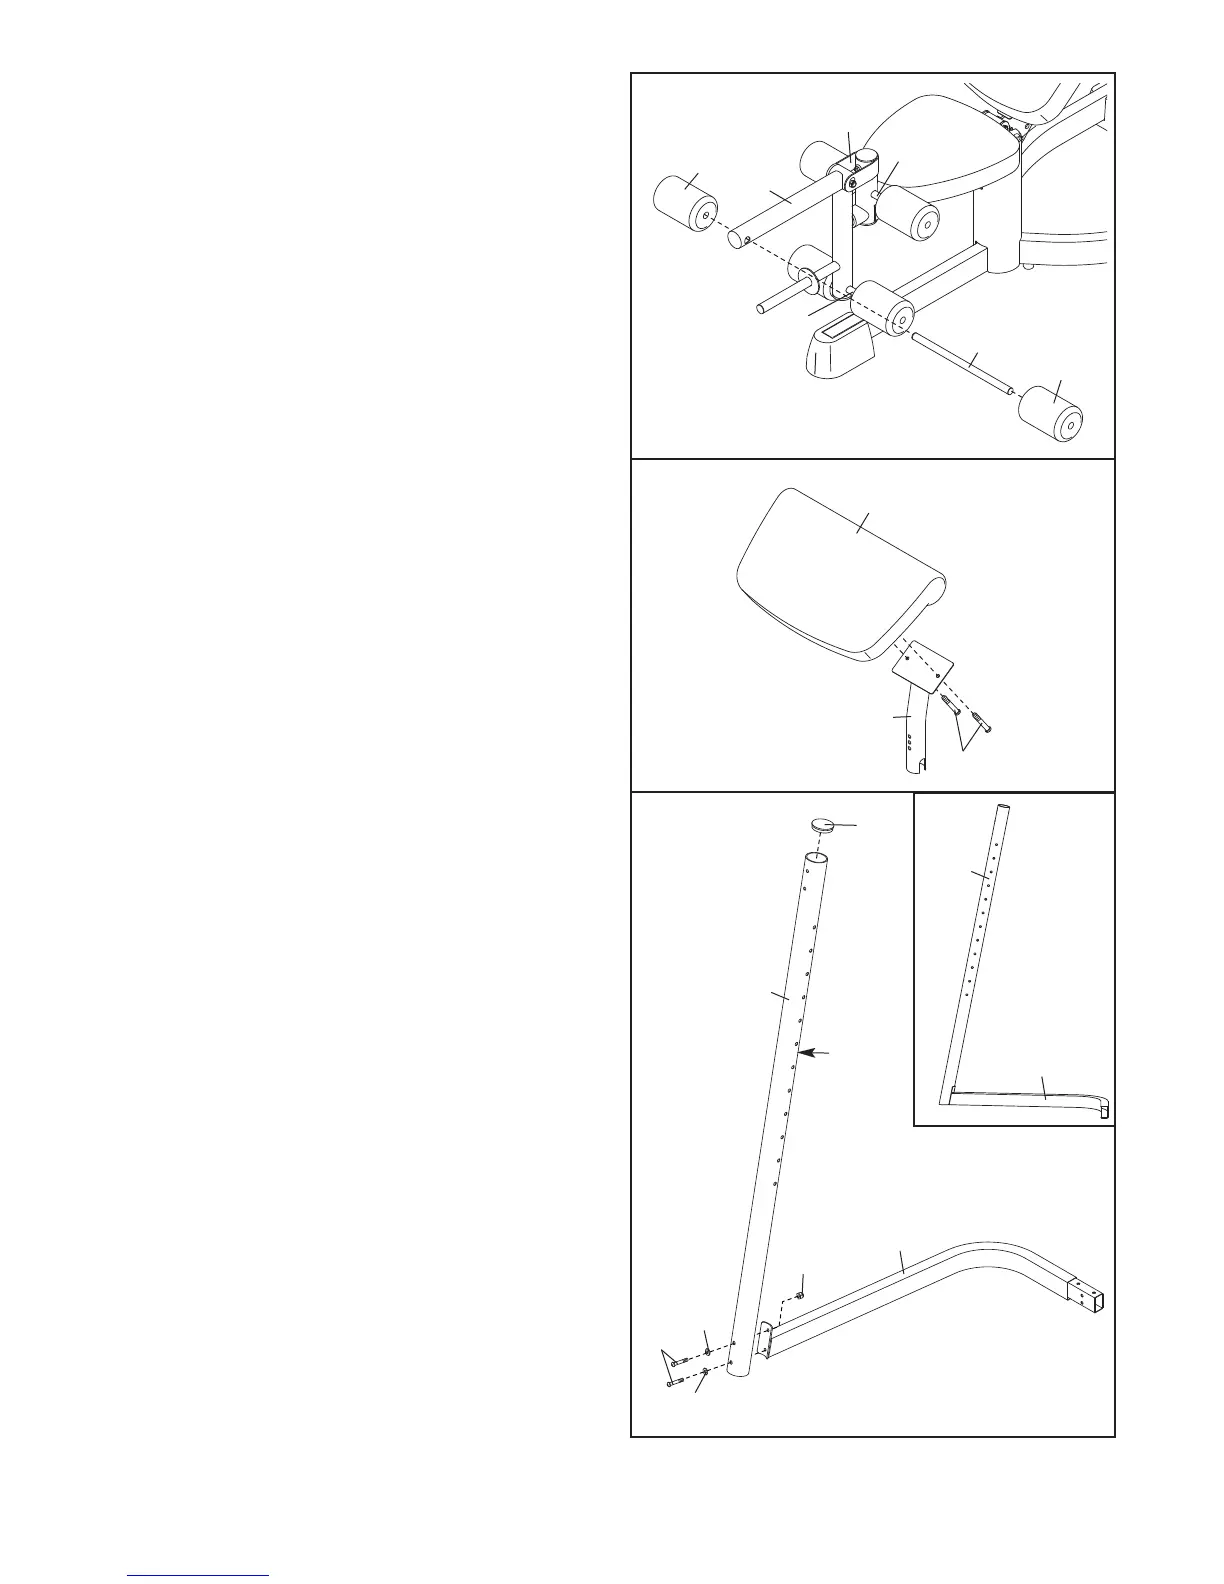
11. Identify the Right Upright (55), which does not
have a warning decal on it. Press a 63mm Round
Cap (18) into the top of the Right Upright.
Attach the Right Upright (55), with the decals on
the side shown, to the Right Base (47) with two
M8 x 80mm Button Bolts (70), two M8 Washers
(37), and an M8 Nylon Locknut (41).
Note: The
Right Upright will lean over the Right Base
(47) when assembled (see the inset drawing).
Do not tighten the Bolts.
Repeat this step with the Left Upright (not
shown) and Left Base (not shown).
8
10. Attach the Curl Pad (13) to the Curl Post (7) with
two M6 x 15mm Button Screws (40).
9. Insert a Pad Tube (10) into the Leg Lever (6).
Slide two Foam Pads (14) onto the Pad Tube.
Assemble the other two Pad Tubes (10) to the
L
eg Lever (6) and the Seat Frame (5) in the
same manner.
9
10
10
10
14
6
1
4
5
10
13
7
40
37
37
70
11
47
55
41
55
18
Decals
47