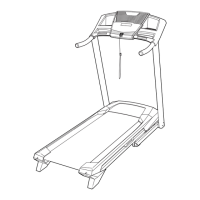
13
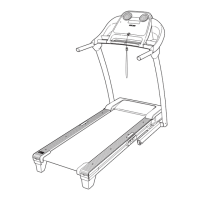
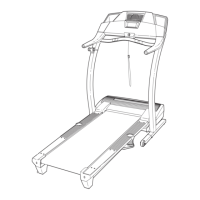
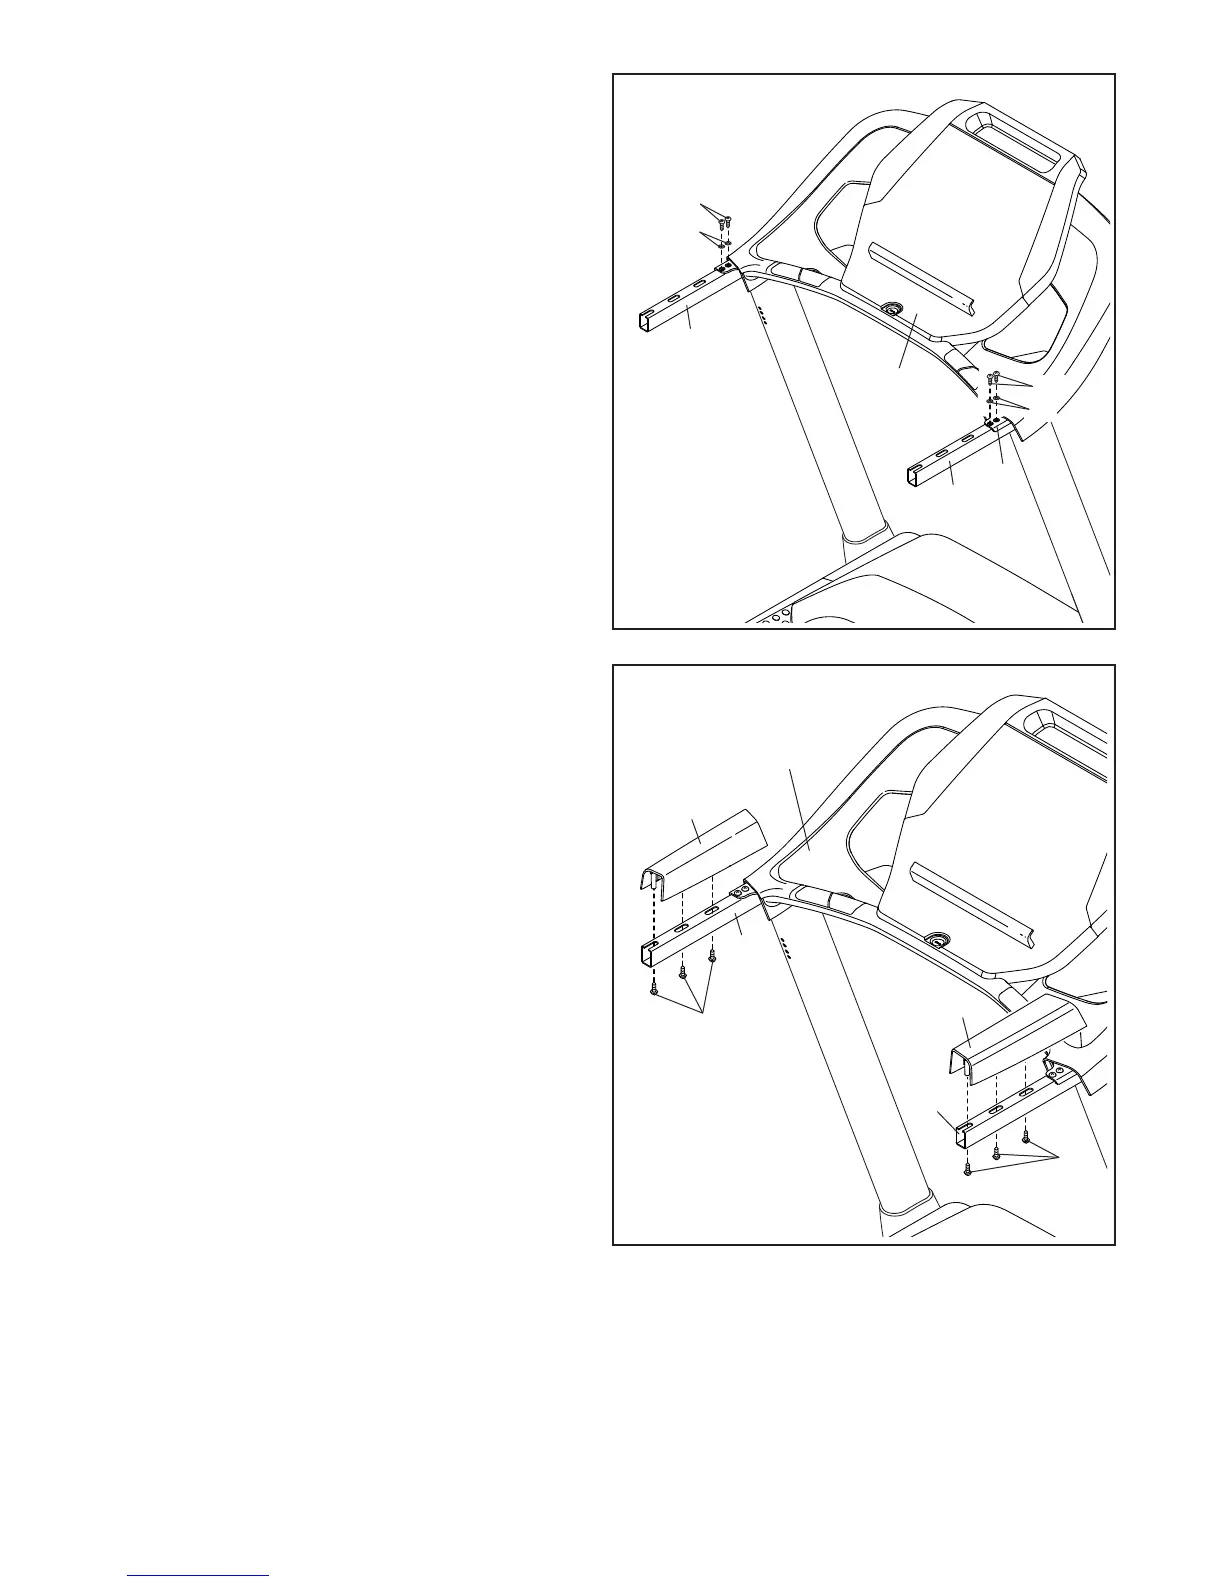
10. IMPORTANT: To avoid damaging the Pulse
Crossbar (5), do not use power tools and do
not overtighten the #10 x 3/4" Screws (9).
Tighten four #10 x 3/4" Screws (9) with four 1/4"
Star Washers (26) into the Pulse Crossbar (5)
and the Handrails (84). Start all four Screws,
and then tighten them.
See step 9. Tighten the four 1/4" x 1/2"
Screws (2).
10
9
9
84
5
84
Console
Assembly
26
26
11. Identify the Left and Right Handrail Inserts (79,
31).
Attach the Left Handrail Insert (79) to the left
Handrail (84) with three #8 x 3/4" Screws (4).
Note: Slide the Left Handrail Insert up against
the console assembly before tightening the
Screws.
Attach the Right Handrail Insert (31) in the
same way.
11
84
31
79
84
4
4
Console
Assembly