Slope Setup
The display reads in percent of grade (the number displayed is the units of
rise or fall per 100 units of run). A 2-1/2% slope (projecting upward from the
front of the laser) shows as 2.50 on the display. If a down slope is needed,
the display is set to the required slope and the rear of the laser is aimed in
the direction of slope. The graphic label just above the slope knob shows the
direction that upward or downward slopes are projected and the proper
direction to turn the knob to increase or decrease the slope.
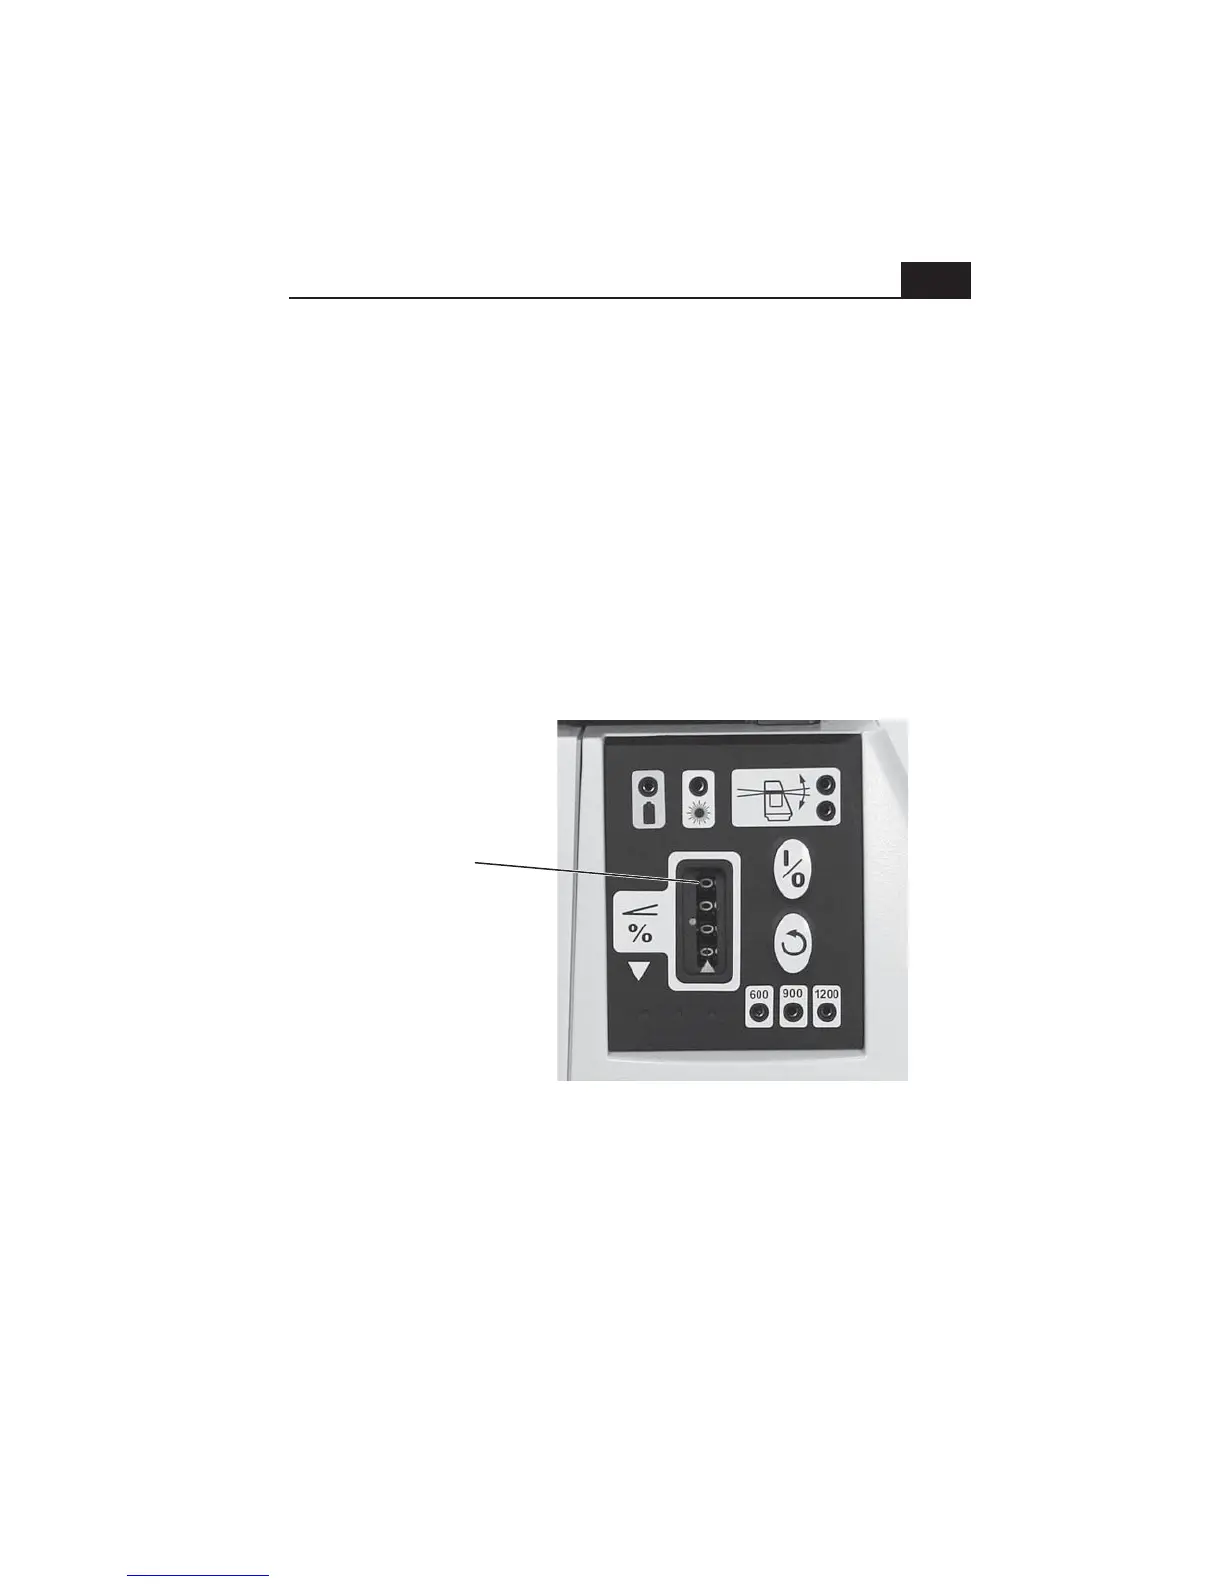
In order to be able to set an accurate zero percent slope (dead level), the
counter can be turned below zero. When the counter on either model is
turned to below zero, the upper counter digit will display a 9. This makes it
obvious that the slope is set incorrectly and should be changed to zero
(level), or to a positive slope setting. (see photo below)
Regularly check your setup against benchmarks. If none are present, set at
least two benchmarks of your own to monitor the accuracy of your setup.
The laser can be set at an offset to a ditch or excavation. Just be sure to
point the sights on the top cap parallel to the direction of the slope.
9
This counter digit
displays a 9 when
the slope setting
goes below zero.
Re-set the slope to
zero (level), or to
a positive slope
setting when you see
a 9 displayed here.