6
Initial Setup Guidelines
Calibration should be checked from time to time.
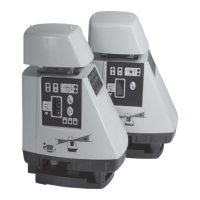
Although both AS2 models are calibrated at the factory and are
exceptionally rugged lasers, it is well worth the effort to check calibration
before you first use your laser (after shipping) and then from time to time
to ensure that you are doing the highest quality work possible. Always
check calibration if the laser has been handled roughly.
Check your setup.
Although not required, it is good jobsite practice when using any laser or
optical instrument to check your setup from time to time. Use
engineered benchmarks on the jobsite to assure that your setup is
correct and matches the design of the job. Particularily on very large
sites, or where accuracy is critical, taking a few minutes to verify the
elevation marks you have been given to work from makes sense.
Realize that even engineered benchmarks may not be perfect and
enough verification must be done to be confident you are properly set up.
If there
are not suitable benchmarks on the site, you can set your own by
driving stakes and recording their elevations, or by marking the laser
beam height on stable objects such as telephone poles, concrete walls,
etc. The benchmarks should be 90
0
apart for greatest accuracy. Having
benchmarks to check is of great value for jobs where setups need to
match day after day. If you will only be using the setup for a brief time,
this may not be needed.
Work as close to the laser as possible.
You can work up to 1000 feet (305M) from the AS2 with the R7 receiver
and 1650 feet (500M) from the AS2 MAGNUM using the R8 receiver or
most brands/models of machine control receivers. As with all
instruments, the farther you go, the more any error can add up. Set the
laser in a safe place, as close as possible to your work
Maintain your equipment.
Keeping tripod and mounting hardware tight, and being sure grade rods
are in good condition, can prevent errors and performance problems.