Checking and Adjusting Calibration
Calibration is your responsibility, check it often.
Although both AS2 models are calibrated at the factory and are exceptionally
rugged lasers, it is well worth the effort to check calibration before you first
use your laser (after shipping) and then from time to time to ensure that you
are doing the highest quality work possible. Always check calibration if the
laser has been handled roughly.
Follow the steps below to check the calibration of the laser and make
necessary adjustments.
1. Attach the laser to a flat head tripod approximately 100 feet from a wall or
other stable vertical surface (a telephone pole or concrete building will work
well). We will call the vertical surface the target. The tripod head must be
level enough to allow you to turn the laser 360 degrees with minimal
re-leveling needed. Use the tripod leg adjustments to get the tripod head
level.
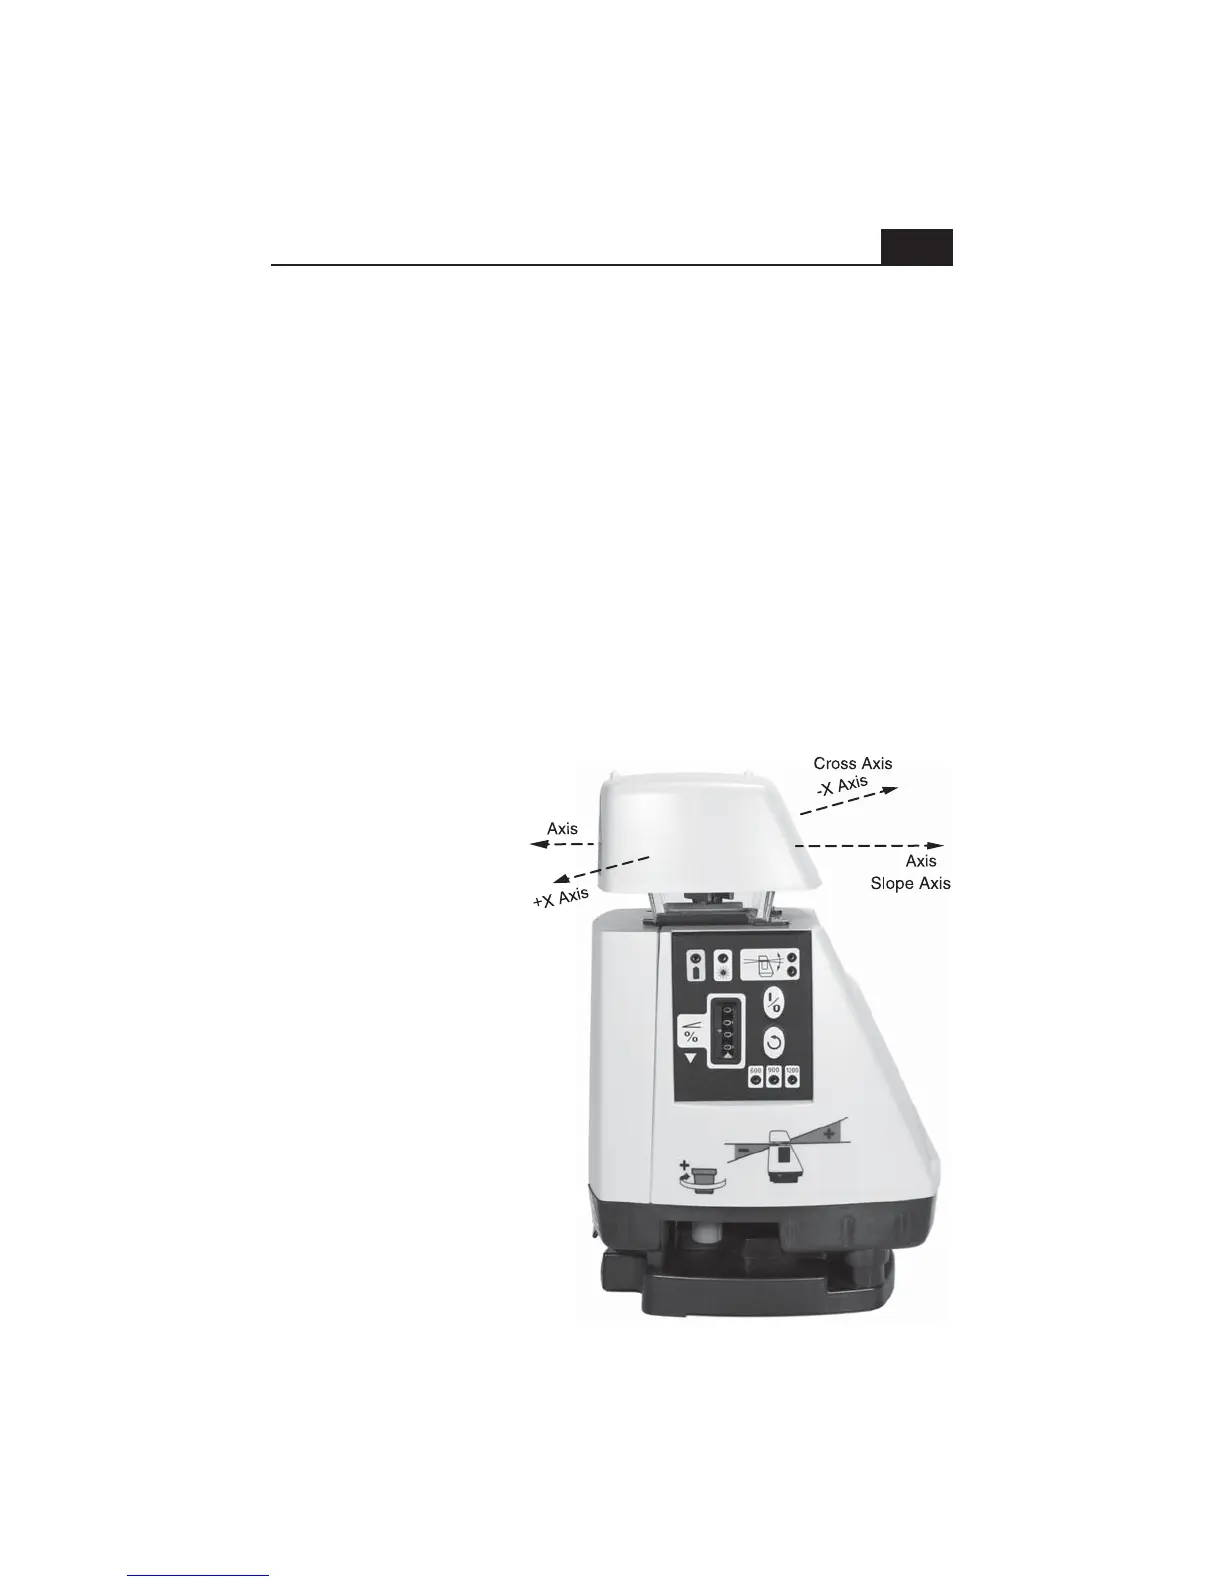
2. Rotate the entire
laser so that either
direction of the cross (X)
axis (see picture) is
aimed at the target.
3. Carefully set the
slope display counter to
00.00 (The red stripe on
the last counter digit
should be aligned with
the pointer). Turn the
laser on and allow it to
level.
4. Take the receiver to
the target and find the
height of the laser beam
by moving the receiver
up or down until you get
a display and/or tone.
Now, find the center of
the display and mark the
target, using the
receiver's beam center
notch as a guide.
12
-Y
+Y