2
6
ENGLISH
Display Settings
[CLOCK]
[CLOCK DISPLAY]
[ON]: The clock time is shown on the display even when the unit is turned
off. ; [OFF]: Cancels.
Preset color:
[INITIAL COLOR]
/
[VARIABLE SCAN]
/
[CUSTOM R/G/B]
/
[RED1]
/
[RED2]
/
[RED3]
/
[PURPLE1]
/
[PURPLE2]
/
[PURPLE3]
/
[PURPLE4]
/
[BLUE1]
/
[BLUE2]
/
[BLUE3]
/
[SKYBLUE1]
/
[SKYBLUE2]
/
[LIGHTBLUE]
/
[AQUA1]
/
[AQUA2]
/
[GREEN1]
/
[GREEN2]
/
[GREEN3]
/
[YELLOWGREEN1]
/
[YELLOWGREEN2]
/
[YELLOW]
/
[ORANGE1]
/
[ORANGE2]
/
[ORANGERED]
Installation/Connection
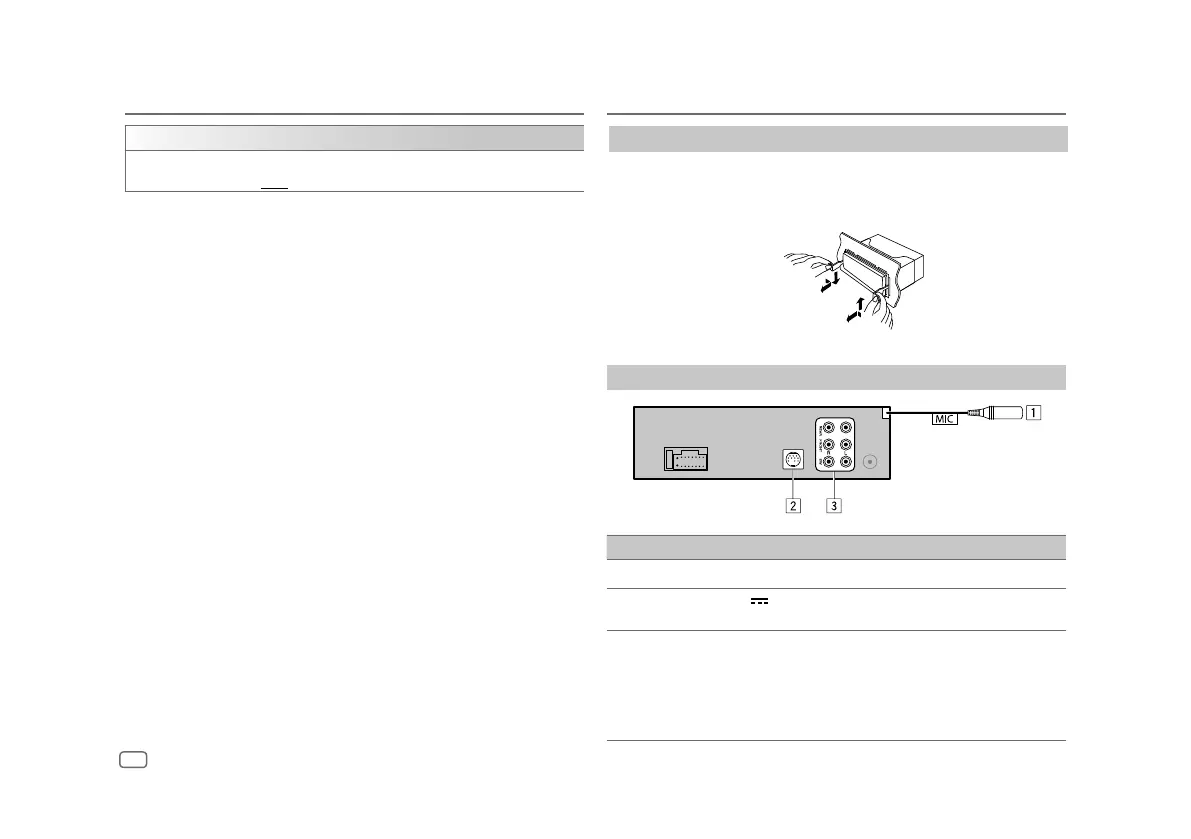
Removing the unit
Insert the extraction keys deeply into the slots on each side, then
follow the arrows as shown on the illustration.
Connect external components
No Part
1
MIC (Microphone input terminal) (Page
16
)
2
Expansion port (12 V 500 mA): To the optional SiriusXM Vehicle Tuner (commercially
available) (Page 12)
3
Output terminals
REAR : Rear output
FRONT : Front output
SW : Subwoofer output
•
When connecting an external amplifier to the output terminals of this unit, securely
connect the amplifier ground wire to the car chassis to prevent damage to the unit.