Page 20
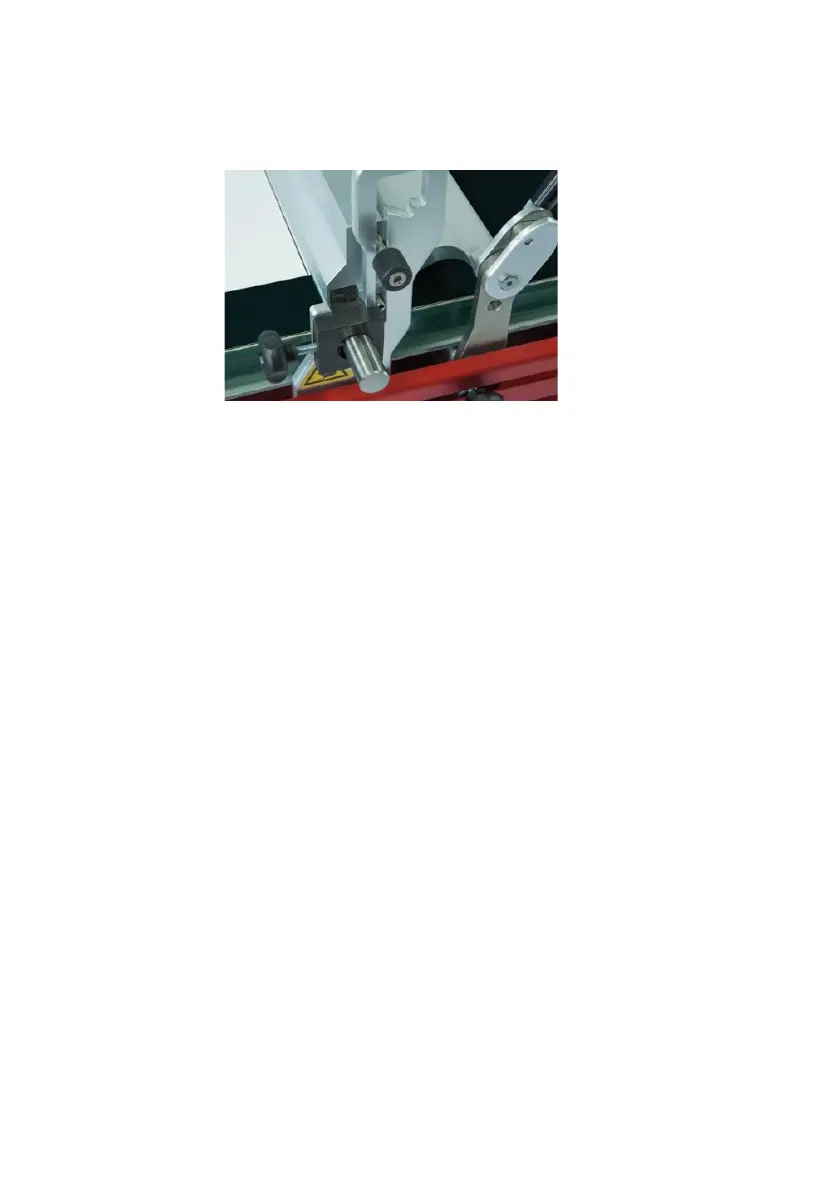
6.2.1 Fixing unit for profile rods and wire-bar applicators
• Put the wire-bar or profile rod into the holder (9).
• Fix the fixing unit for profile rods and wire-bar applicators as shown below.
6.3 Application with gap applicator
When using the glass plate (i.e. in case of non-heatable applications) note the
followings:
• Make sure that the glass plate is mounted with its glass surface facing up.
Alternatively a precision-vacuumplate can also be used.
Set the start stop (1) as follows:
• Place your substrate (e.g. test chart / film) at the desired place on the glass
plate. Keep in mind that the gap applicator will be placed in front of the weight
(7).
• Set your gap applicator to the desired gap height and place it on the substrate
at the desired starting position of the application area.
• Lower the weight (7) to the bottom position.
• Move the drawing unit (22) to the gap applicator.
• Open the clamping device (5) and loosen the screw of the start stop (1).
• Move the start stop (1) directly behind the weight (7) and refasten it with the
screw.
• Fix the substrate with the clamping device (5), by pulling on the clamping grip
(3).
Hint: If the substrate is too small to use the clamping device (5), use a piece of
adhesive tape or the optional precision-vacuumplate to fix it.
Set the end stop (2) as follows:
• Loosen the screw of the end stop (2).
• Move the drawing unit (22) forward and stop it with the end stop (2) as soon as
the desired drawing area has been reached.