Page 18
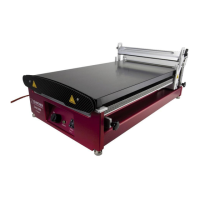
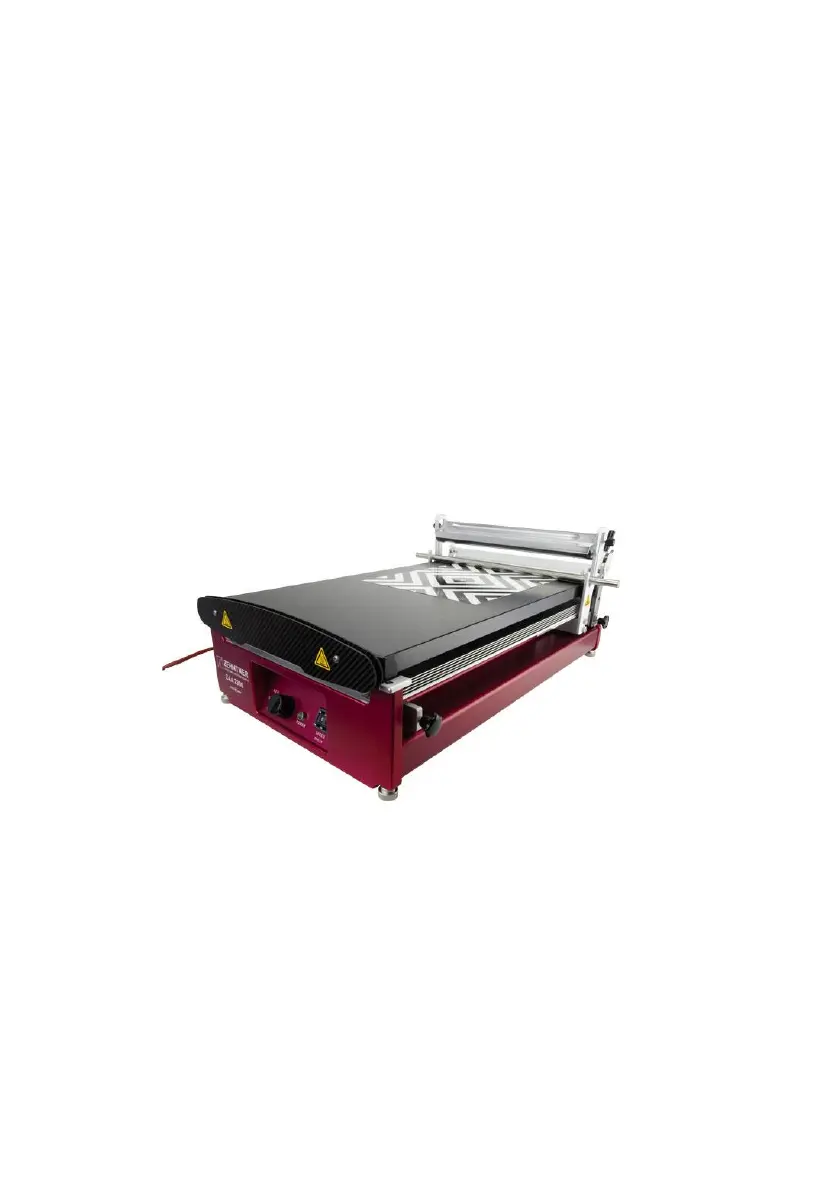
6.2 Application with wire-bar or profile rod
When using the glass plate (i.e. in case of non-heatable applications) note the
followings:
• Make sure that the printing blanket side of the glass plate is facing up.
• Ensure that the printing blanket is covered with the polyester mat.
• Lift up the weight (7) and hinge it into the top position.
Set the start stop (1) as follows:
• Move the open clamping device (5) and the drawing unit (22) to the back of
the apparatus.
• Place your substrate (e.g. test chart / film) at the desired place on the plate
and fix it with the clamping device (5), by pulling on the clamping grip (3).
• Place the drawing unit (22) above the upper edge of the substrate – for the
ideal positioning together with your rod – so, that the rod rests at the desired
starting position of the application on the substrate.
• Move the start stop (1) directly behind the drawing unit (22) and fasten it with
the screw.
Hint: If the substrate is too small to use the clamping device (5), use a piece of
adhesive tape to fix it.
Adjust the end stop (2) as follows:
• Loosen the screw of the end stop (2).
• Position the end stop (2) behind the desired drawing area and lock it with the
screw.
• Adjust the FWD-STOP-REV button (13) to REV (backward) position and let
the drawing unit (22) move to the start stop (1).
• Place the wire-bar or profile rod into the holding device (9).
• Lower the weight (7) until it sits on the wire-bar / profile rod and holds it in
place.