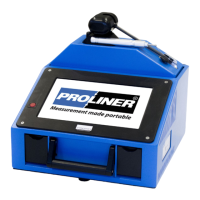
Do you have a question about the PRODIM Proliner and is the answer not in the manual?
| Operating Temperature | 0°C to 40°C |
|---|---|
| Storage Temperature | -20°C to 60°C |
| Measurement Technology | Laser |
| Battery Life | Approx. 8 hours |
| Connectivity | USB, Bluetooth |
| Accuracy | ±0.1mm |
| Power Supply | Rechargeable battery |
Information is for internal use only; disclosure and copying are prohibited and may be unlawful.
All rights reserved; reproduction prohibited without prior written permission from Prodim International BV.
Operator is responsible for accuracy and safety; use trained personnel and ensure cable safety.
The contents of this manual may be changed without prior notice.
Press once to capture a single point; Proliner records a line between measured points.
Press to register a section of points until pressed again; records lines/radii based on shape.
Ends a measured contour; holding button 3 creates and names a new layer.
Press button 4 to delete the last measured point; holding deletes the last measured contour.
Overview of the Proliner's main screen elements like battery status, settings, date/time, and logo.
Used to create and manage projects, files, and customer data.
Functionality to open, rename, or delete existing projects.
Import and export projects and files to/from USB or network storage.
Configure measurement settings like pen type, contour closure, compensation, and projection planes.
Ensure the Proliner is in a fixed, stable position with all measurement points reachable.
Determine the 2D projection plane by measuring three or more points.
Measure the outer rim of the kitchen block and surrounding situation for countertop overhang.
Measure cabinets, cut-outs, sinks, cranes, and other required internal data.
Edit the drawing, add notes, and export the final measurement as a DXF file.
CAD features for editing measurements, drawing shapes, adding dimensions and notes.
Creates fluent lines and radii for CNC processing of digital templates.
Import DXF files to libraries for cut-outs, sinks, profiles, and materials.
Create elements from selections and place them in a virtual slab for material calculation.
Add project details, notes, and briefings to digital templates for interpretation.
Allow customer to check digital template and project info on-site for approval.
Create customizable reports with drawings and project data for customers and production.