Setting Up the Treadmill
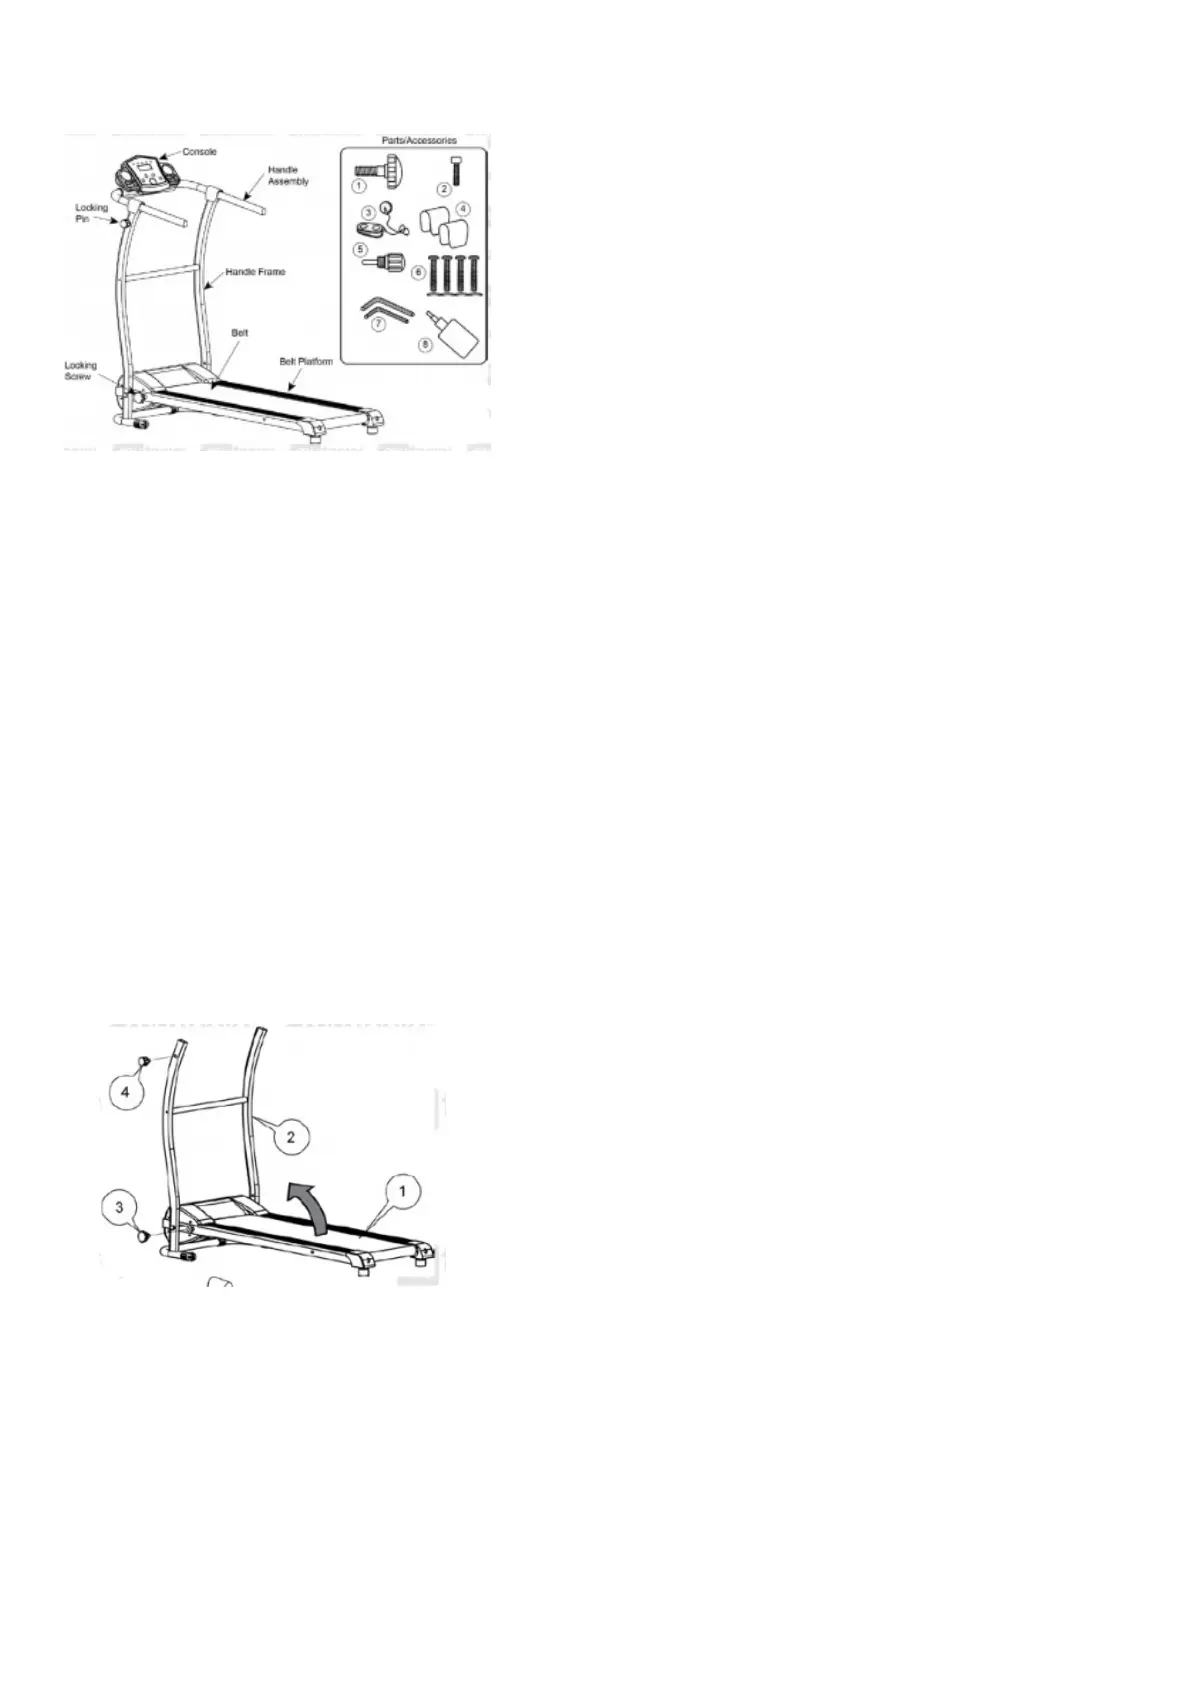
The TRX1 Elite treadmill comes partially assembled. The unit comes with the following parts. Ensure that all parts are included before assembly.
No. Qty. Description
No. Qty. Description
1 1 M12x50 locking screw and nut 5 1 Spring loaded locking pin
2 1 M6x40 console screw 6 4 M8x50 handle screw and shaped washer
3 1 Safety tether 7 2 5 mm and 6 mm Allen key
4 2 Handle screw covers 8 1 Belt Lubricant
Assembly
1. Take all parts out of the carton and place them on a firm, flat Remove all packing materials around the parts.
2. With the treadmill flat, lift the handle mounting frame ( 2) so that it is upright, then secure it to the belt platform ( 1) using the locking screw ( 3). Insert the
locking screw and firmly tighten by hand (rotate right) against the handle mounting
3. Insert the spring loaded pin (4) into the handle mounting frame ( 2) and tighten firmly by hand (rotate right).
4. Place the handle assembly (5) on to the handle mounting frame ( 2), then secure it using the handle screws and shaped washers ( 6). Ensure the washers
follow the shape
of the tube when installed. Tighten the screws (rotate right) using the supplied Allen key. When the screws are installed, clip the covers ( 7) to the handle over
the screw heads.
5. Plug the handle assembly electrical connector (right hand side handle) into the socket on the handle mounting frame.