5
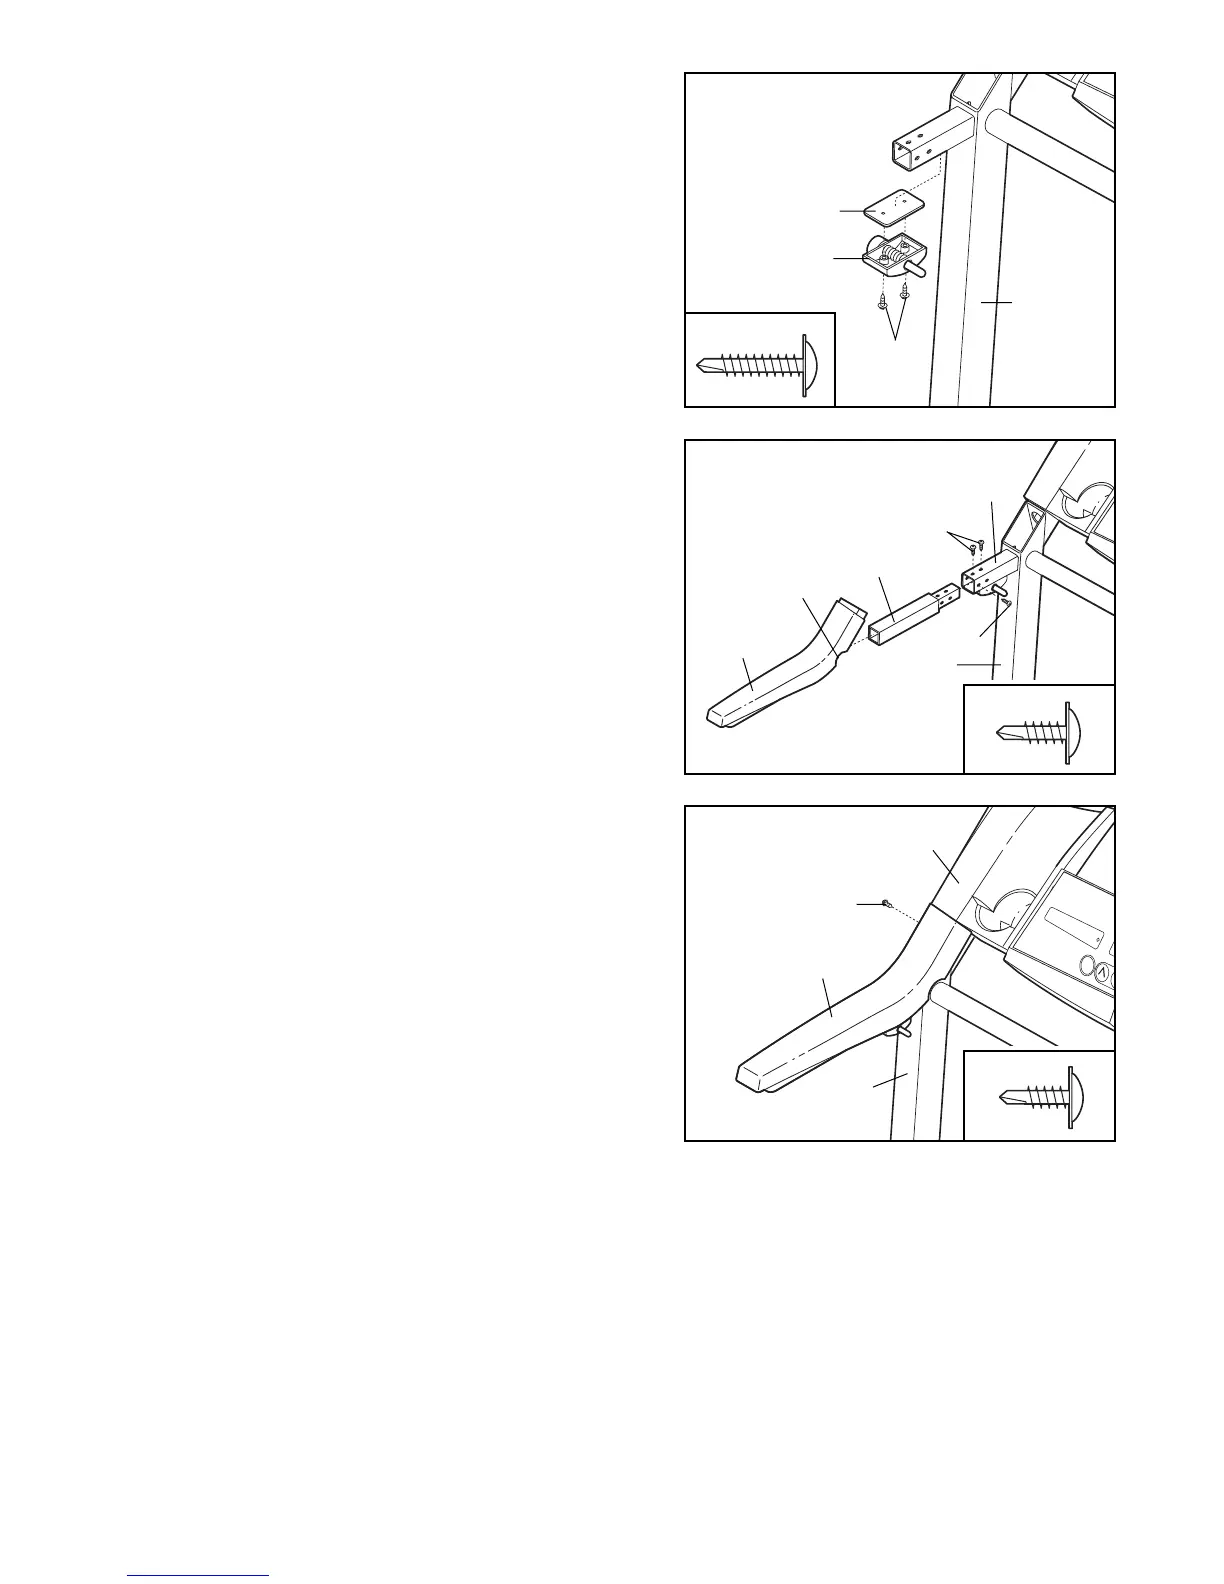
5. Make sure that the front edge of the Left Foam Grip (110)
is under the Console Base (87) as shown. Tighten a
Small Screw (76) into the side of the Left Foam Grip as
shown. Note: You may need to pull on the side of the Left
Foam Grip to align the Small Screw with the hole in the
Upright (82).
Attach the Right Foam Grip (not shown) and the other
Handrail Extension (not shown) as described in step 4
and this step.
Note: Extra screws may be included.
76
110
82
87
4. Insert a Handrail Extension (85) into the post on the left
Upright (82). Align the holes in the Handrail Extension
with the holes in the post. If necessary, tap the Handrail
Extension with a rubber mallet to fully insert it. Next, attach
the Handrail Extension by tightening three Small Screws
(76) into the indicated holes. Note: If there is only one
hole in the top of the post, tighten the third Small
Screw into the hole in the left side of the post.
Identify the Left Foam Grip (110), which has a large
cutout in the right side. Slide the Left Foam Grip as far as
possible onto the post on the left Upright (82). It may be
helpful to apply soapy water to the Handrail Extension (85).
76
82
110
Cutout
76
Post
85
4
7
76
76
3
3. With the help of a second person, carefully tip the Uprights
(82) back to the vertical position.
Attach the Latch Assembly (9) and the Latch Spacer (56)
to the left Upright (82) with two Screws (101) as shown.
9
56
101
82
101