12
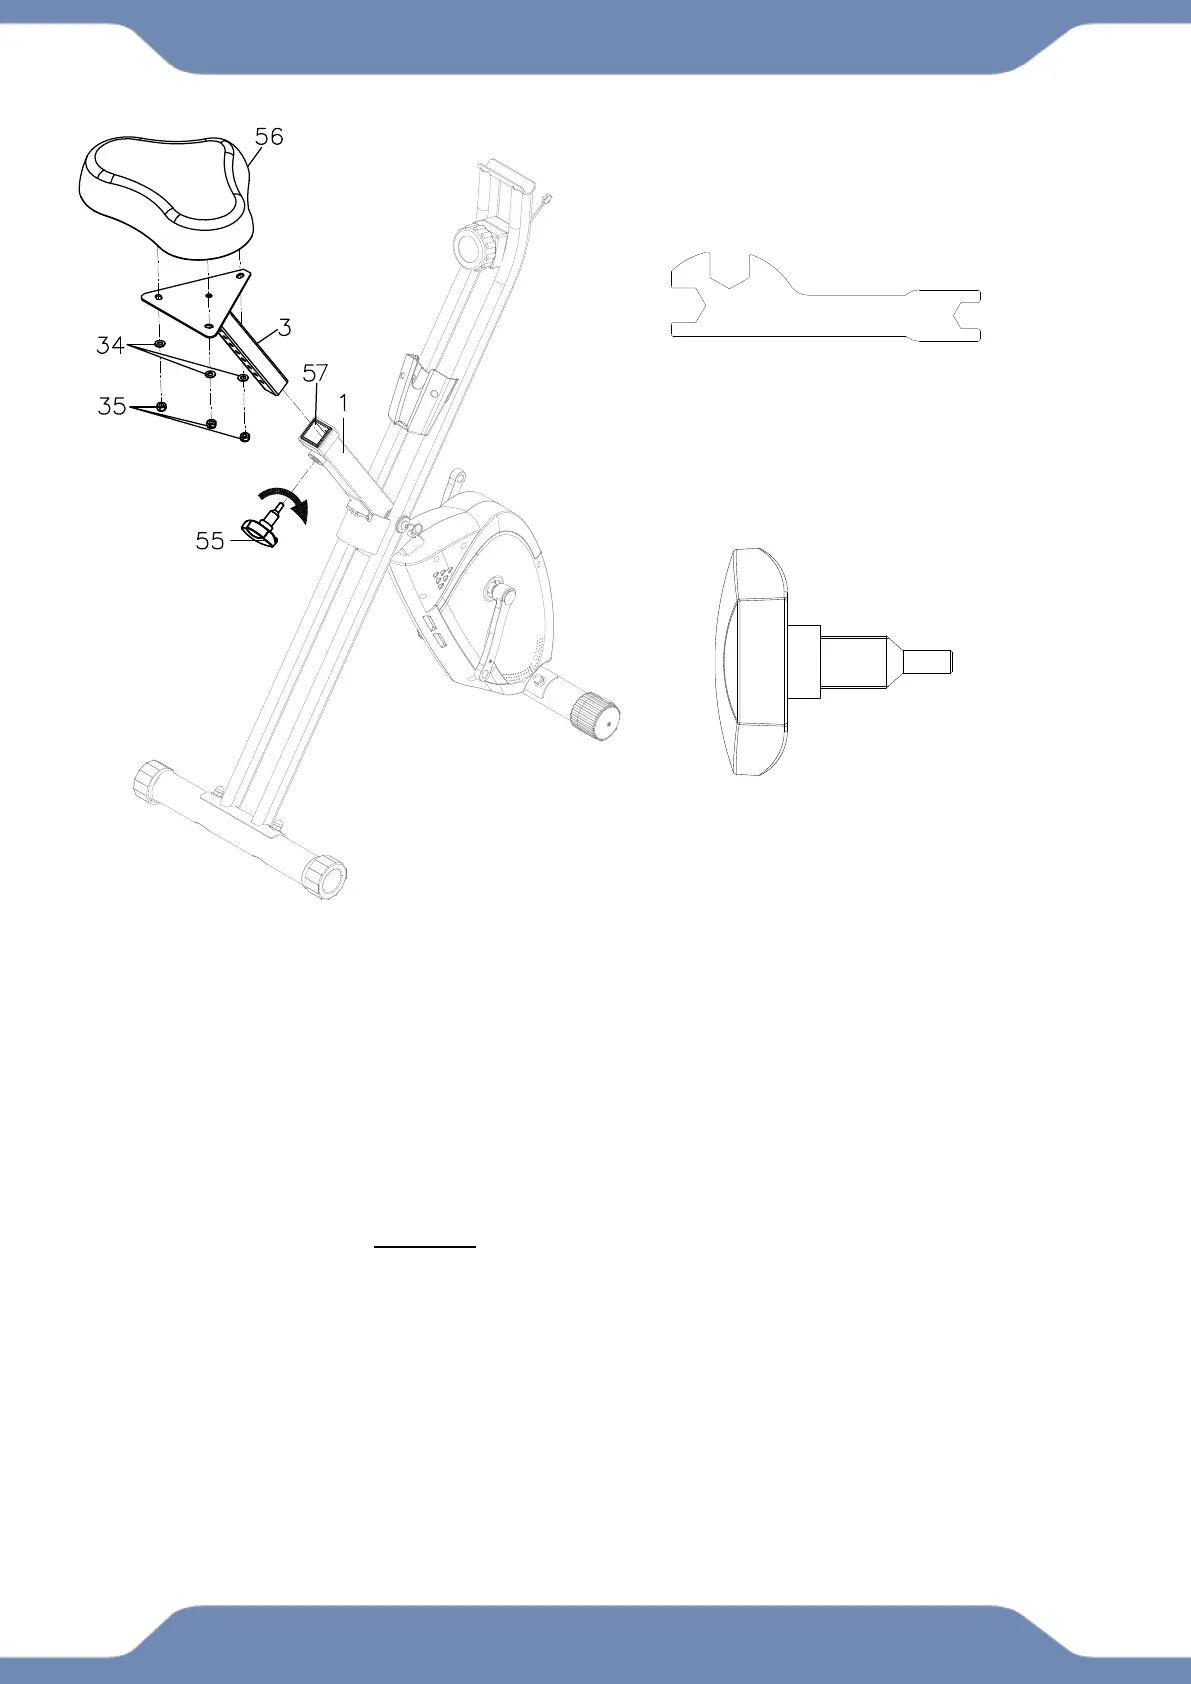
Step 3
3A. Remove three Flat Washers (34) and Three Nuts (35) from the Seat Cushion (56).
3B. Align the bolt holes on the underside of the Seat Cushion (56) with the holes on top of the
Seat Post (3). Attach the Seat Cushion (56) to the Seat Post (3) with three Flat Washers (34)
and three Nuts (35). Tighten the nuts with the 13- 19mm Wrench provided.
3C. After securing the Seat Cushion (56) to the Seat Post (3), insert the Seat Post (3) through
the Seat Post Plastic Bushing (57) and into the shaft of the Front Frame (1). Insert the
Adjustment Knob (55) into the threaded hole on the backside of the Front Frame (1). Turn the
Adjustment Knob (55) in a clockwise direction, making sure that the safety pin of the
Adjustment Knob (55) catches one of the height adjustment holes of the Seat Post (3) before
you start fully tightening.