13
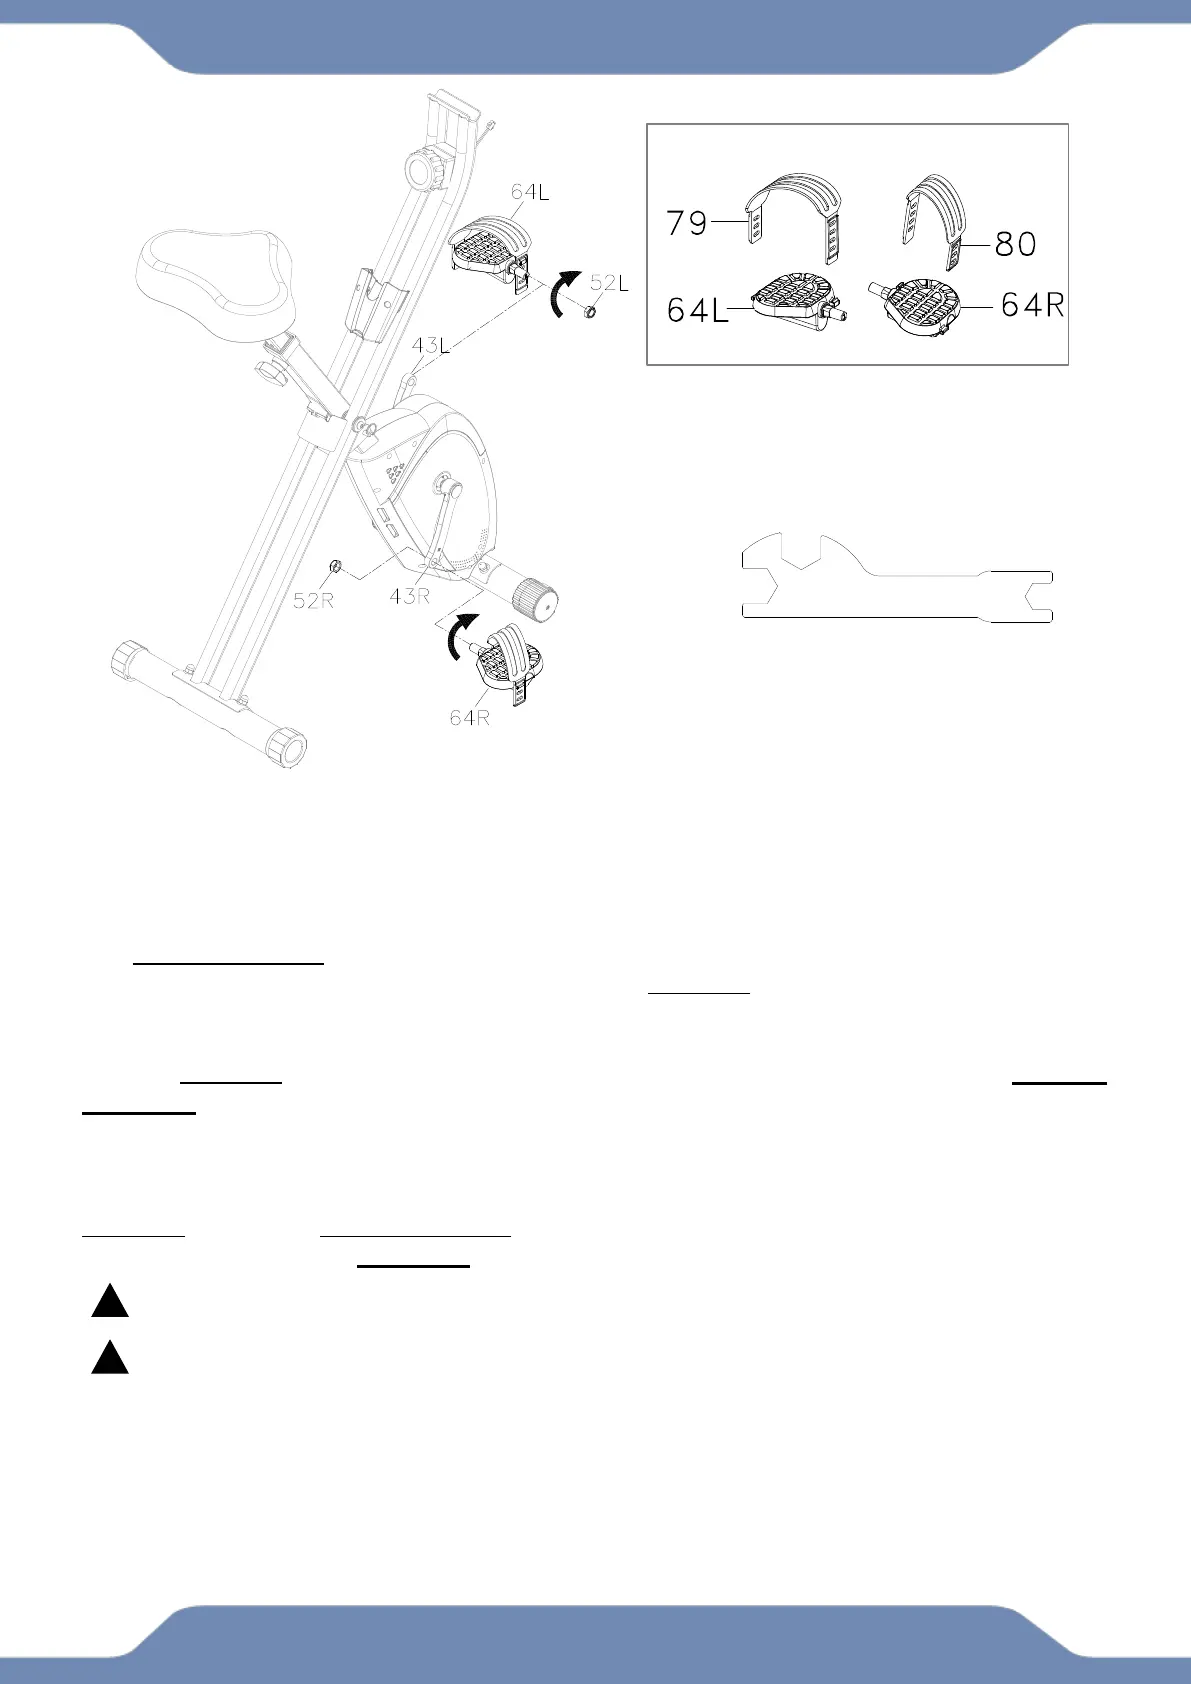
Step 4
4A. Remove the Left Nylon Nut (52L) and Right Nylon Nut (52R) from the Left Pedal (64L)
and Right Pedal (64R). Attach the Left Pedal Strap (79) onto the Left Pedal (64L) and the
Right Pedal Strap (80) onto the Right Pedal (64R).
4B. Installation of the Left Pedal: Making sure that it is straight, insert the Left Pedal (64L) into
the threaded hole in the Left Crank (43L). Turn the pedal shaft of the Left Pedal (64L) by hand
in a counter-clockwise direction. Lightly screw on the Nylon Nut (52L) that was taken off the
Left Pedal (64L) onto the protruding pedal shaft in a clockwise direction. Finish off the tightening
of the Left Pedal (64L) with the 13-19mm Wrench. Once the Left Pedal (64L) has been
tightened, use the second 13-19mm Wrench to tighten the Left Nylon Nut (52L) by turning the
nut in a clockwise direction. WARNING: Install the Left Pedal (64L) only with a counter-
clockwise direction.
4C. Installation of the Right Pedal: Repeat the same steps from 4A and 4B for the Right
Pedal (64R) installation into the Right Crank (43R). However, turn the right pedal shaft
clockwise and the nut counter-clockwise during installation. WARNING: Install the Right Pedal
(64R) with only with the clockwise direction.
The Cranks, Pedals, Pedal Shafts, and the Pedal Straps are marked “R” for Right and “L”
for Left.
See the ADJUSTMENT pages, P.19 for instructions to install and adjust the pedal straps.
This machine is not intended to be pedaled in reverse.