5
ASSEMBLY INSTRUCTIONS
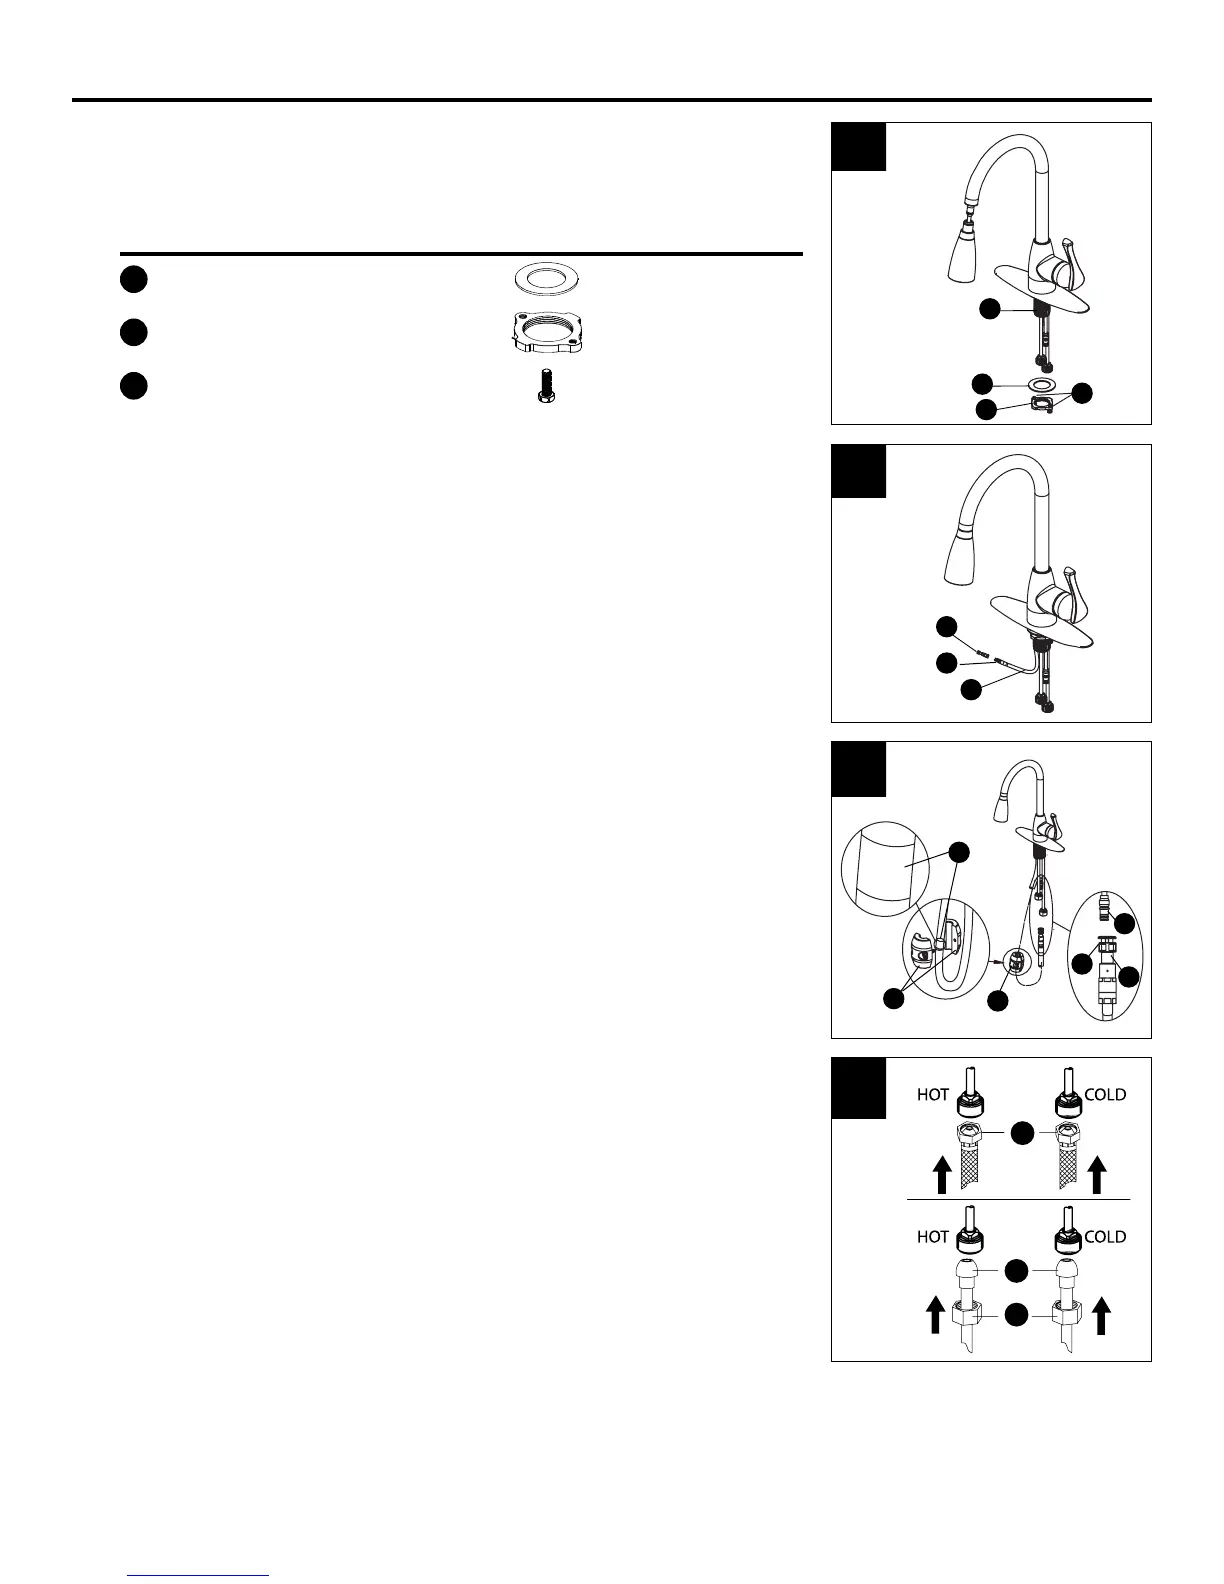
6.
Install the metal washer (BB) onto the threaded shank (6.1). Thread the
locking nut (AA) onto the shank (6.1). Lock the locking nut (AA) into position
by tightening the hex bolts (CC). Do not overtighten.
Hardware Used
BB
Metal washer x 1
AA
Lock nut x 1
CC
Hex bolt x 2
6
7.
After inserting the hose (7.1) through the hole in the sink surface, retract the
hose (7.1) back down, and reattach the quick connector (7.2) by screwing it onto
the end of the hose (7.3) in a clockwise motion. Hand tighten only.
7
8.
Push the quick connector (8.1) rmly upward and attach it to the receiving
block (8.2). Pull down moderately to ensure the connection has been made.
If it is necessary to remove the quick connector (8.1), squeeze the tabs on the
hose (8.3) and then pull down to disconnect. After connecting the hose (8.3),
install the weight (C) at the point of the hose marked "weight here" (8.4).
8
Weig
ht
Here
W
e
i
g
h
t
H
e
r
e
9.
Make Connections to the Water Lines
(9.1) Use 1/2 in. IPS faucet supply lines or (9.2) use coupling nuts (not
supplied) with (9.3) ball-nose risers (not included).
Turn water supply or shut-off valve back on and check for leaks. If leaks
occur, gently tighten the faucet connections.
9
9.1
9.3
9.2
AA
BB
6.1
7.1
7.2
C
C
7.3
CC
8.4
8.2
8.3
8.1