1
3
1
1
4
5
6
1
2
5
ASSEMBLY INSTRUCTIONS
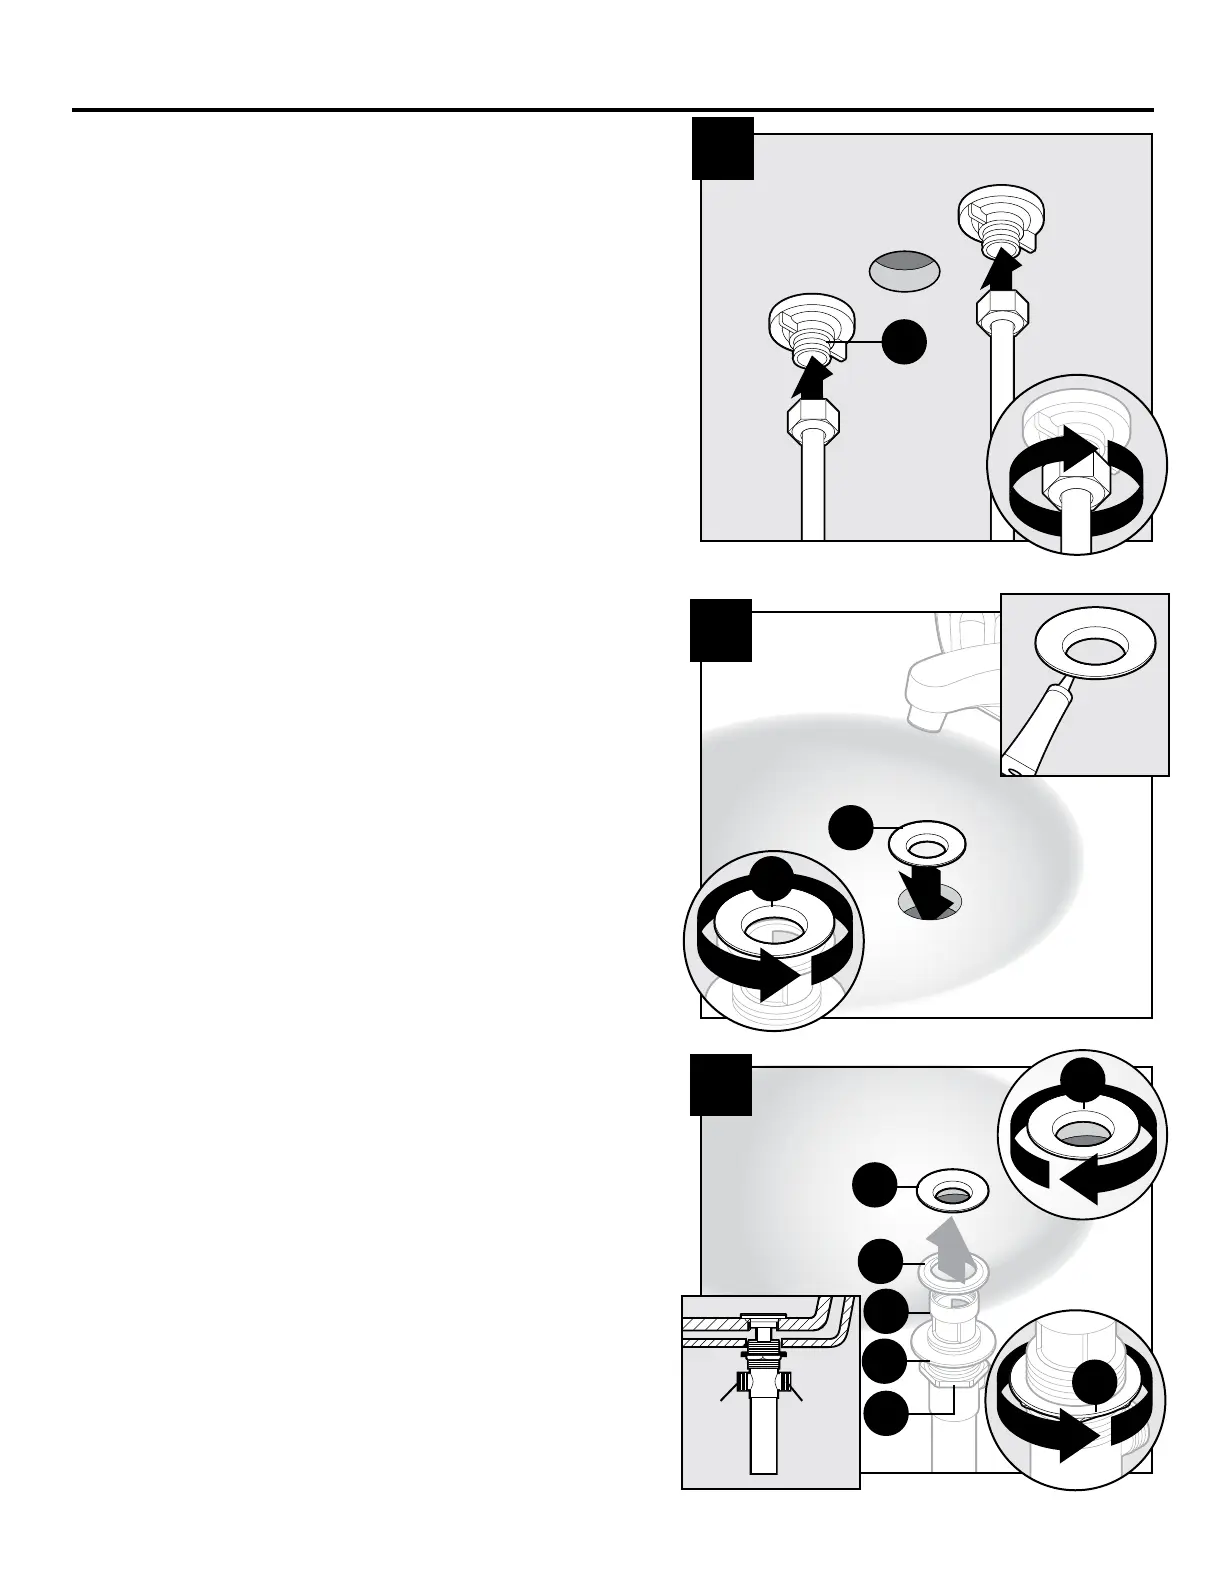
4. Install coupling nuts (not included) to supply
lines (not included). Screw coupling nuts and
supply lines onto faucet (A).
5.Removeange(F)fromthepreassembled
drain assembly. Apply a bead of clear
silicone sealant (not included) under the
ange(F)andplaceintosink.
Note: From below, remove ball nut (M) from
drain body (E).
6. From below, reattach drain assembly to
ange(F).Secureintoplacebytightening
lock nut (J). Caution: Sink damage can occur
from overtightening.
Note: Opening for ball rod must
face toward rear of sink.
A
F
K
E
J
I
F
I
F
F
No Yes