MOUNTING REMOTE CONTROL
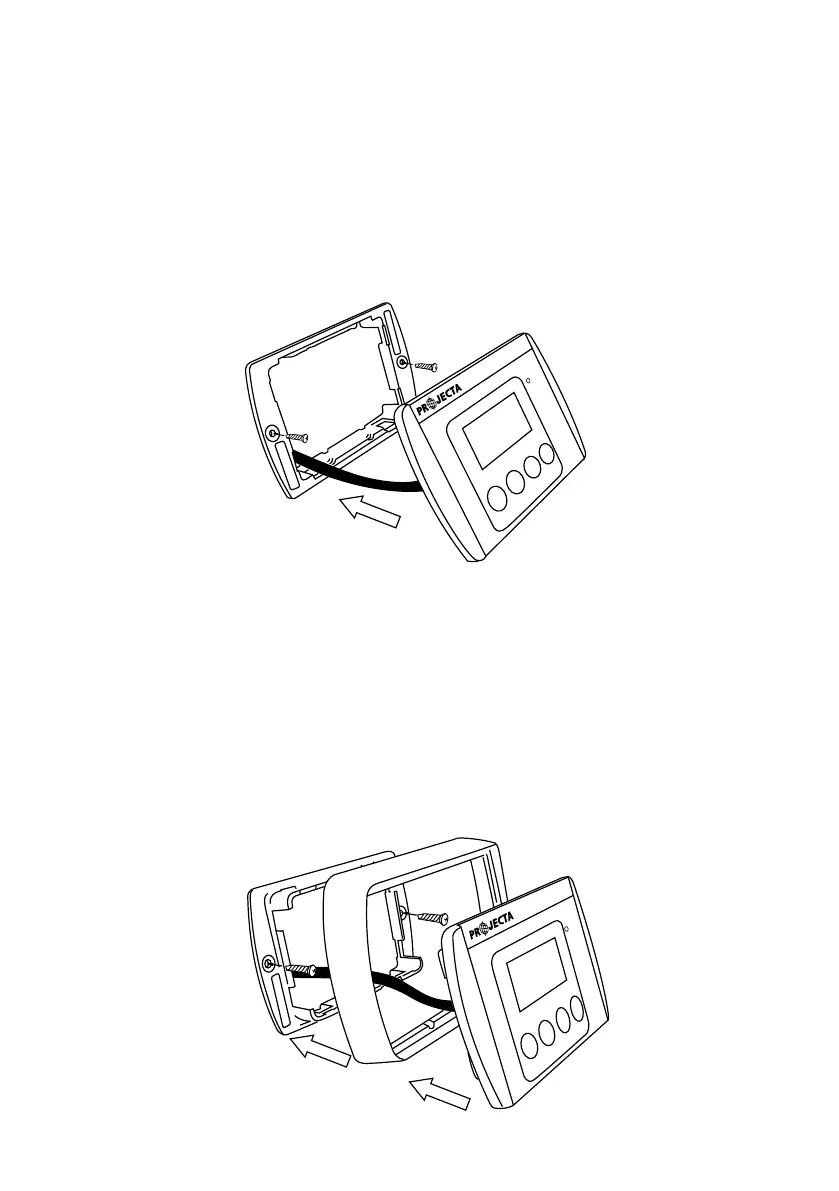
FLUSH MOUNT
• Cut a 93mm x 70mm hole into the desired mounting surface to suit the supplied
mounting plate.
• Position the mounting plate into the hole with the side labelled ‘FLUSH MOUNT’ facing
outwards and screw the supplied screws into the mounting surface as per the below
illustration.
• Clip the remote control into the mounting plate.
SURFACE MOUNT
• Position the supplied mounting plate onto the desired mounting surface so the side
labelled ‘SURFACE MOUNT’ is facing outwards and screw the supplied screws into the
mounting surface as per the below illustration.
• Drill a 15mm cable exit hole into the mounting surface, ensure cable exit hole is
positioned directly in the middle of the mounting plate.
• Position the remote control into the remote control surround as per the below
illustration and clip into the mounting plate.
11
STATUS
OFF/ON
WATTS/
LOAD%
ECO
VOLTS
STATUS
OFF/ON
WATTS/
LOAD%
ECO
VOLTS
F L U S H M OU N T
F LU S H M OU N T
STATUS
OFF/ON
WATTS/
LOAD%
ECO
VOLTS
STATUS
OFF/ON
WATTS/
LOAD%
ECO
VOLTS
F L U S H M OU N T
F LU S H M OU N T
S UR FA CE MOU NT