12
3.2 Monitor
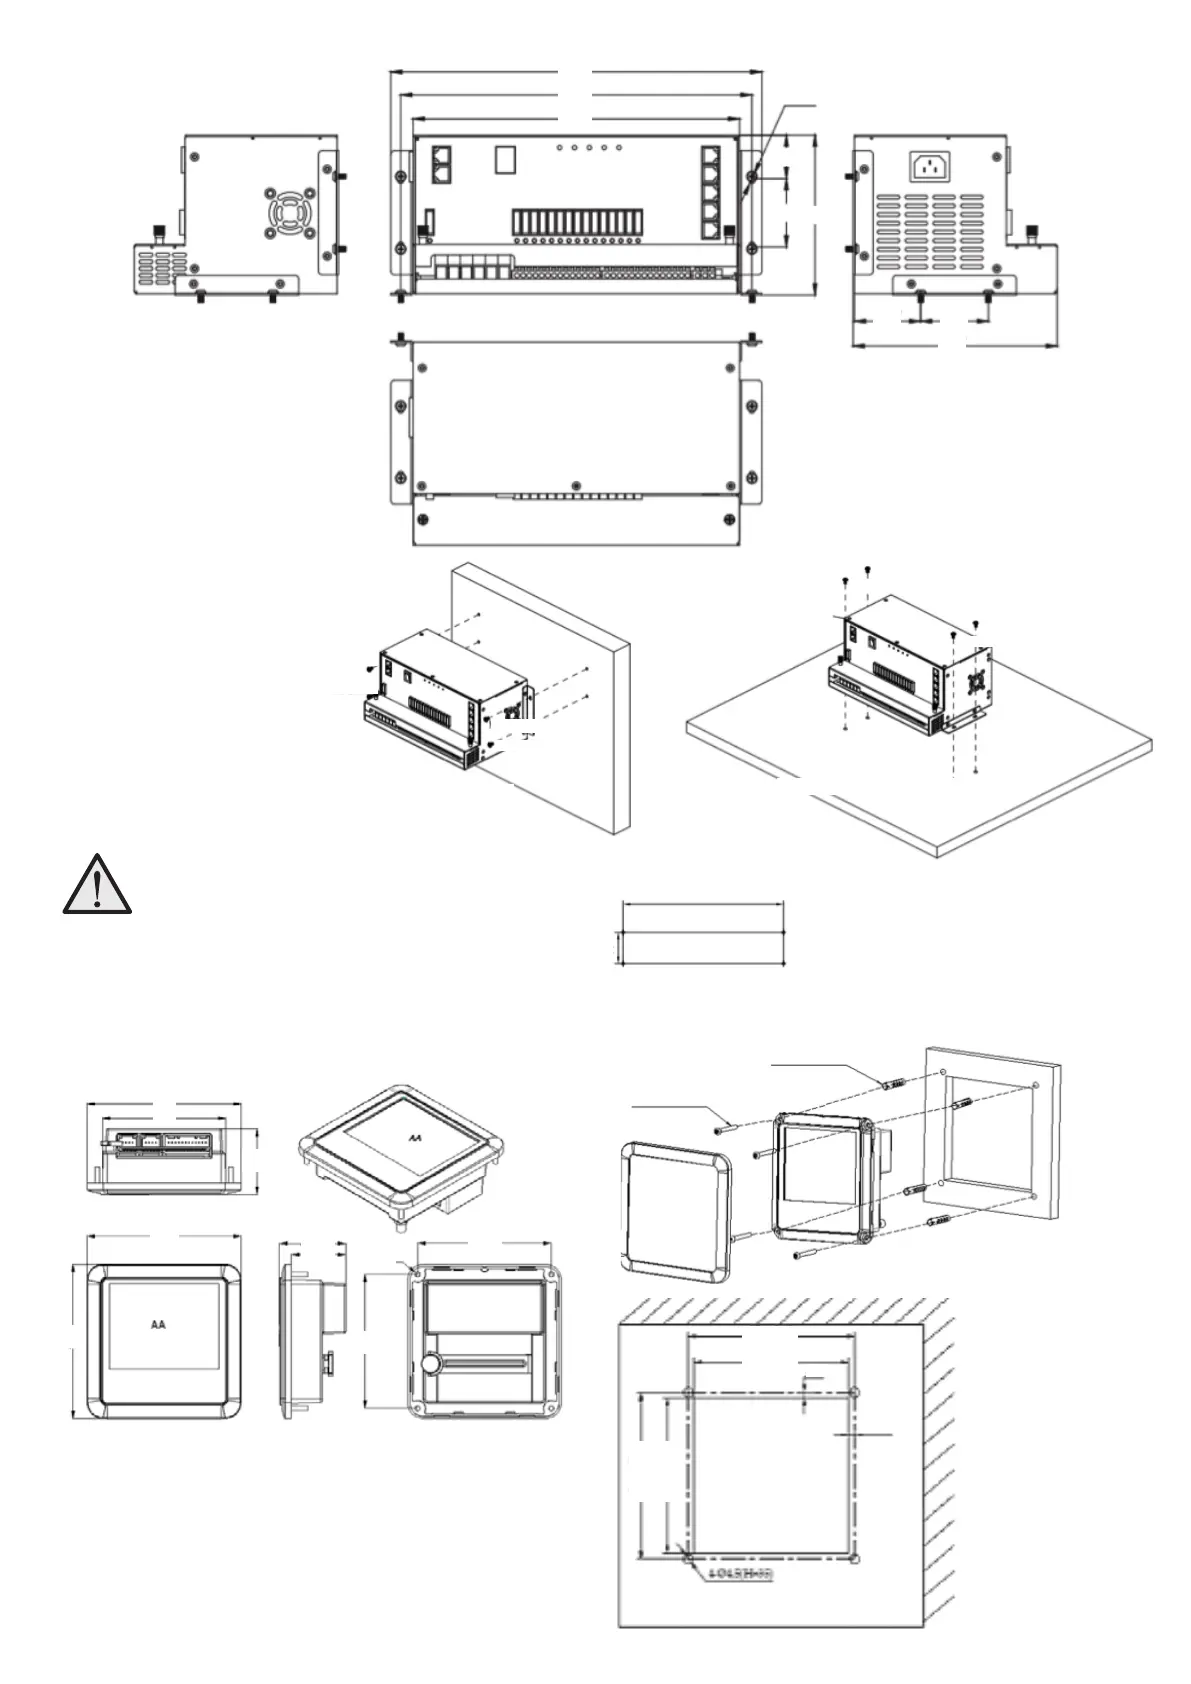
Figure 13 Dimension of Monitor
(Unit: mm)
Figure 14 Installation of
Monitor (Unit: mm)
Installation
PM435 can be installed on a
horizontal surface or vertically
on a wall. Please see following
instructions:
Figure 12 Installation of PM435
(Unit: mm)
Ensure clearance on both
sides of PM435 unit upon
installation. A recommended
clearance of 5cm on each side.
Figure 11 Dimension of PM435
(Unit: mm)
Hole size
Installation
300
284
264
M4
35
55
129
53.5 55
165
284
101
81
101
4-Ø3.5
2.5
2.5
4-Ø4* Ø5*24
87.6
101
43.1
87.6
43.45
35.6
87.6 ±0.5
82.0
+2
87.6 ±0.5
82.0
+2
55
M420mm
M420mm
Vertical Installation
Hole size
Horizontal Installation
M420mm
4-M325mm
M420mm
M420mm
M420mm
M420mm
M420mm